Tag Archives: rangefinder

1937 Zeiss Ikon ~ Contax II CLA

my 1937 Contax II came to me in pretty good condition. it just needed the shutter mechanism cleaned and lubed. and the optics in the RF/VF cleaned.

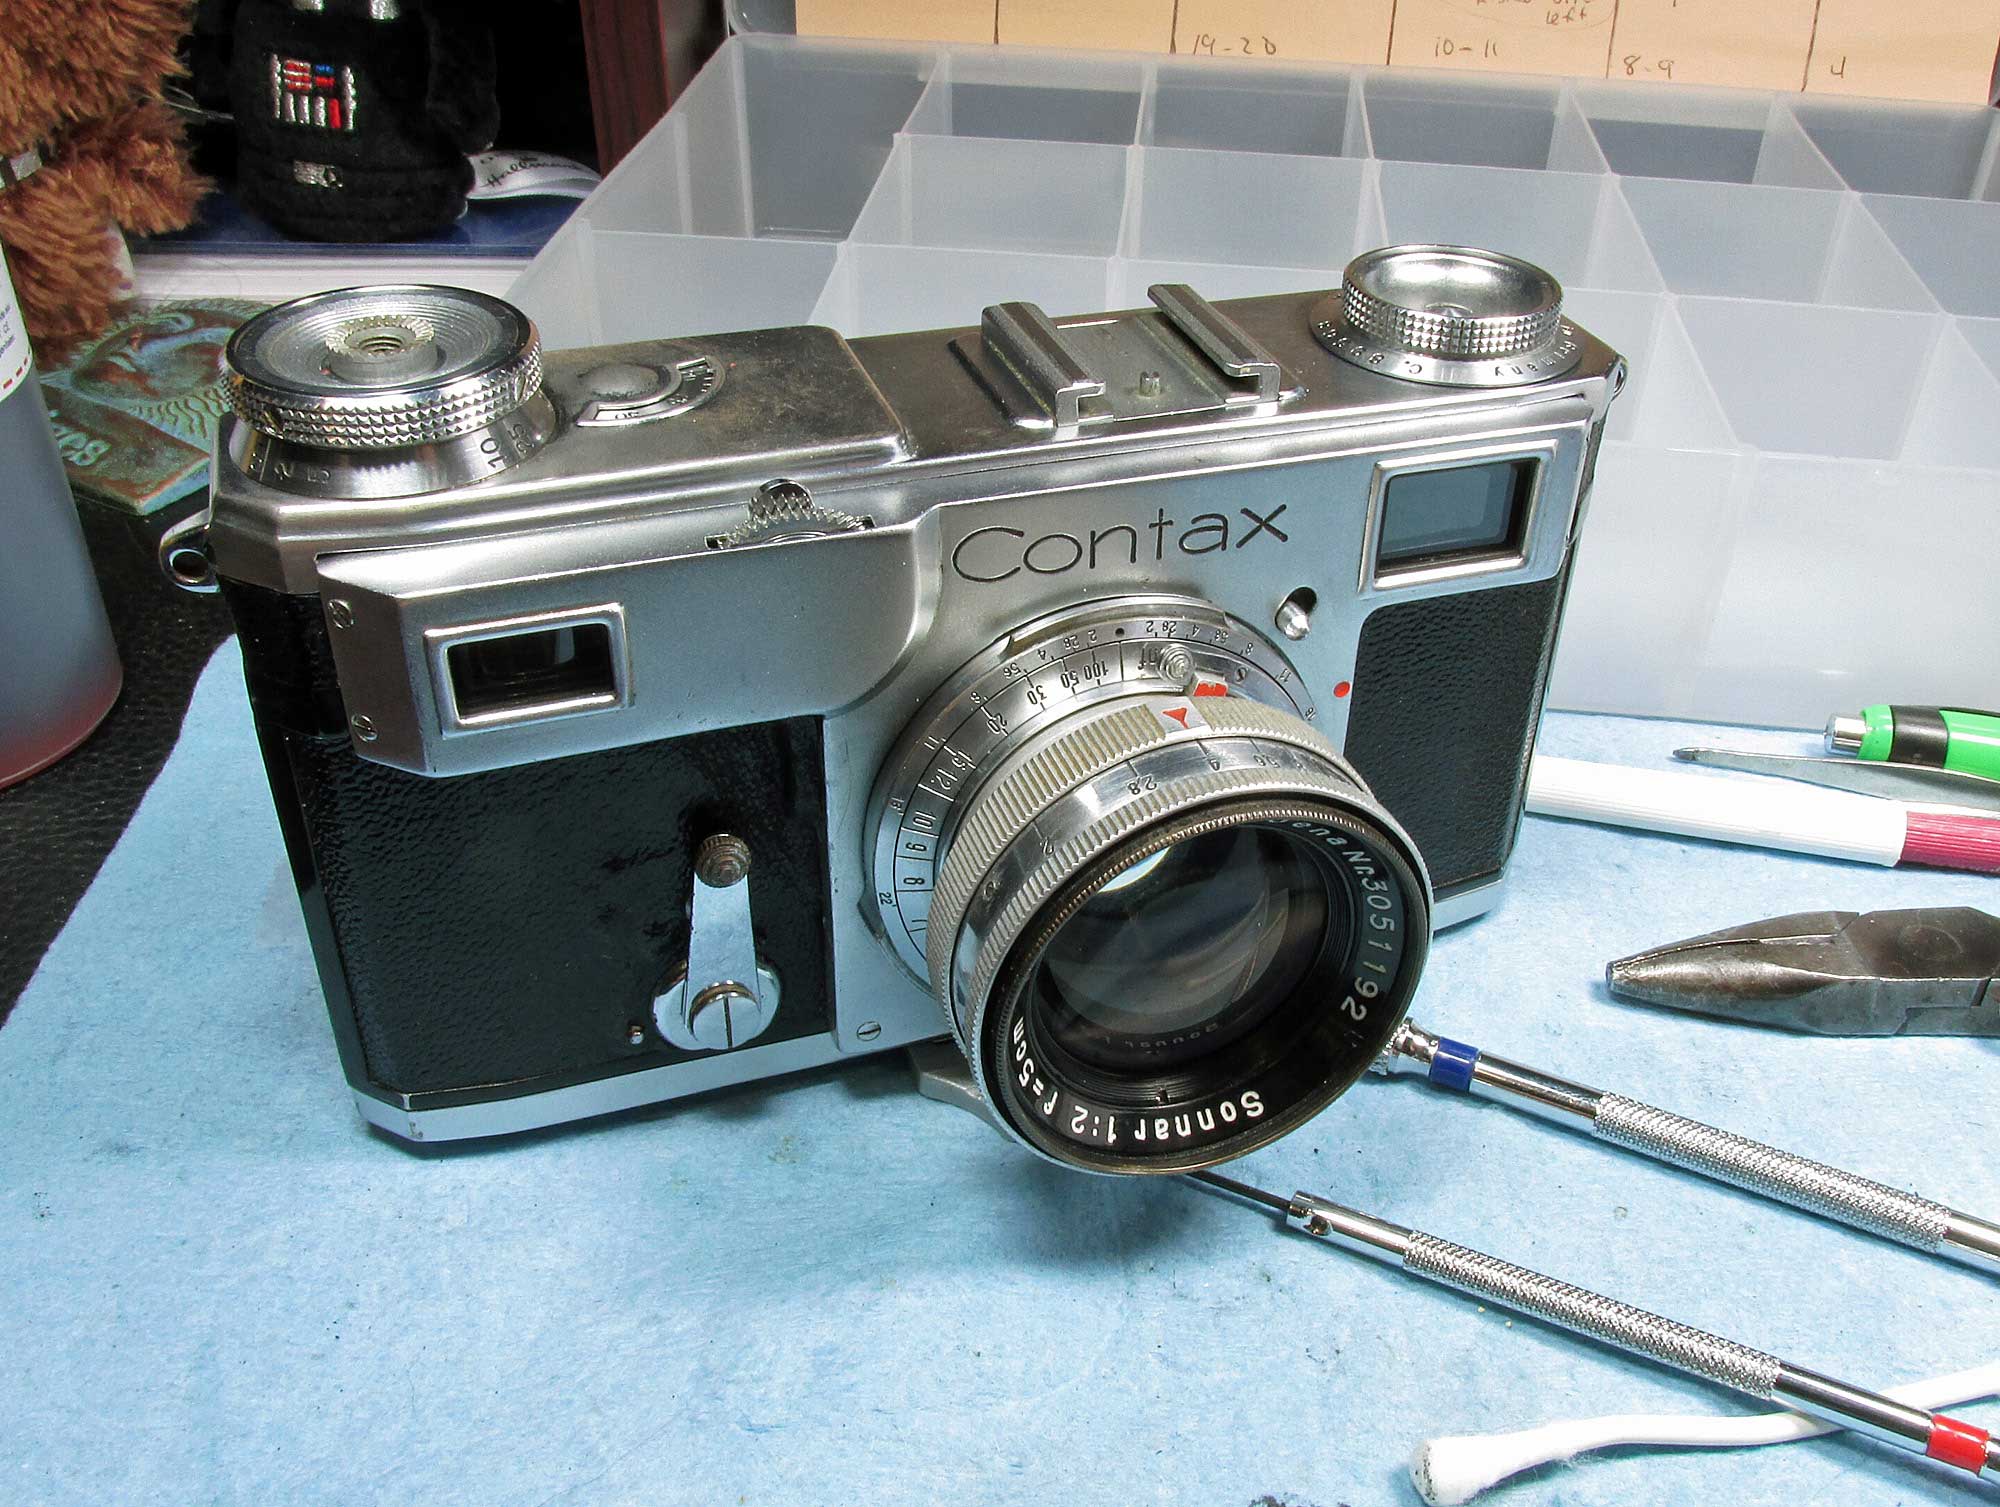
Giving my 1937 Zeiss Ikon Contax II as best of a CLA (clean, lube, adjust) as I could without dismantling the mechanism itself, I doused with lighter fluid twice, avoiding the shutter slats, tapes and glue, which is fairly easy as, everything is on one side. then I oiled a few choice spots, avoiding escapements.

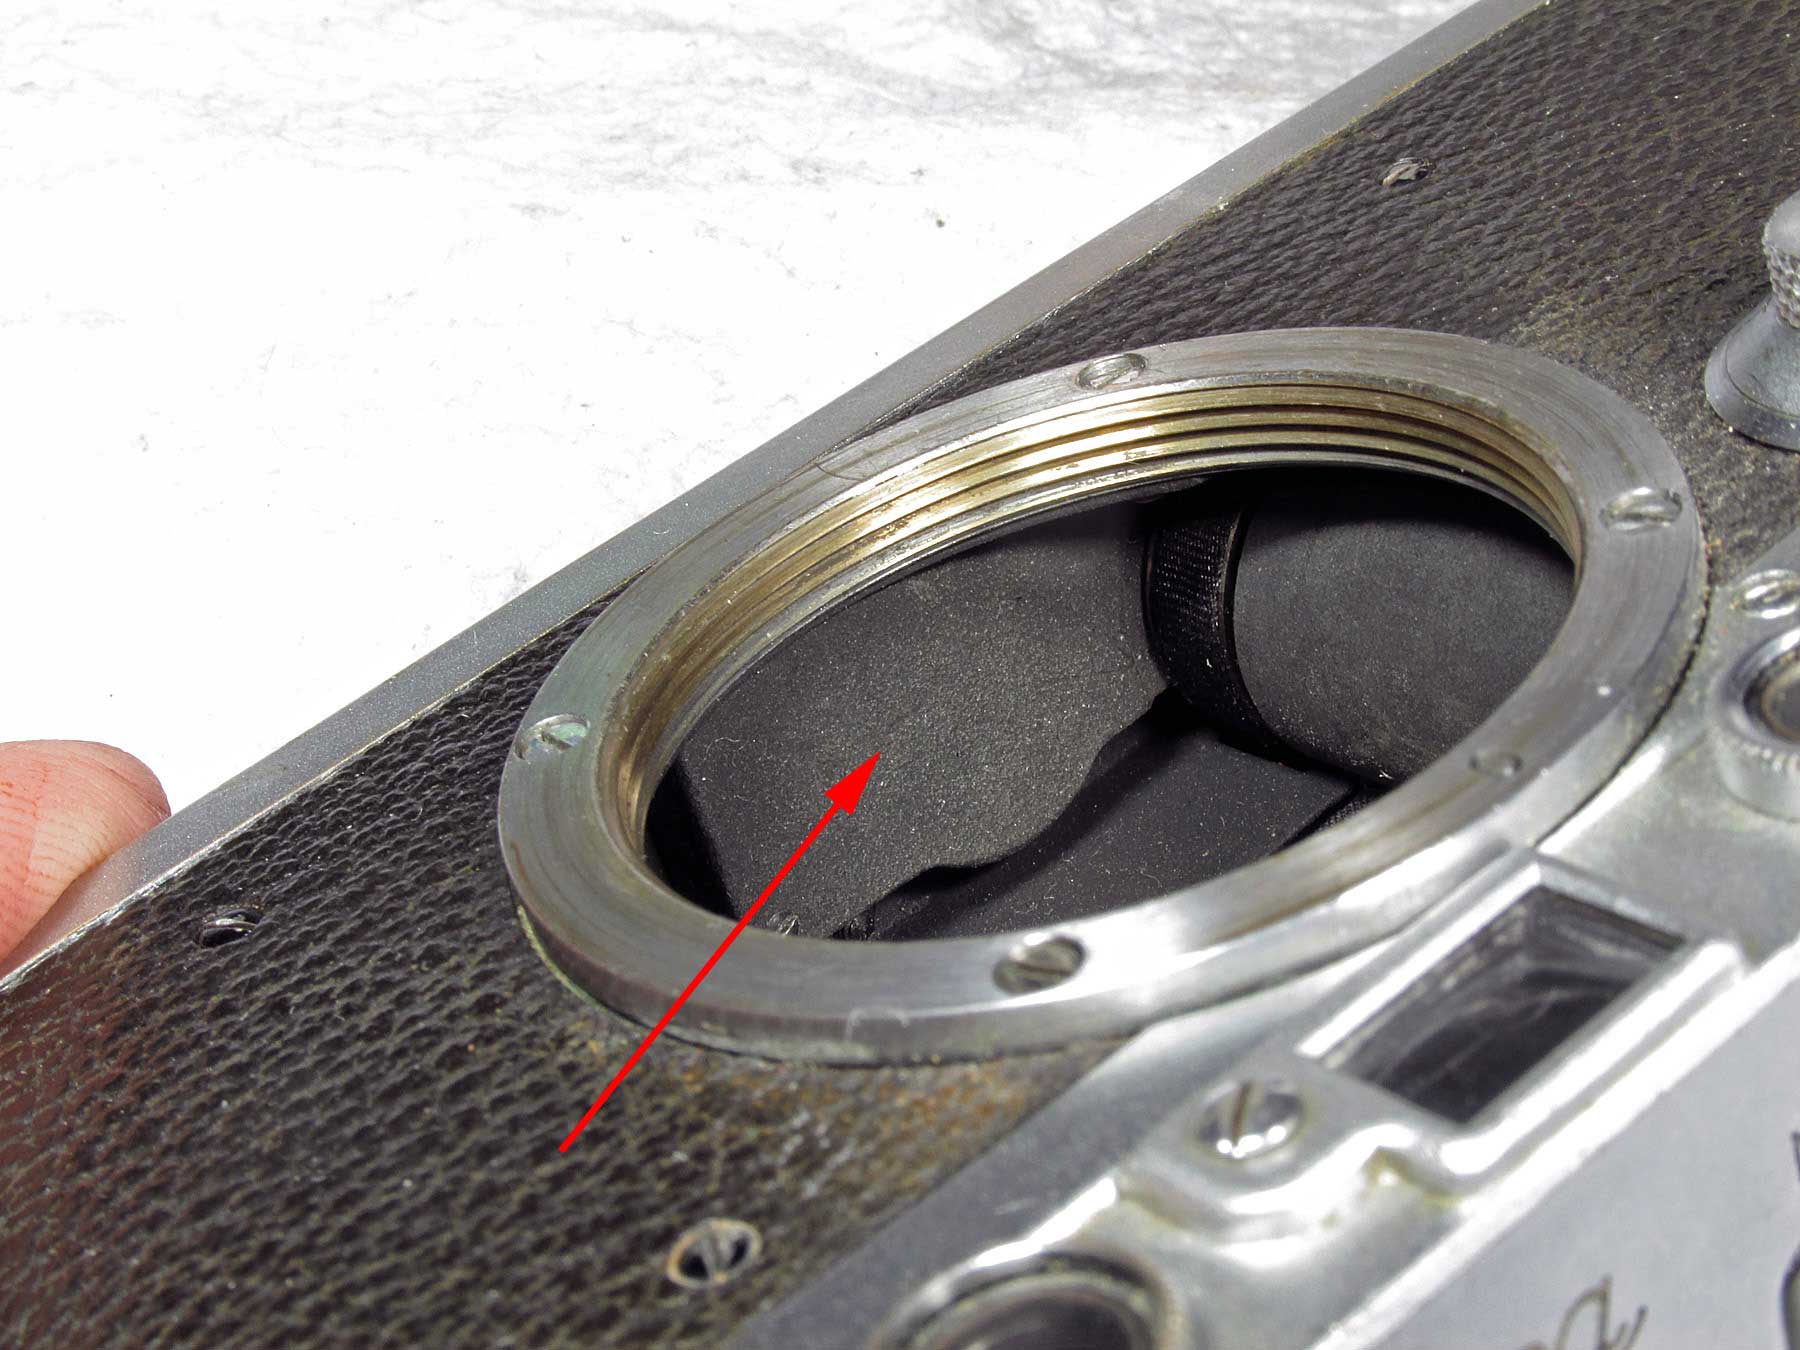
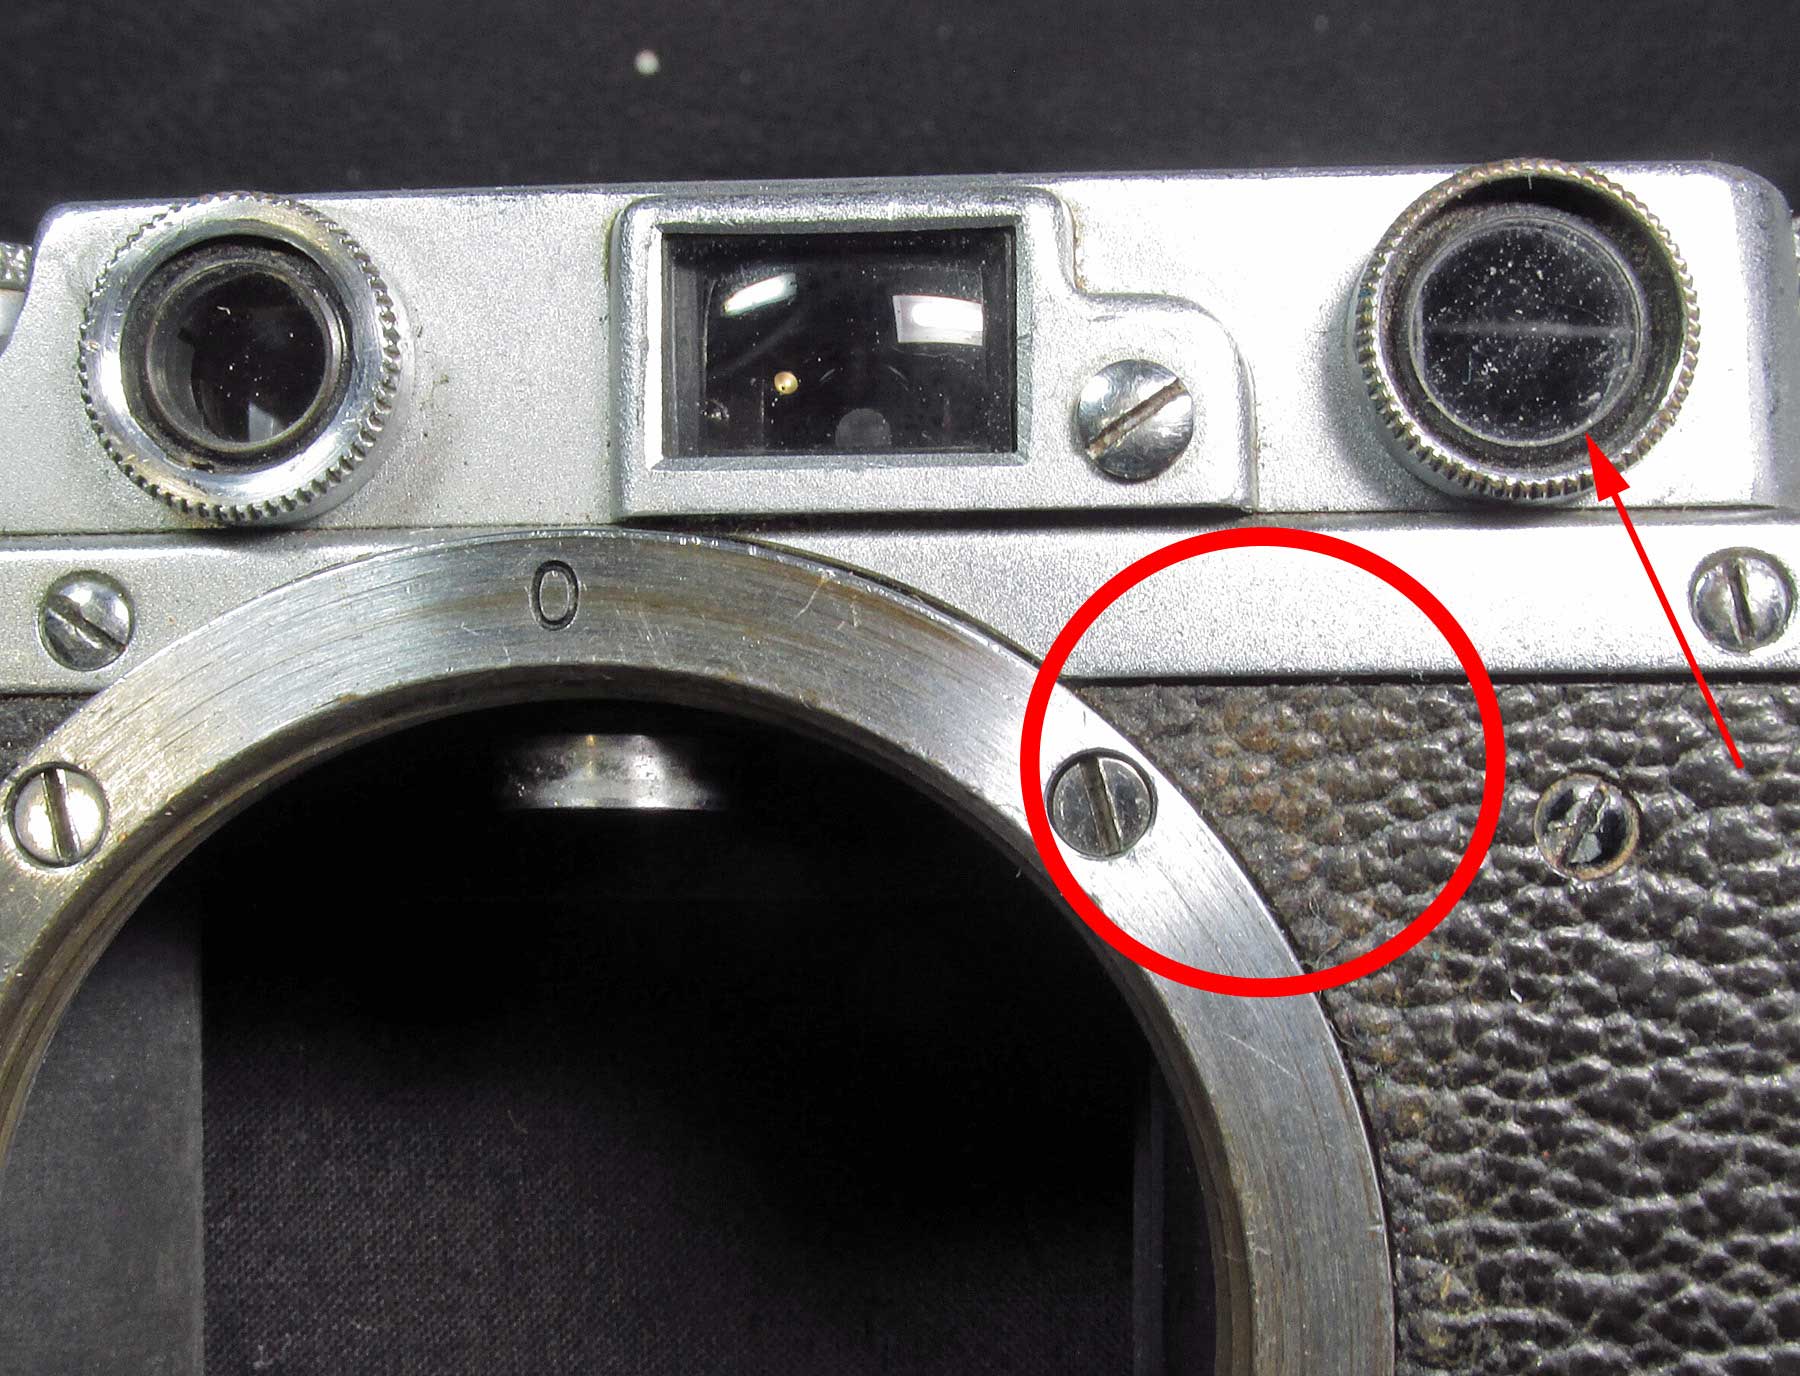
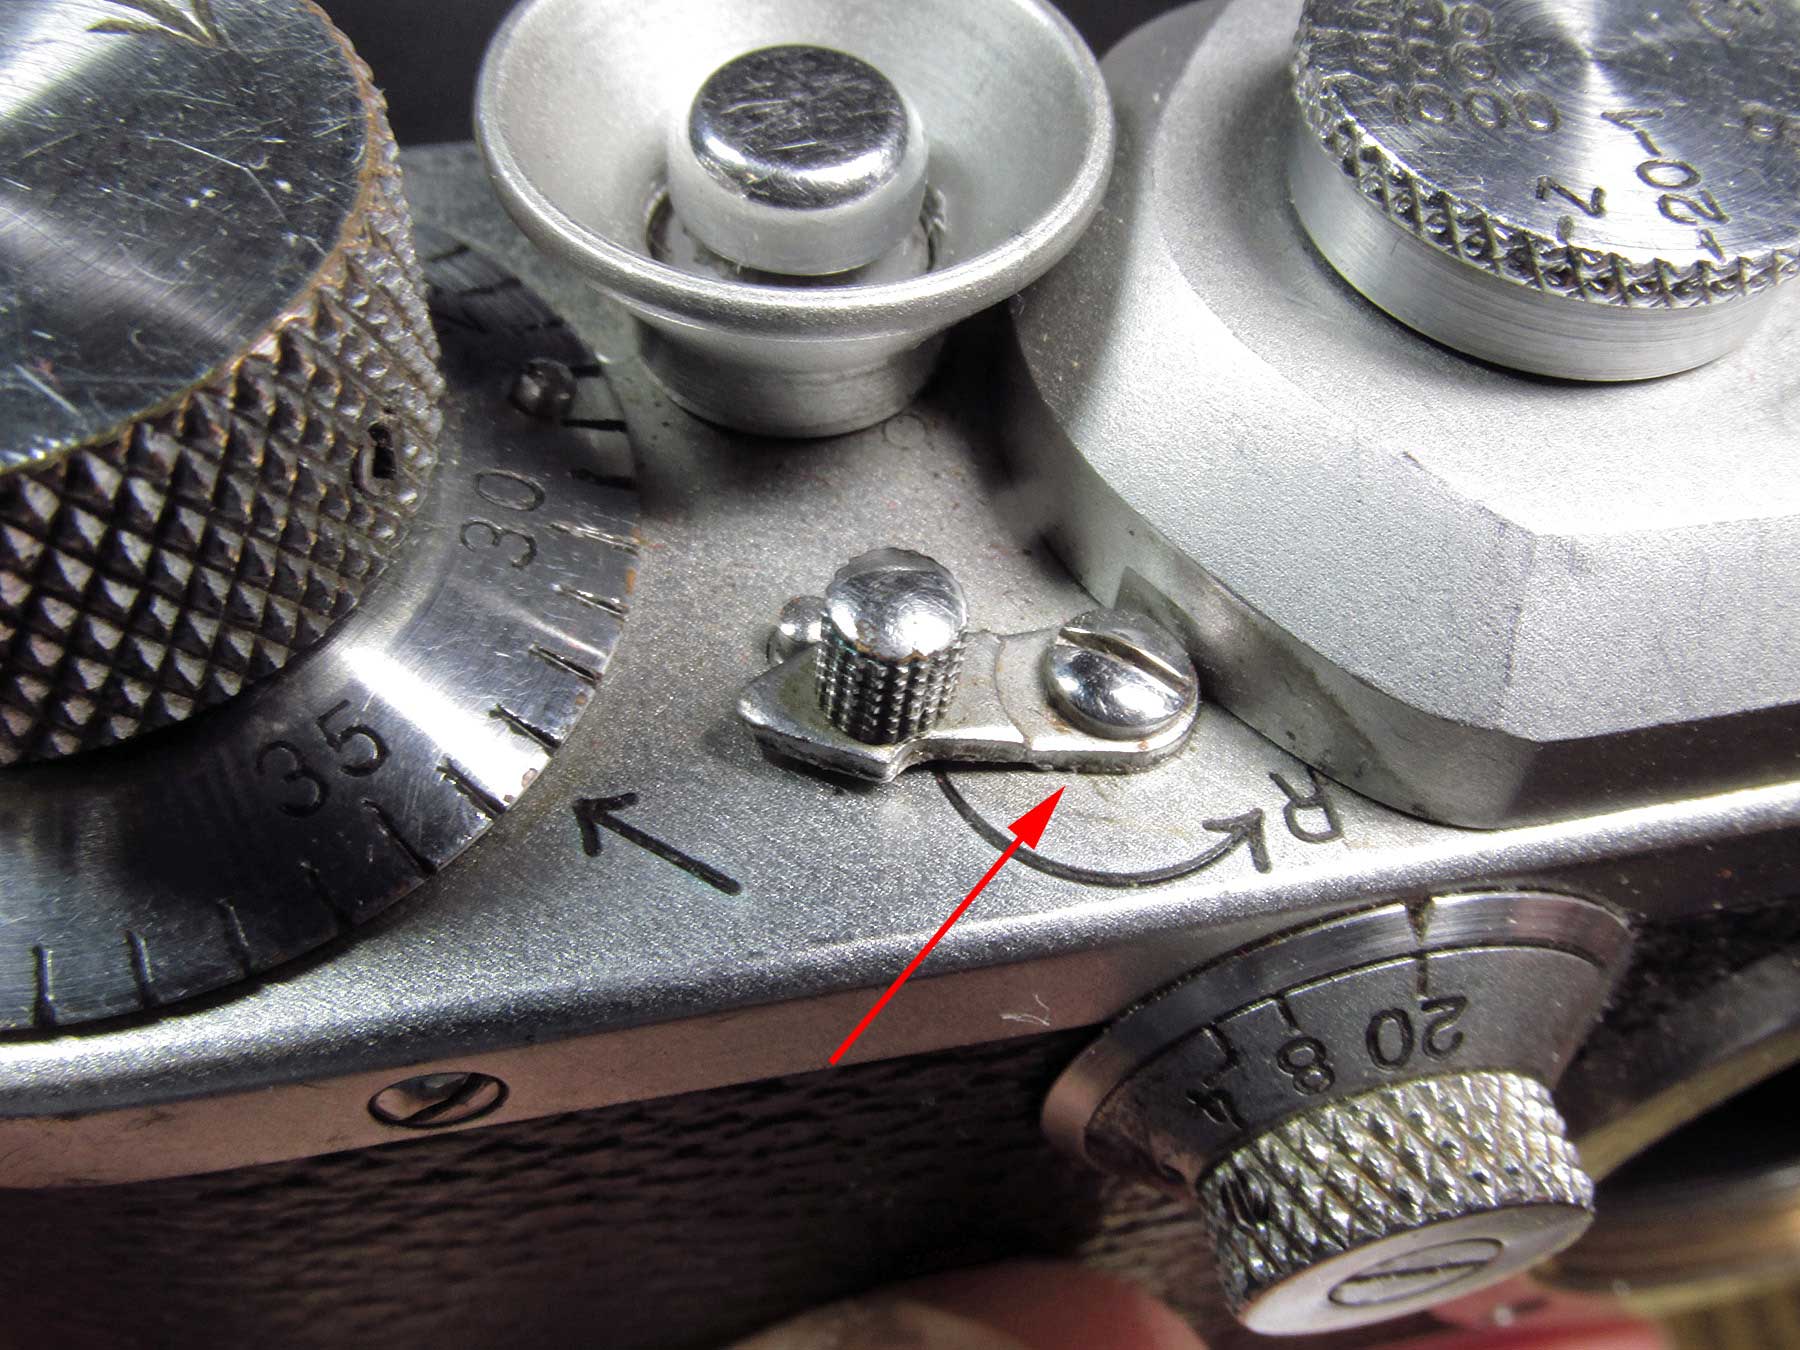
With the help from forum friends, I fixed a problem with the Infinity on the RF, the previous hacker put the longer screws on the RF side of the front plate and they were preventing the plano-convex lens from traveling all the way to the side.
Continue reading 1937 Zeiss Ikon ~ Contax II CLA

Cleaning E. Leitz Wetzlar Summar Haze

Exterior mystery crust

The Leica lens, E. Leitz Wetzlar “Summar” 50mm (5cm) f/2 is notorious for having internal haze, clouding images sometimes giving a desired warmth called “Leica Glow”. Some desire it for using as a portrait lens or other such use as the effect is warranted.

Before I show you how I got my 1939 Leica Summar lens apart to clean the haze, I first cleaned some kind of dried gunk on the front element that resembled very bad cleaning marks.

I had seen it before on my former 1936 Summar and other people complaining about their’s calling it cleaning marks, so it must be a somewhat common thing. This time it was more crusty, uneven looking that led me to believe it wasn’t just the glass itself.

my former 1936 Summar with mystery crust around front element

Continue reading Cleaning E. Leitz Wetzlar Summar Haze

Leica IIIf Beamsplitter Replace

I’ve given my 1953 Leica IIIf “red dial” a CLA, or Clean Lube and Adjust and now I need to replace the half-mirror, or beamsplitter in the rangefinder. The beamsplitter gives the double image that moves back and forth as you focus the lens until the two images become one, then it is focused. On older cameras, the beamsplitter, which is a half-mirror, or partially silvered so it is transparent as well as reflective, looses some it’s reflectiveness and is hard to focus.

After getting the top off I was able to get to the rangefinder.

leica_IIIf_splitter 002
remove the end cap by simply prying off. It is held on with lacquer

Continue reading Leica IIIf Beamsplitter Replace

Images from my 1936 Leica IIIa

After completing the service, cleaning, repair, adjustment on the 1936 Leica IIIa, I shot a test roll to see if everything was working as it should. There are a lot of things that can be wrong on an 80 year old camera. A test roll can show if the film is advancing correctly, getting the proper space between images on the negative, shutter speeds are correct, the rangefinder and lens are in good sync so the images come out good and clear. etc…

The first test roll showed that the shutter  was at the right speed but on the faster speeds, it was not adjusted correctly. The second or “closing” curtain was catching up with the first curtain part way across the film area.

The dark area on the right means the closing curtain caught up with the opening curtain, and is called 'capping' Here at 1/500 speed it is about 75 % at 1/1000 it was almost 100%
The dark area on the right means the closing curtain caught up with the opening curtain, and is called ‘capping’ Here at 1/500 speed it is about 75 % at 1/1000 it was almost 100%


at 1/200 speed there is slight capping

Continue reading Images from my 1936 Leica IIIa

Leica IIIa CLA, Clean the Slow Speed Escapement

Before giving my Leica IIIa a semi-complete CLA, I want to tackle the slow speeds being sluggish problem. Thanks to the Internet, I found a few sites that explained how truly easy it is. I mean, anybody can do this task and perhaps bring their 75-80 year old camera back to it’s former glory.

Two screws to get started is all it takes. The hardest part is putting it back in and that just takes some dexterity. This method is possible without a complete removal of the body shell as is needed for the newer IIIb. IIIc, IIIf, IIIg, but if you are planing a shell removal for whatever reason, CLA, investigation of a problem or the like, then by all means, wait until then, it would just be easier to put it back in but taking it out makes no difference.

On the model III and IIIa, the slow speed escapement is easy to remove by just taking the lens off

remove the bottom film plate and remove these two screws. Be careful, they are one flat head and one roundish head remember where they go
remove the bottom film plate and remove these two screws. Be careful, they are one flat head and one roundish head remember where they go. The escapement will practically fall out of the lens opening area.

Continue reading Leica IIIa CLA, Clean the Slow Speed Escapement

1936 Leica IIIa CLA and Repair

Giving my 1936 Leica IIIa a CLA. It basically works fine, the shutter fires on all speeds but the slow speeds are sluggish. The curtains have previously been changed, maybe even twice in it’s 78 year history and look good. Overall there is brassing on the top and bottom plates but from normal heavy usage telling me it was well loved. From what I can see, the inside looks clean-ish, no major rust or anything like that.

leica_IIIa-cla-01
overall ‘before’ shot

leica_IIIa-cla-05
dirty vulcanite

leica_IIIa-cla-06
filthy around hard-to-clean places

Above, showing the external condition, dirt and a reddish oxidation to the Vulcanite (red circle) and dirty internal glass.

Continue reading 1936 Leica IIIa CLA and Repair

1957 Canon L2 top plate removal


canon_L2_clean-26

I recently acquired a 1957 Canon L2 from a fellow in Japan. As the listing stated, it is fully functional in every way. It is a joy to use. Smooth, well built, balanced. It’s only flaw is the same as every camera I’ve gotten, Hazy viewfinder. I did some research and found not much at all on this model but similar models share the same rangefinder set up, but the top plate is slightly different on them. The following is the method I used to get at the insides of the top plate.

canon_L2_clean-01  start by removing the front RF collar. It unscrews counter clockwise (ccw) with just your fingers After removing the collar, remove the lens, it should be tight but it just slips out and under that is a ring that holds the lens. A spanner wrench is required to remove it. The lens has spanner slots too, this can be aligned with the ring underneath and both unscrewed at the same time if you have the right tool. Also the lens spanner slots makes it possible to realign the vertical RF image by rotating it until the image is correct.

Continue reading 1957 Canon L2 top plate removal

Vintage Camera Repair Nicca 3S / Tower 43

T3S-shutter_repair-47

After film testing my Tower 43, I was getting pictures back from the Lab that the frames were only half exposed and with an obvious hunk of broken film wedged in the area between the image aperture and the pressure plate. It was possible that the film piece was fouling the shutter curtains, so after removing the film piece I tried another roll but got the same results, just not as bad.

Continue reading Vintage Camera Repair Nicca 3S / Tower 43