
I recently acquired a 1957 Canon L2 from a fellow in Japan. As the listing stated, it is fully functional in every way. It is a joy to use. Smooth, well built, balanced. It’s only flaw is the same as every camera I’ve gotten, Hazy viewfinder. I did some research and found not much at all on this model but similar models share the same rangefinder set up, but the top plate is slightly different on them. The following is the method I used to get at the insides of the top plate.
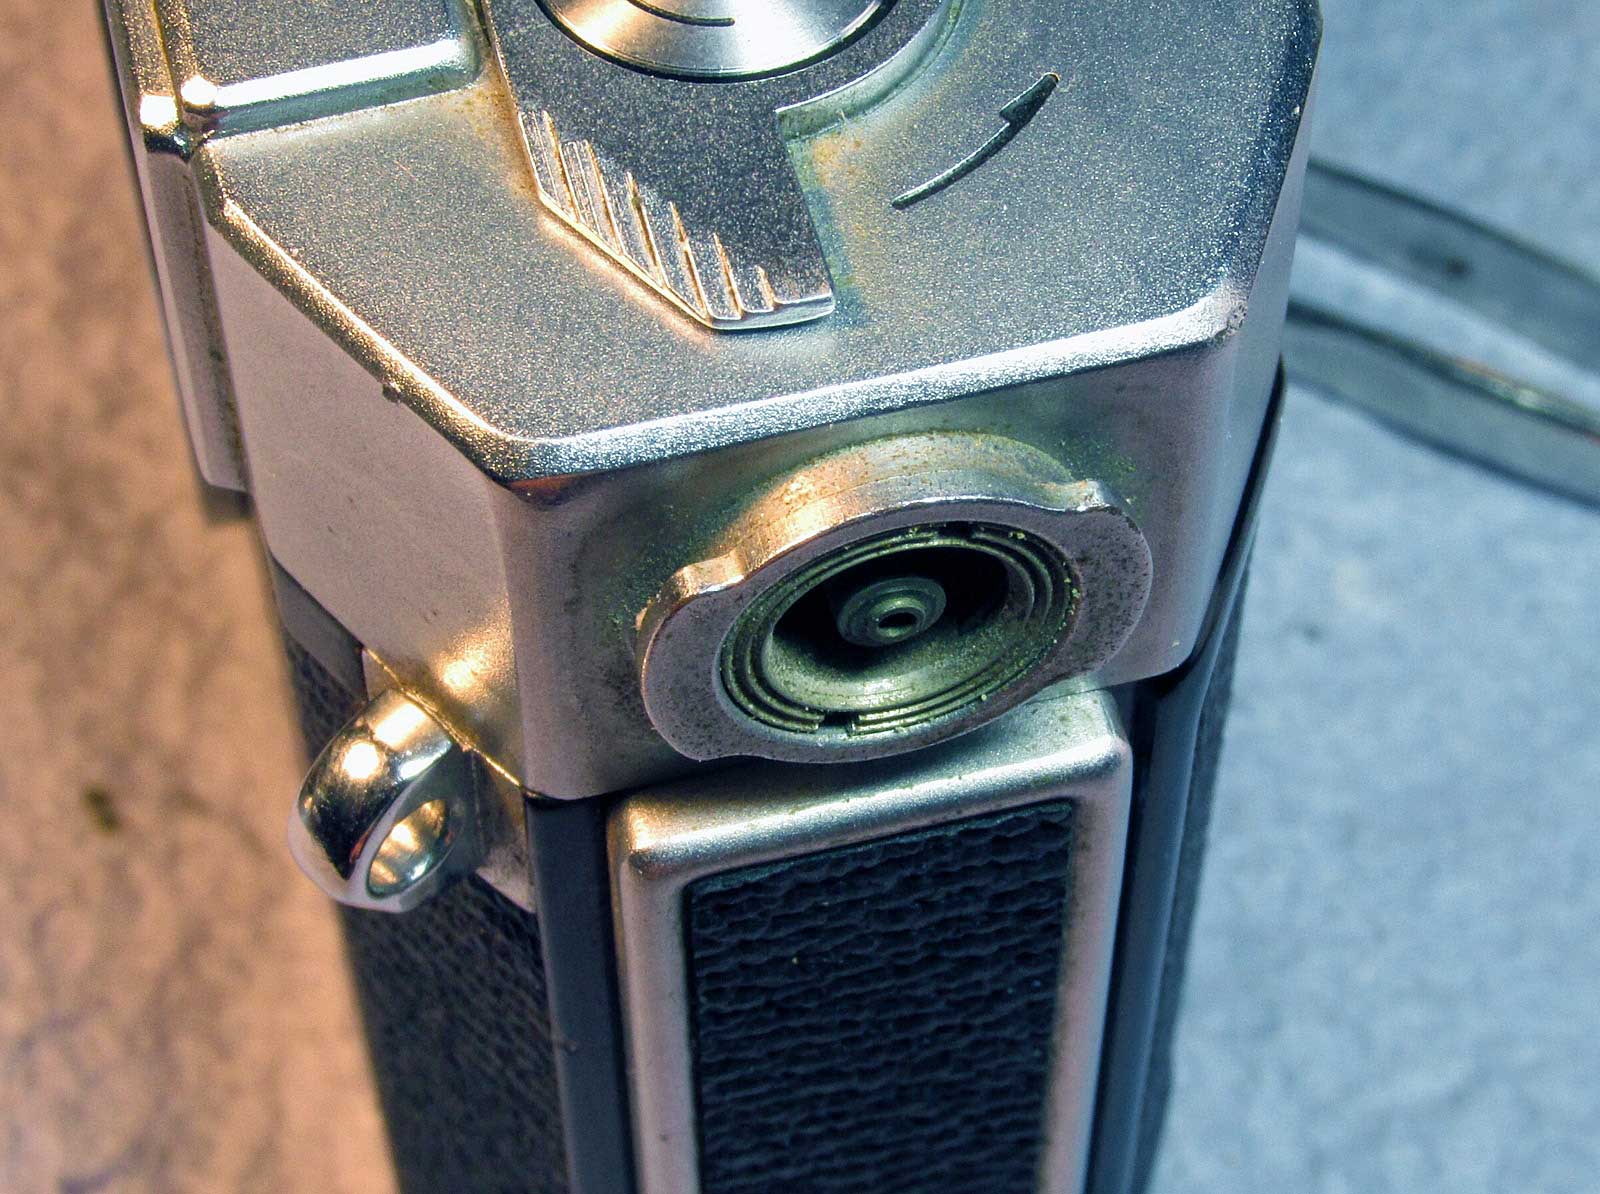
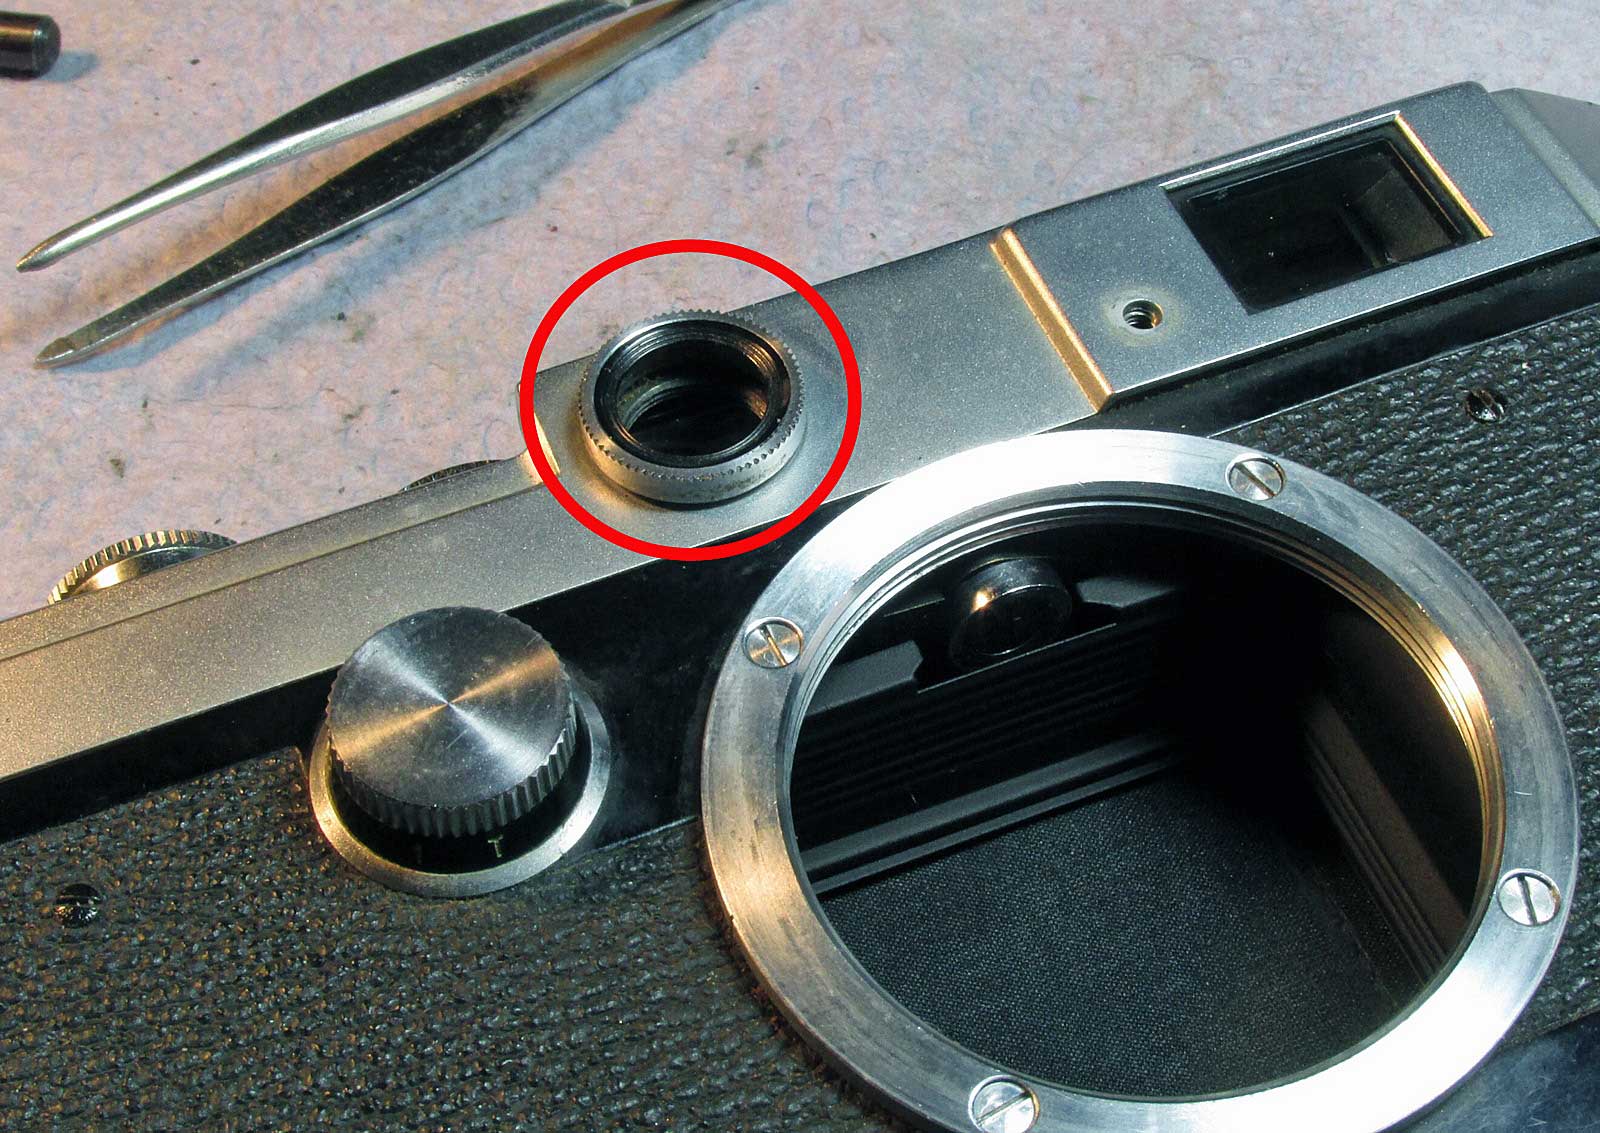 start by removing the front RF collar. It unscrews counter clockwise (ccw) with just your fingers After removing the collar, remove the lens, it should be tight but it just slips out and under that is a ring that holds the lens. A spanner wrench is required to remove it. The lens has spanner slots too, this can be aligned with the ring underneath and both unscrewed at the same time if you have the right tool. Also the lens spanner slots makes it possible to realign the vertical RF image by rotating it until the image is correct.
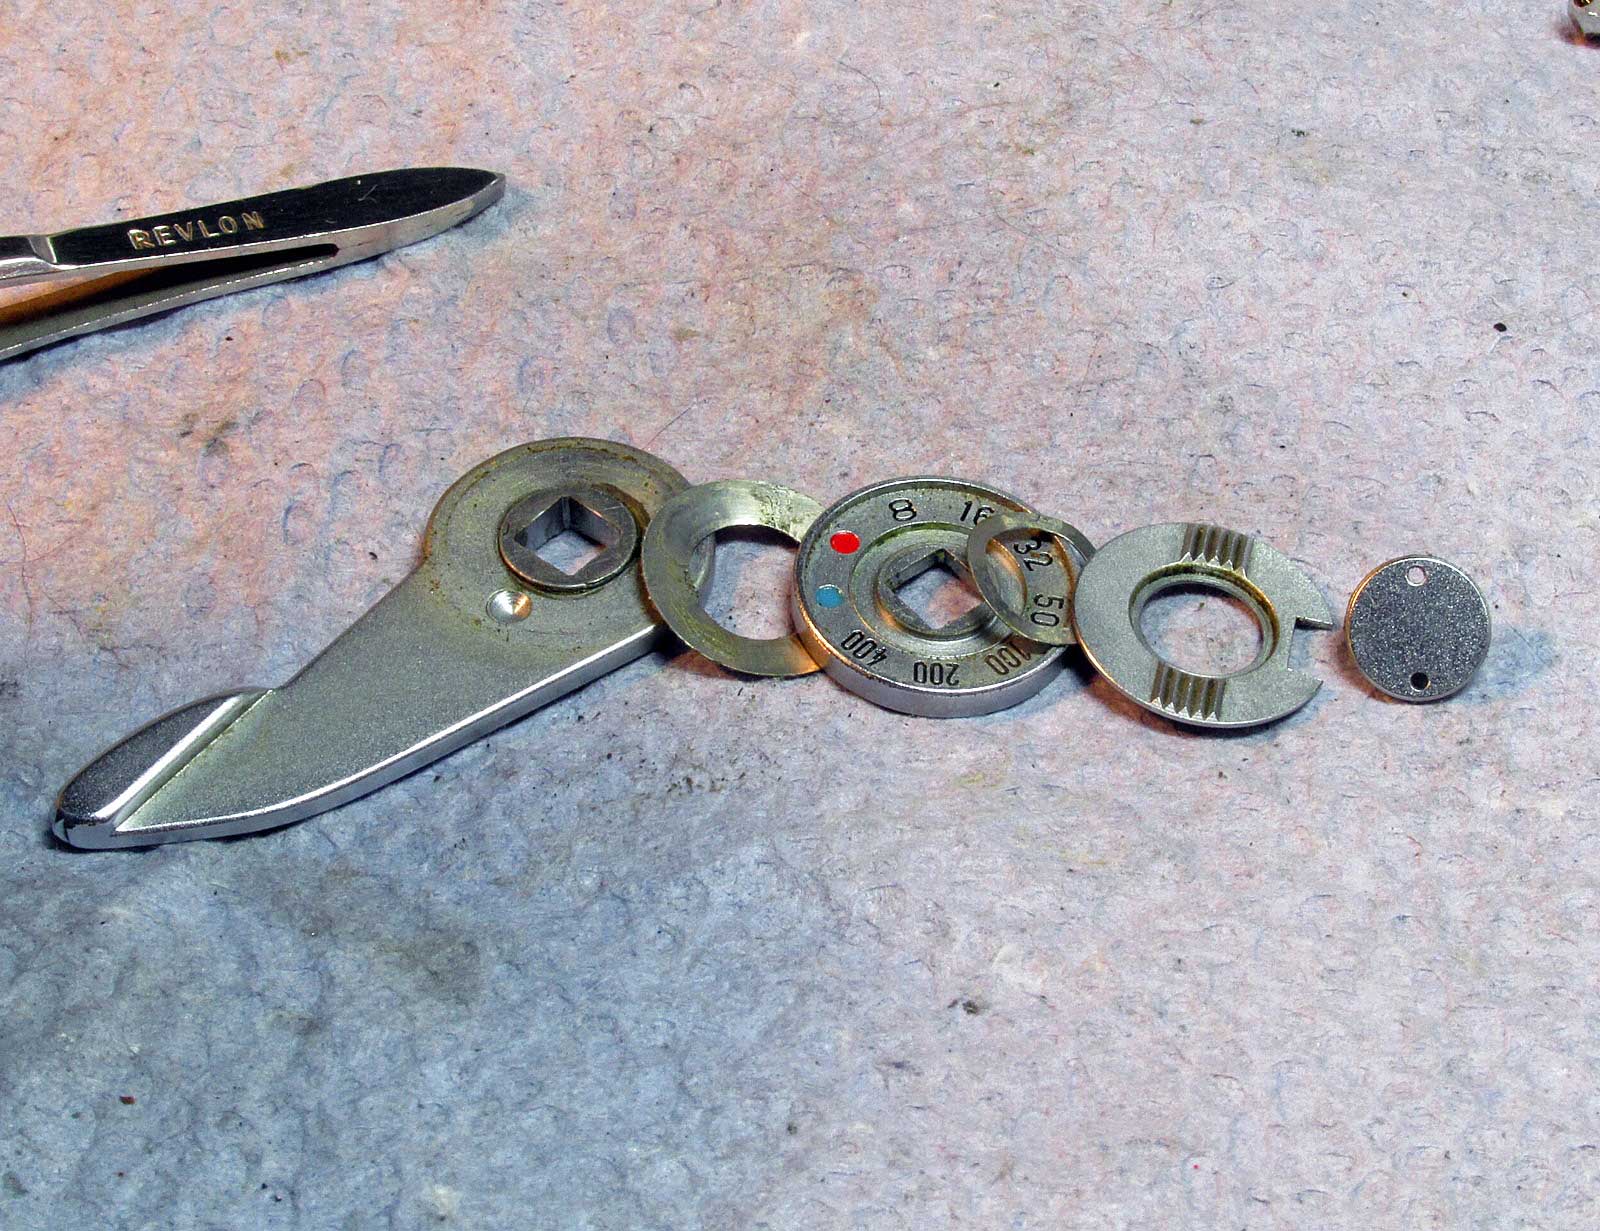 Next remove the thumb film advance lever. It takes a pin spanner but I use a pair of pointed tweezers (file down the sharp tips slightly) remove CCW then you get these parts, remember the order in which they come out.
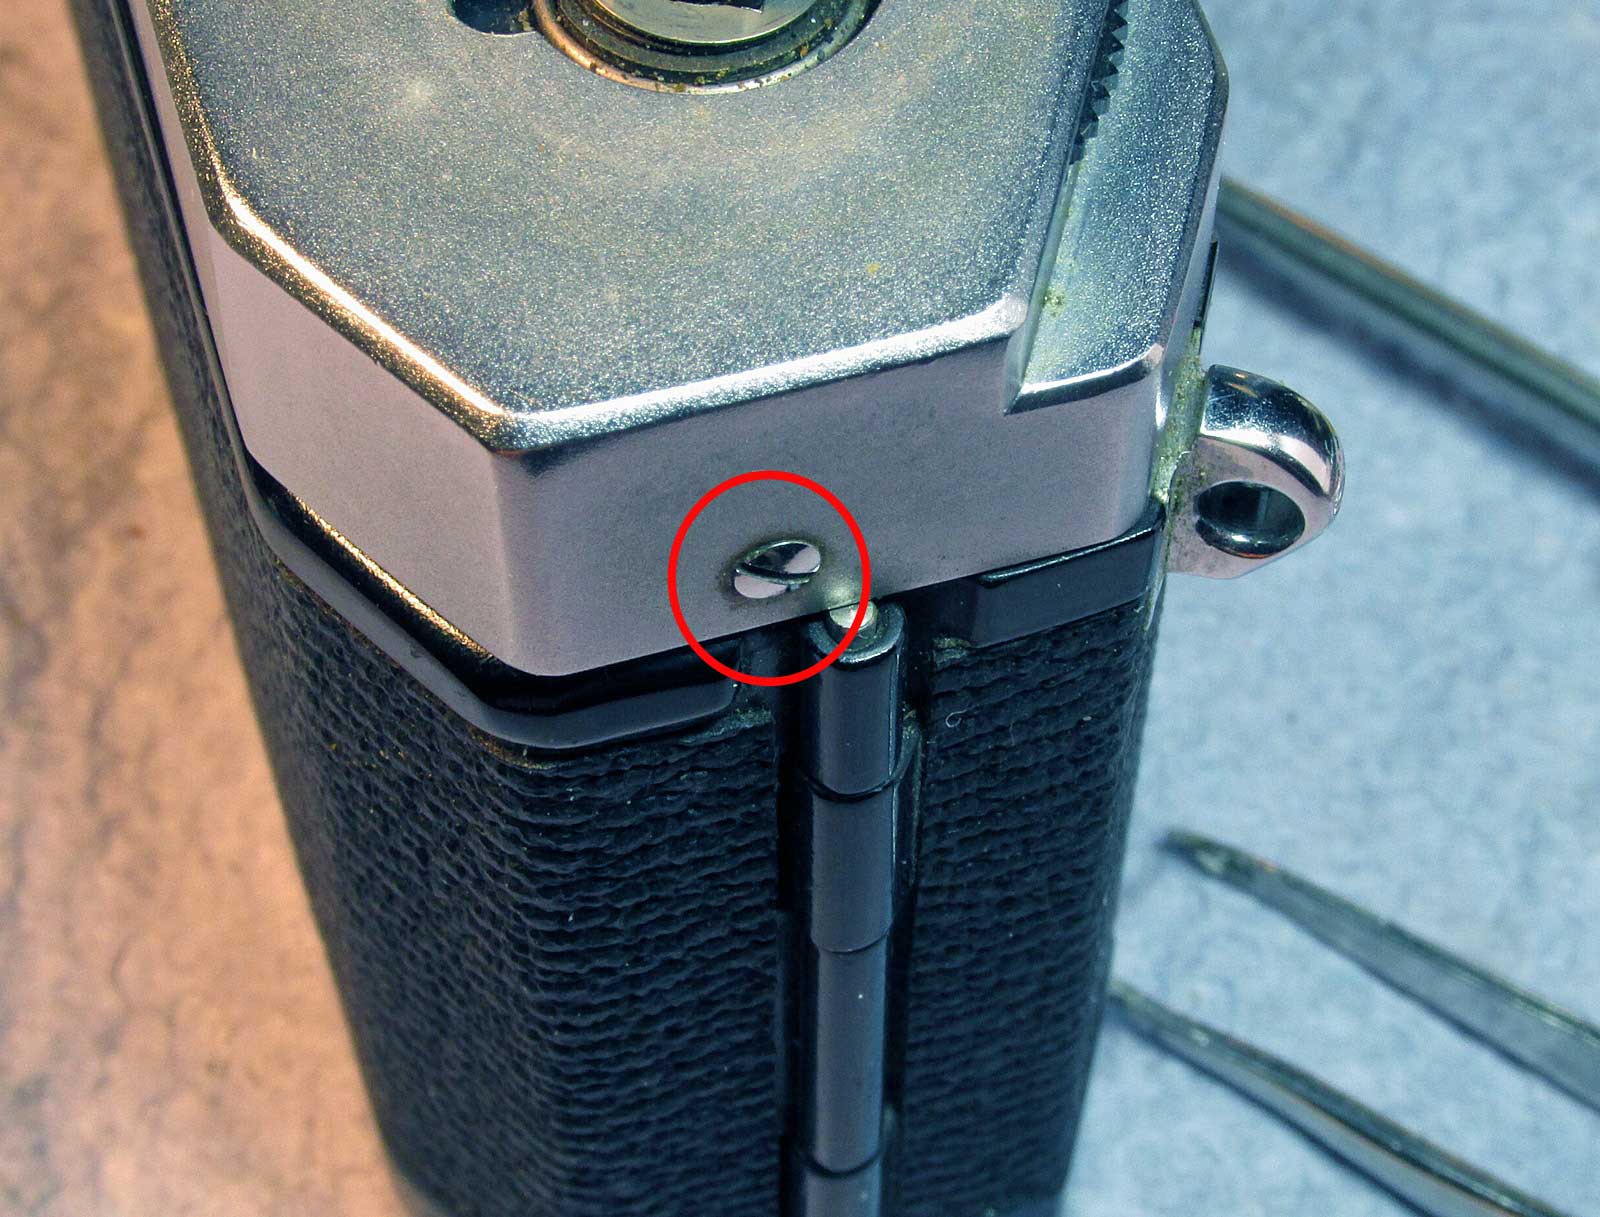
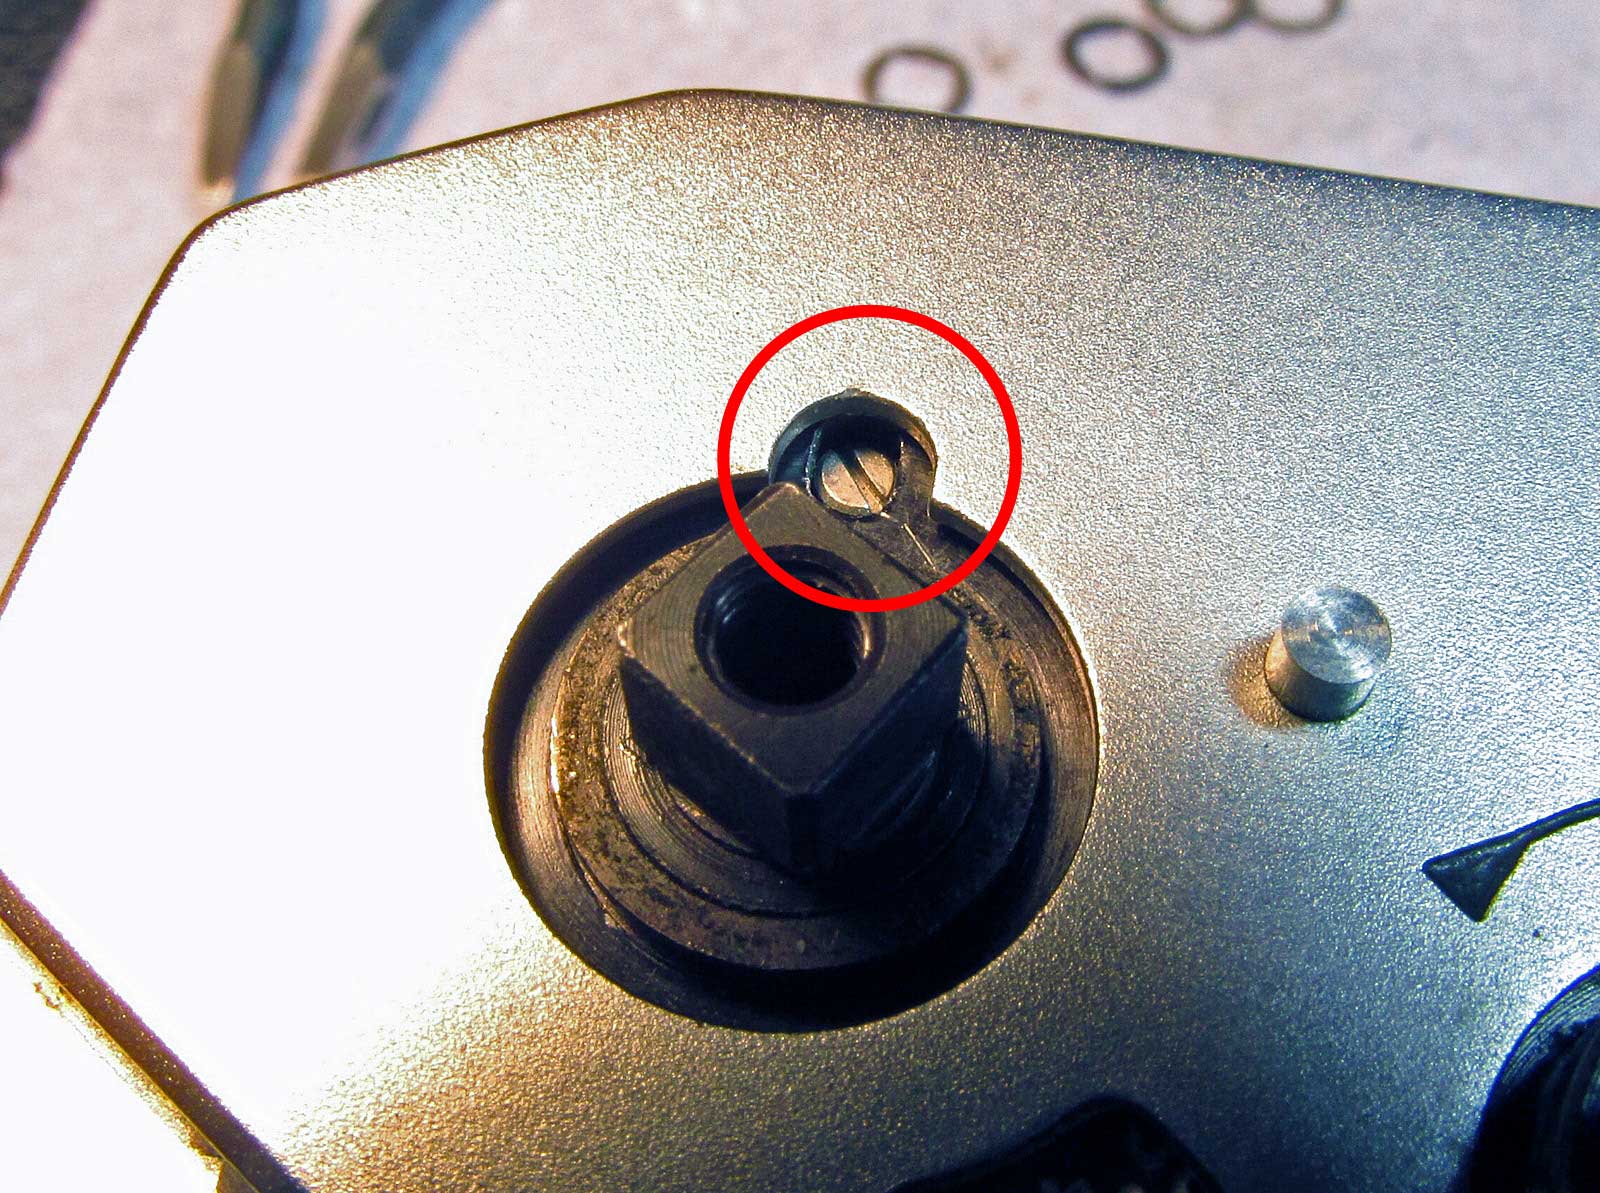
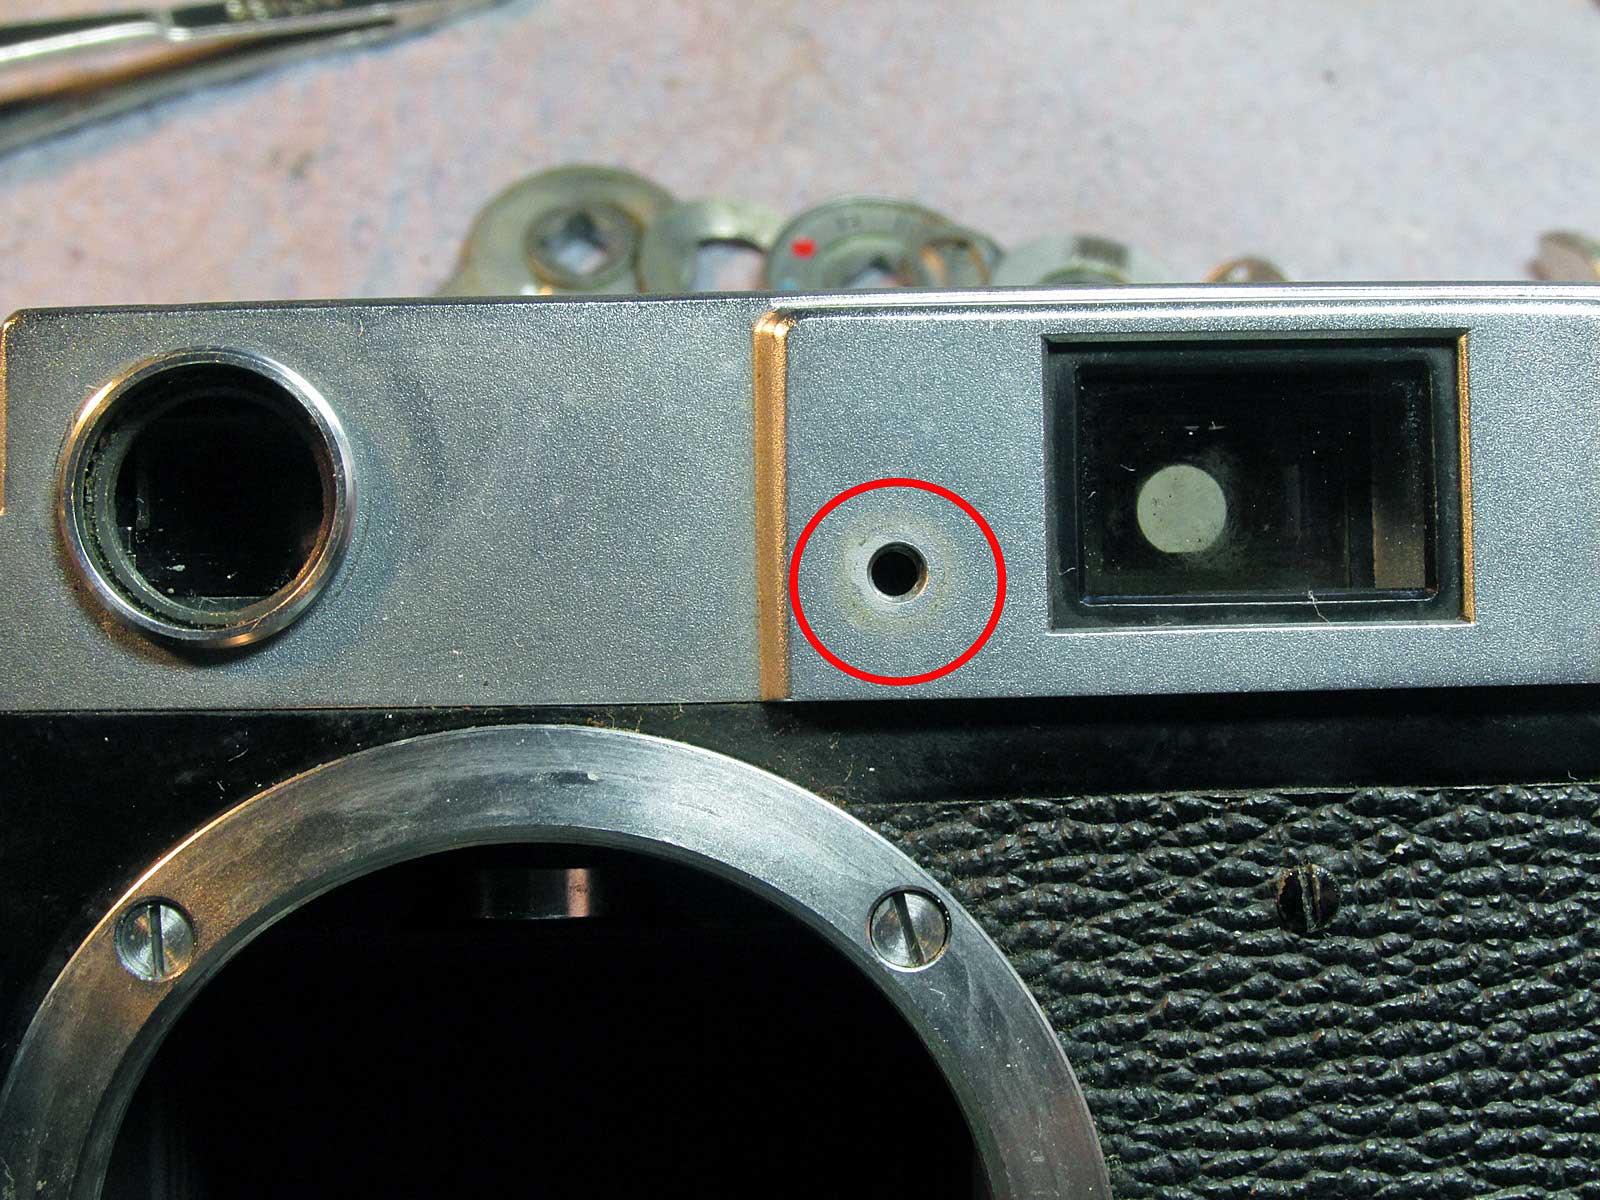 remove the screw next to the viewfinder. This has the horizontal adjust screw inside it for later if needed.
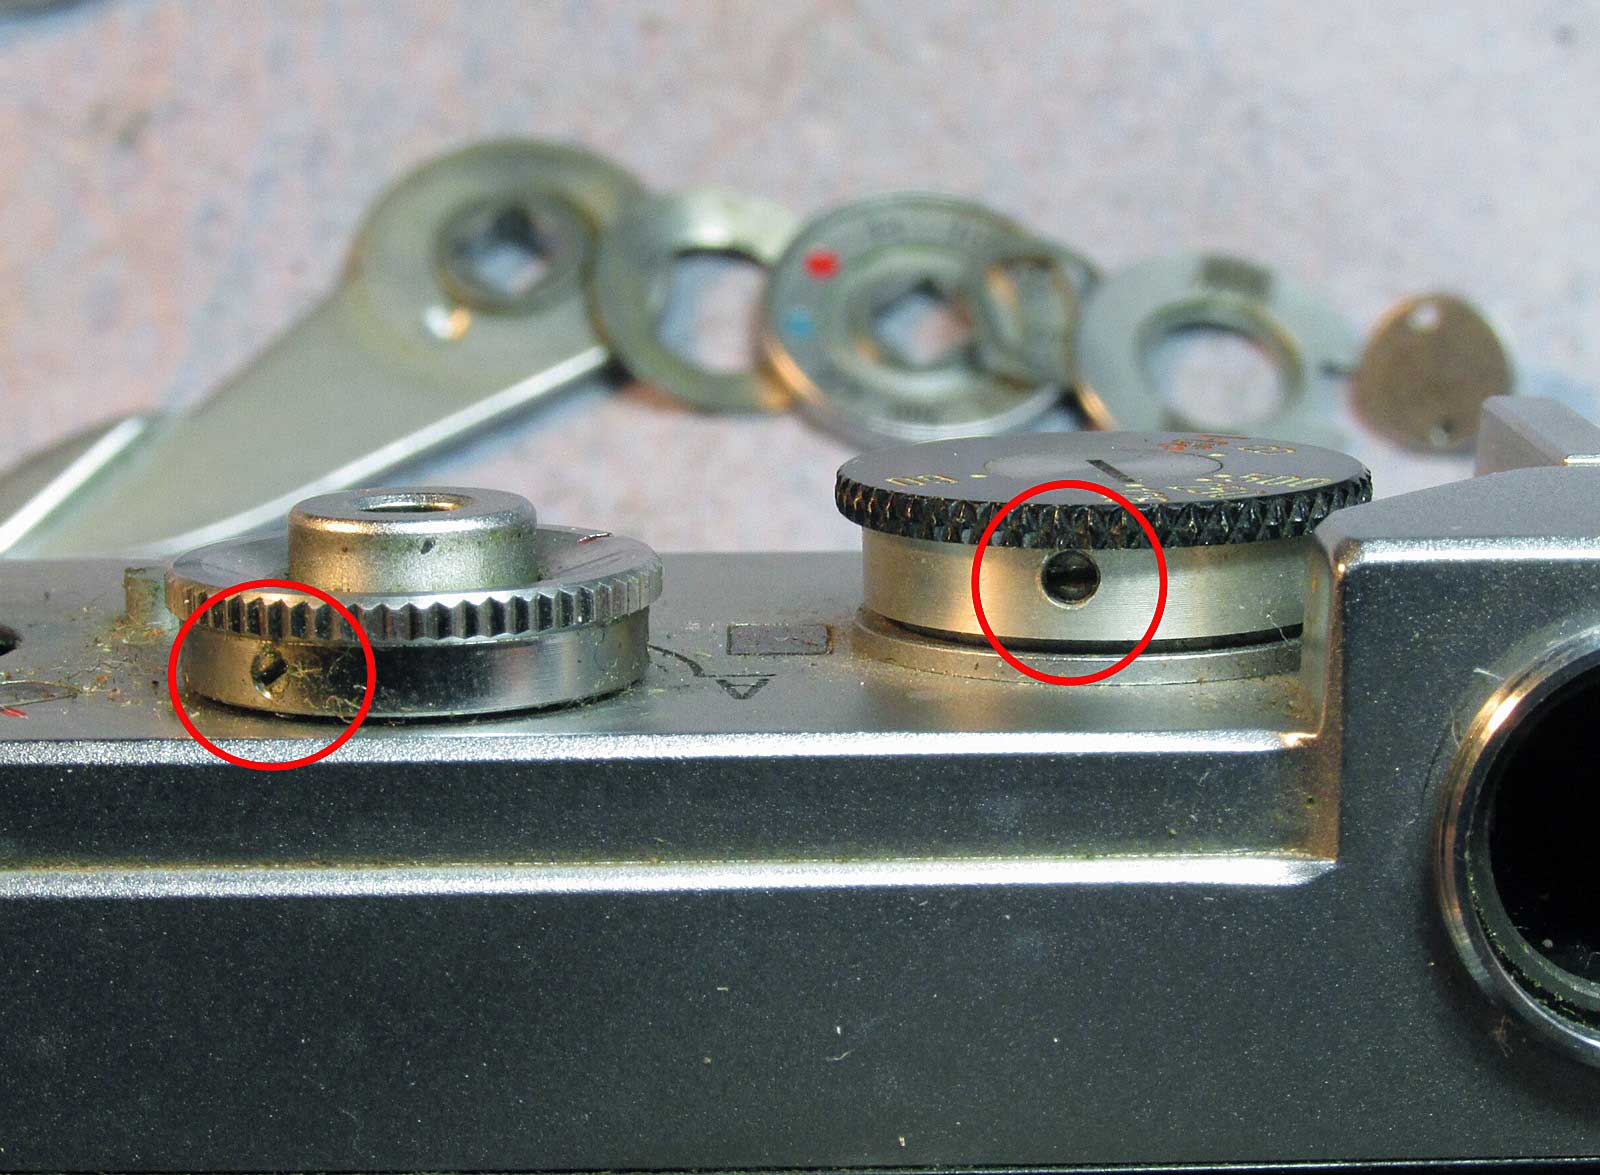 remove the shutter speed select knob and the collar around the shutter release button. These both have 3 tiny screws but only loosen the screws, no need to remove the screws. They both then pull straight off. I set mine to ‘B’ to remember where it was when I put it back.
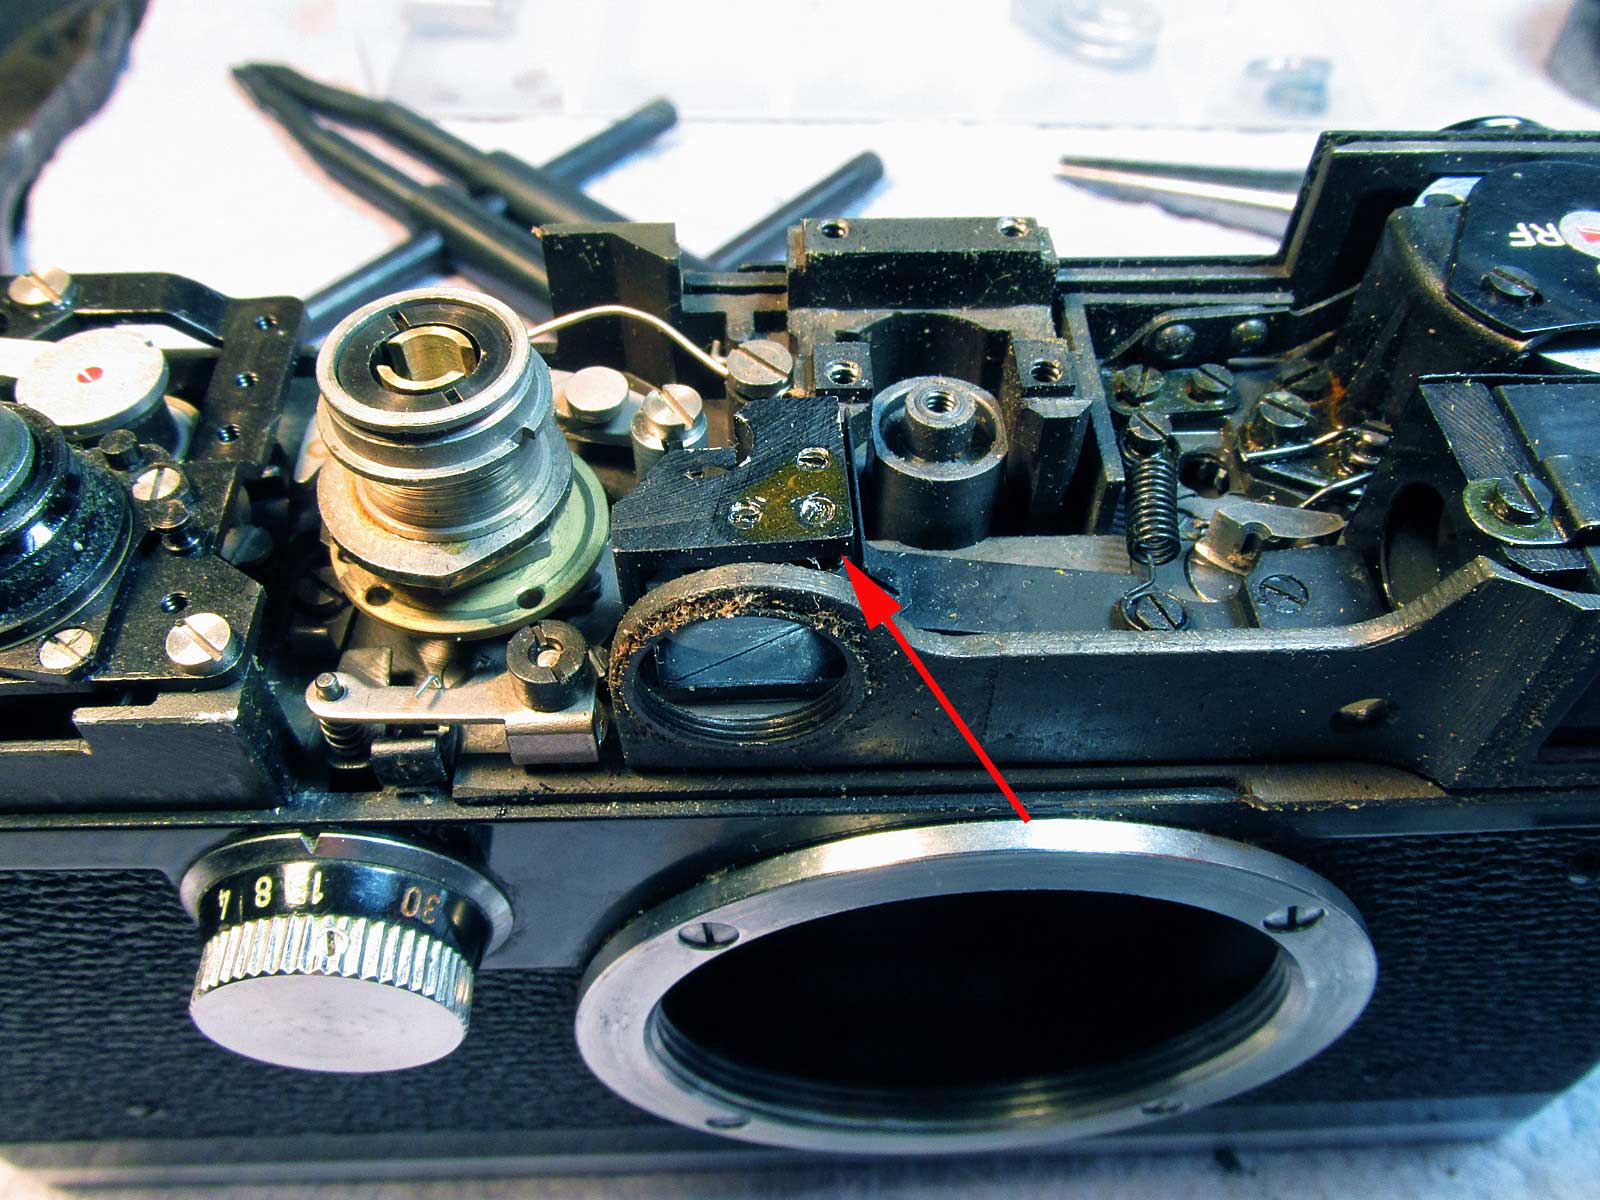
 remove the cold shoe with the 4 screws and then remove the Parallax correction post. This is a device that gives parallax correction to the series of Canon Brightline Viewfinders that go with their corresponding lenses, 28, 35, 50, 90 135mm etc. To remove the post, I found it helpful to press in on the rangefinder coupling arm in the lens cavity, this pops the post up above the cold shoe. There are 2 tiny spanner slots, get it started with a small spanner wrench and then finish with the tweezers.
 remove the flash PC socket and flash bayonet mount bracket. Unscrew the PC socket (ccw) with your pin spanner or tweezers, then just pull out the bayonet bracket.
 remove the screw on the opposite end.
 remove this spring collar from around the shutter advance post. I would put a strip of scotch tape over this area while prying the spring to prevent it from flying across the room.
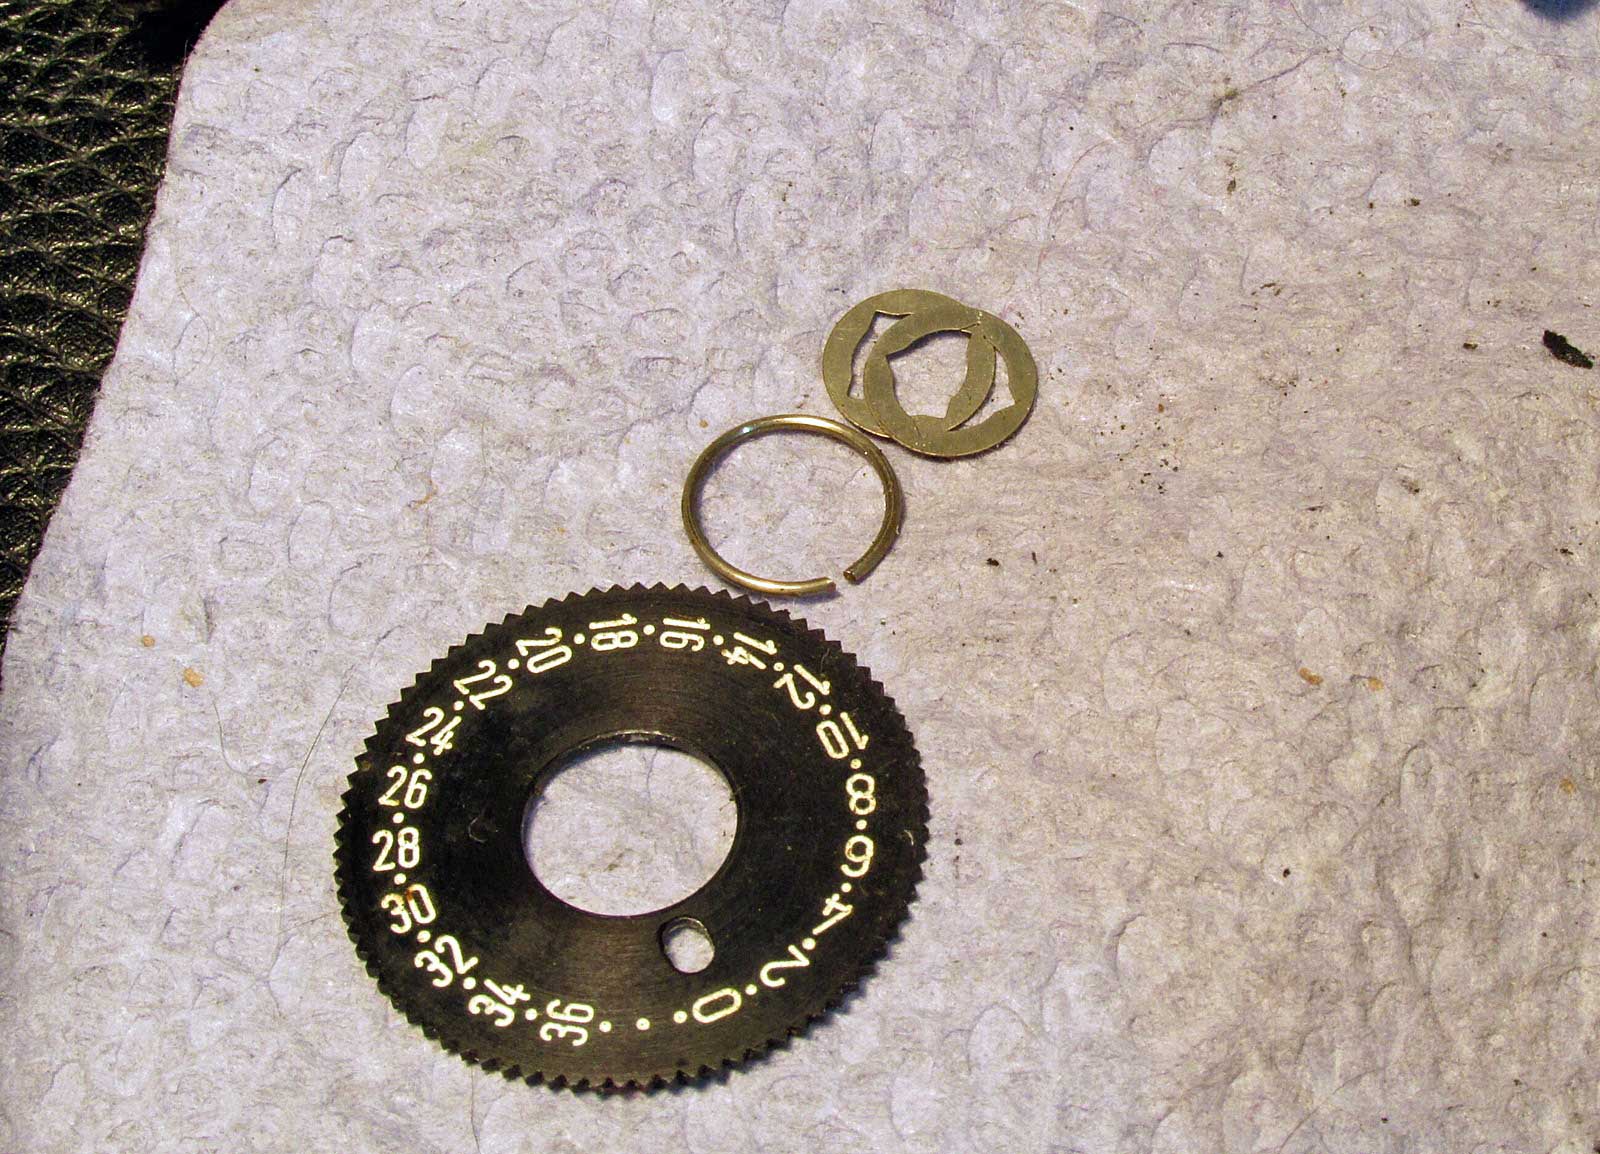 After removing the top plate, this is the frame counter ring with it’s collar. (and a few surprise washers I didn’t know were still on the post)
 here it is with the top removed.
 this is the large rangefinder prism. Remove the 2 screws and retainer bar. It’s a tight fit but a gentle tap and flip the camera over and it will pop out. Clean it with soapy water and buff with a cotton rag. (don’t soak or loose the paper wad on top that gives tension while screwed down) While the prism is out, you can reach in with your Q-Tip and clean the 3 rotating parallax lenses one by one.
 this is the small RF prism that moves back and forth as you focus. Clean the two surfaces of it carefully
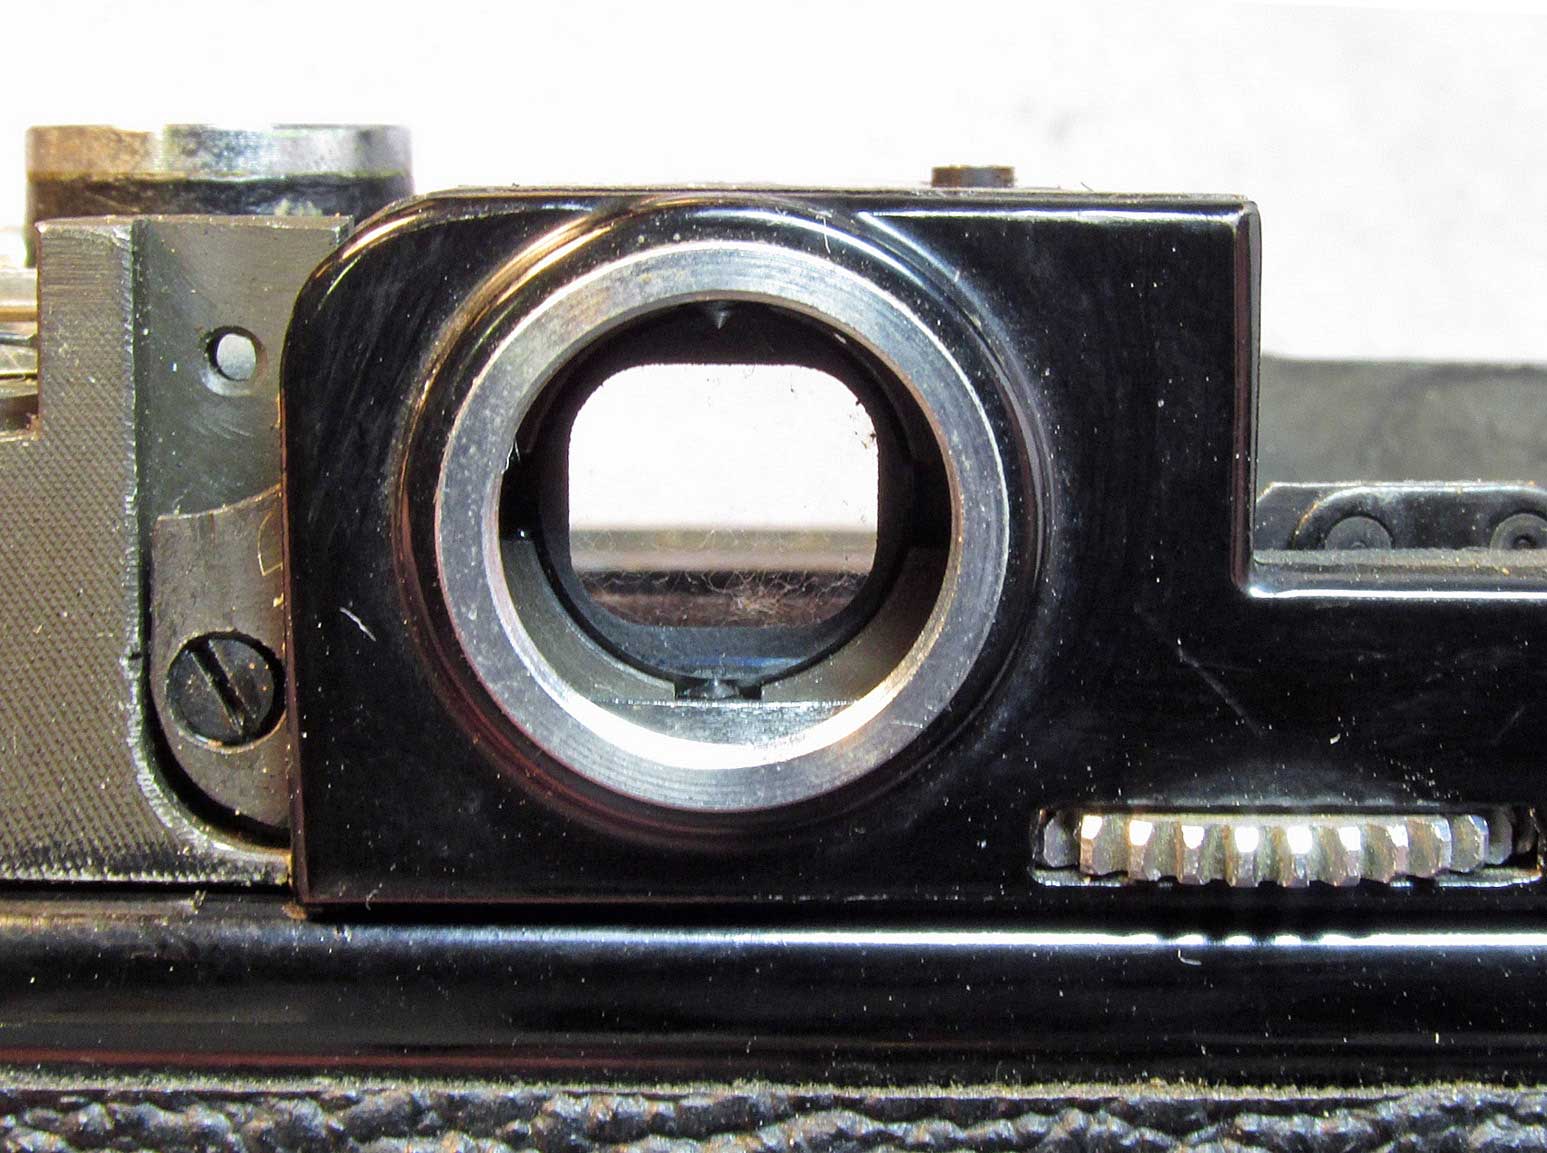 on the back, unscrew the viewfinder lens (ccw small spanner to get it started, fingers once it’s loose) reach in with your Q-tips and clean each parallax lens one by one.
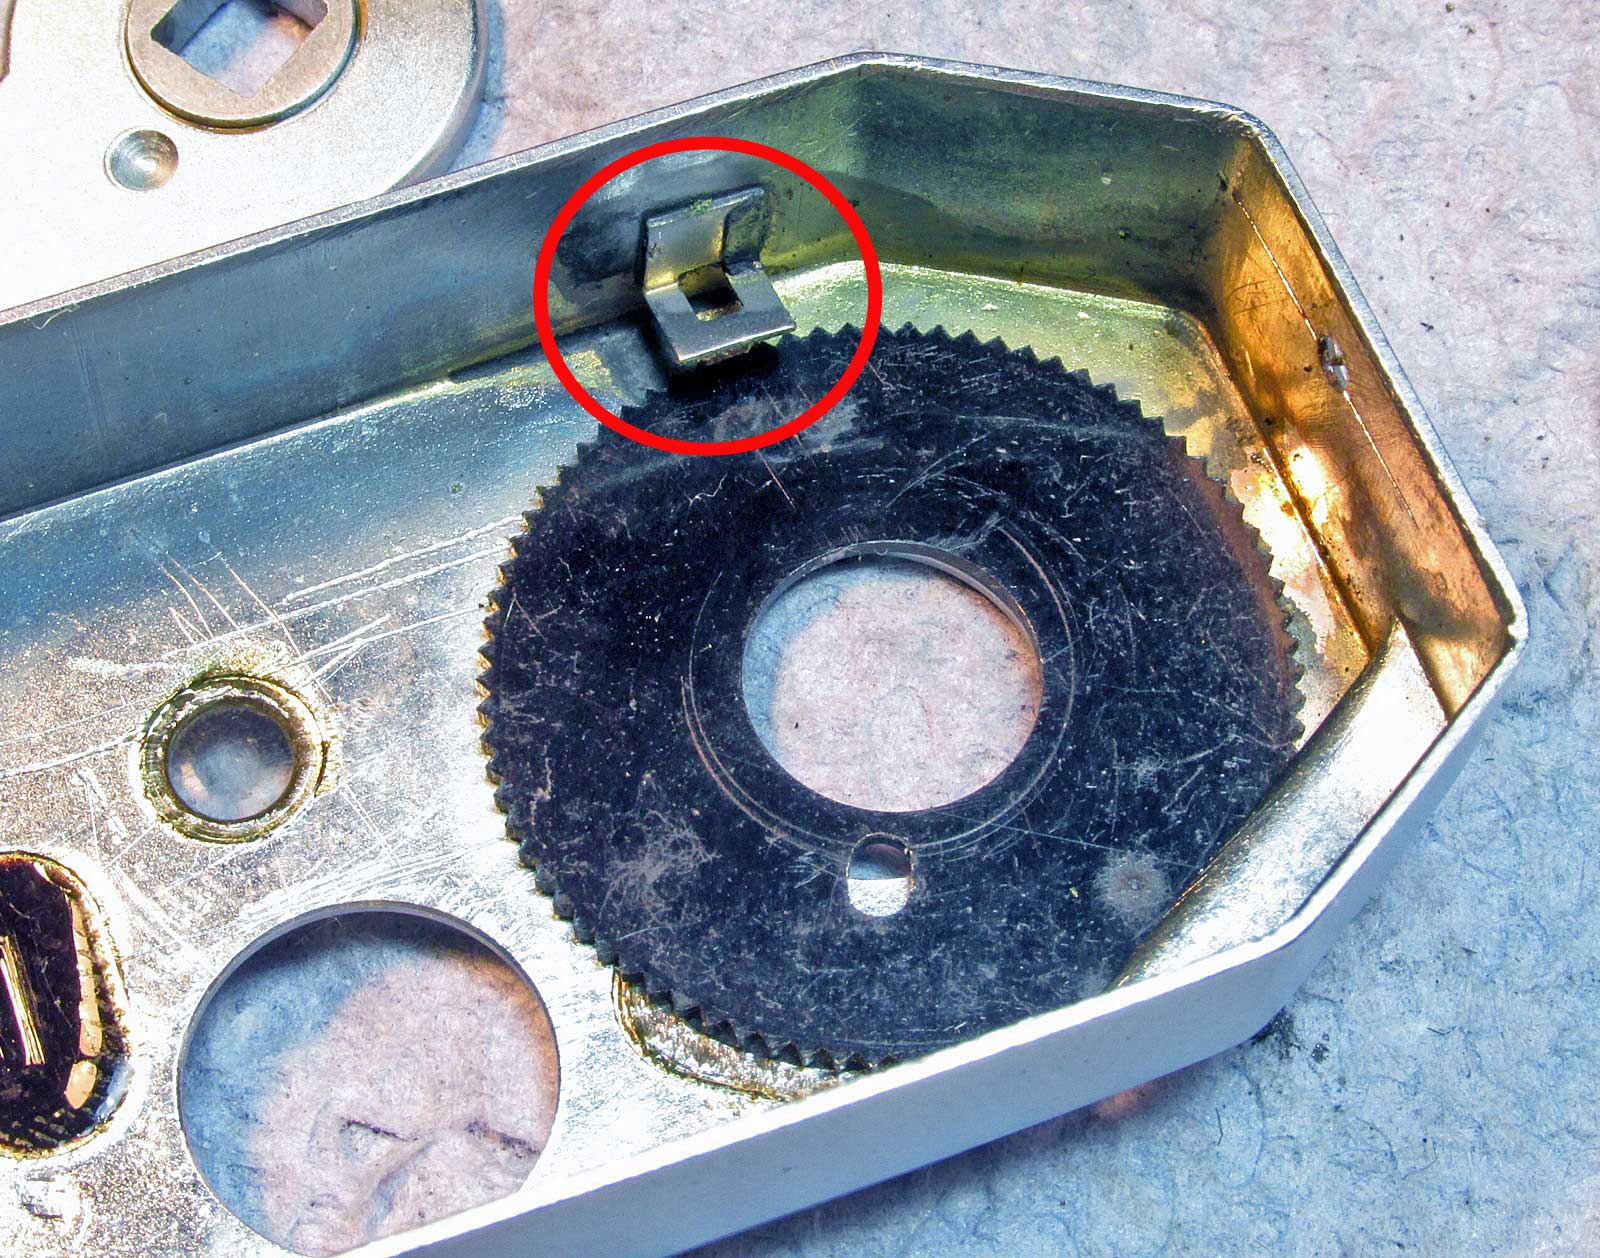 when putting the top plate back on, the Canon engineers were thoughtful enough to provide this little shelf for the one side of the frame counter ring to rest on as the other side is in the slot in the side of the plate.
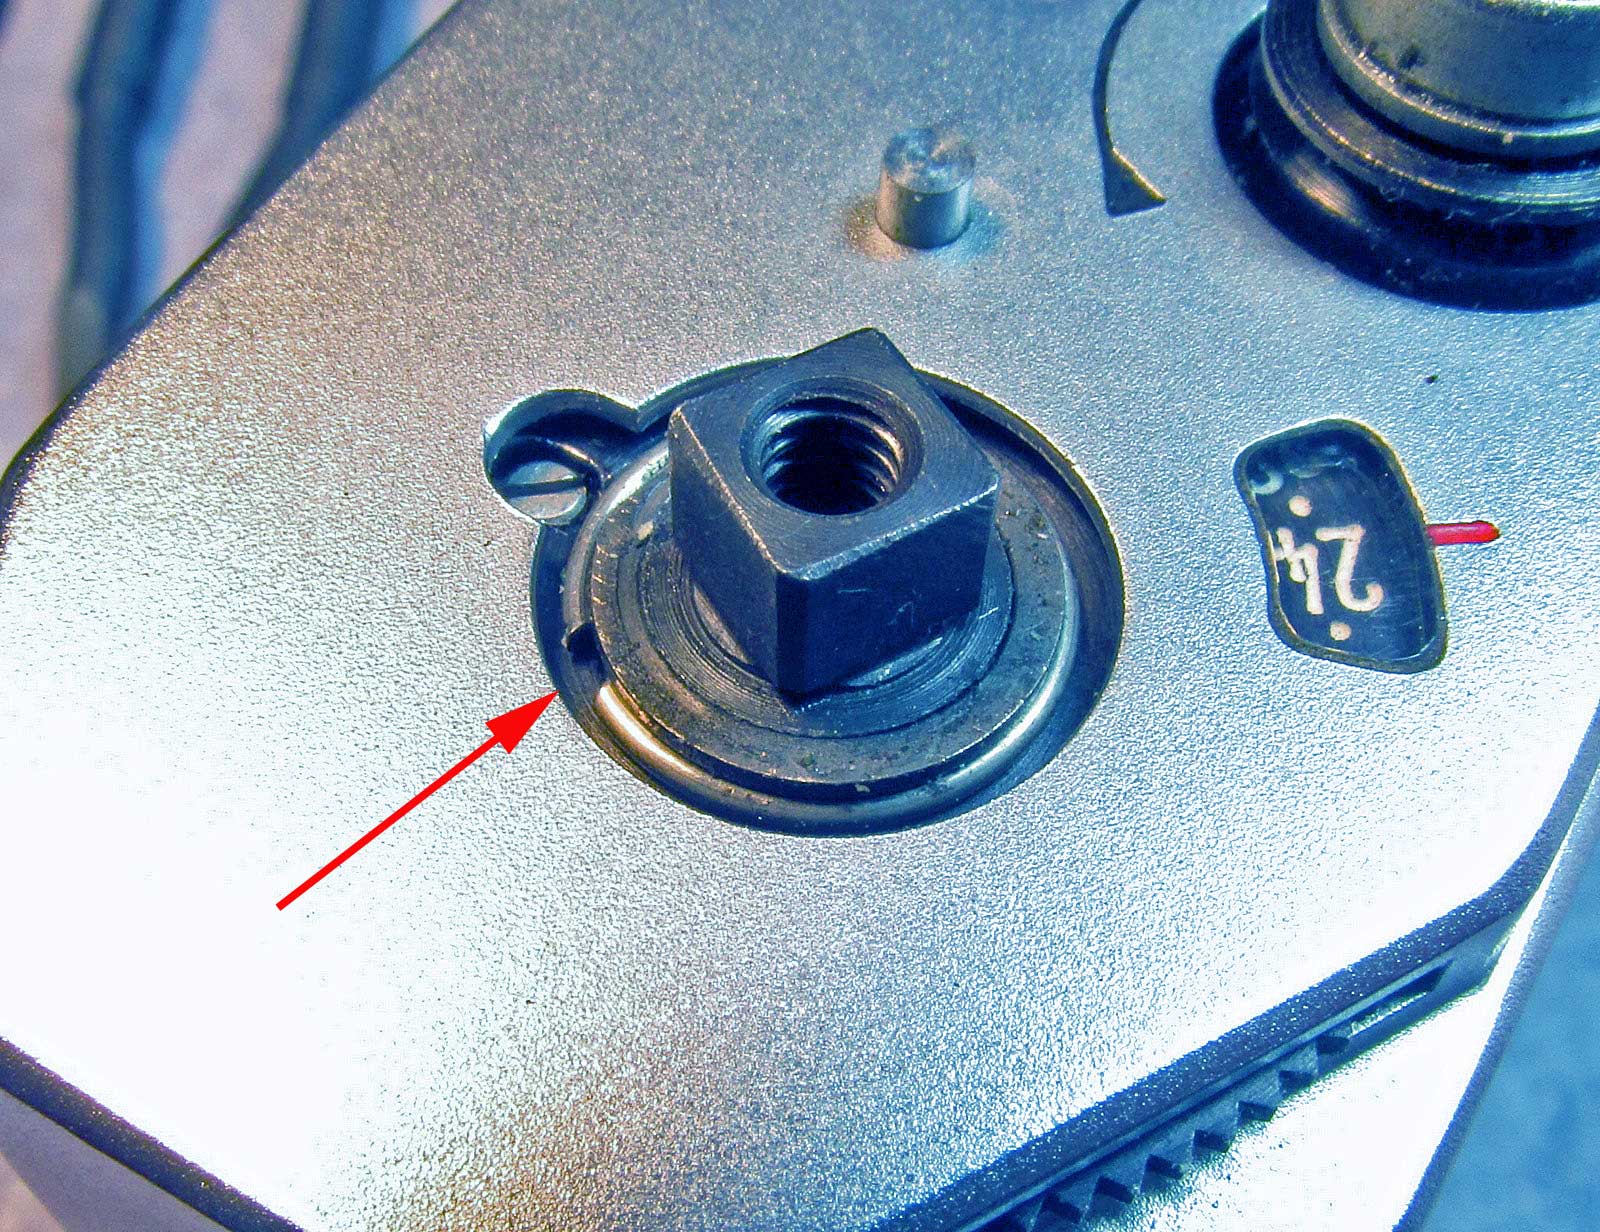
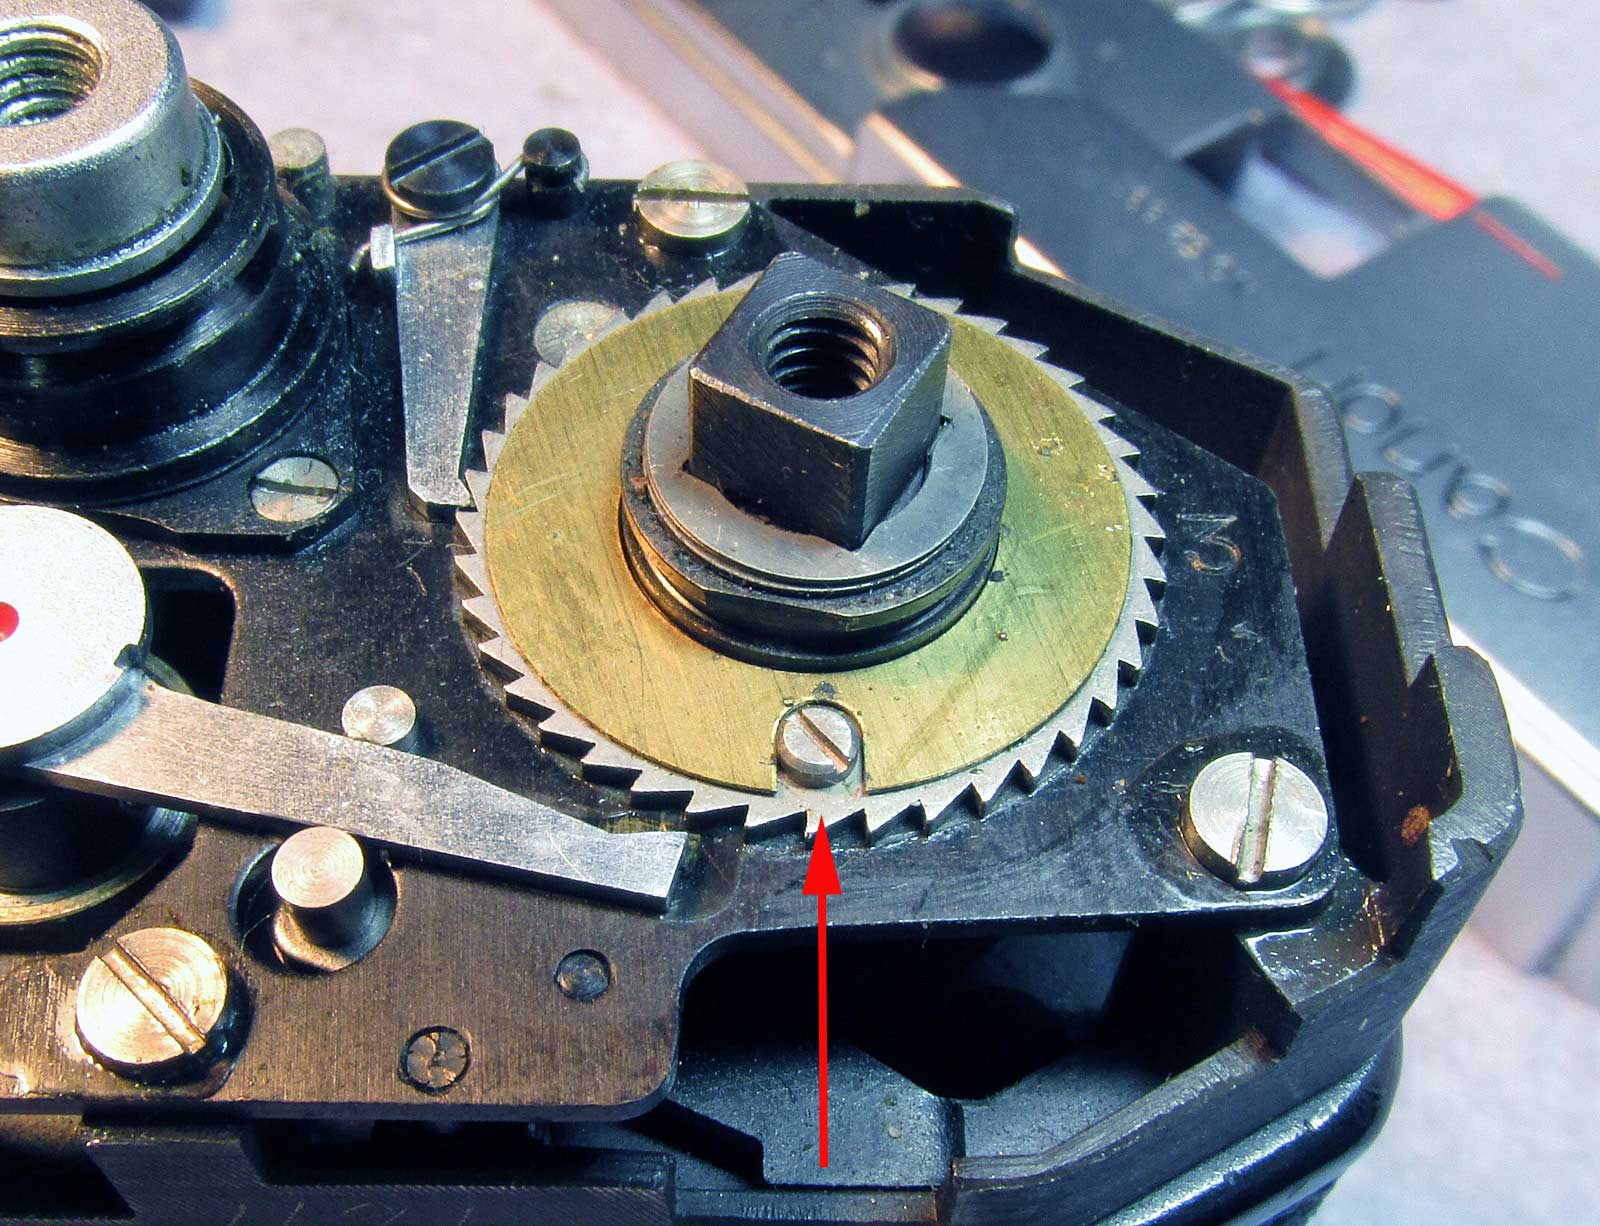 align this set-post at a 90 deg. with the back of the camera. This coincides with a small hole in the frame counter ring.
 a slot in the top of the plate makes it easy to align the hole in the frame counter ring with it’s set-post. Snap on the collar ring. Reassemble the rest the same way you removed them. Remember to align the shutter select knobs middle part with the line in it so when you read the selected shutter speed it isn’t upside down. Yes it will work either way. In fact the shutter speed can be selected while the shutter is cocked or not and you can completely rotate the knob in either direction past B.
Very useful information. My vl2 has similar issue, hazy finder. I follow your instruction, my problem is I can’t get the large prism out. Any suggestion? Thank you in advance. 🙂
I remember mine was a bit settled in. It says “give it a gentle tap and turn over and it will fall out”… I can’t remember exactly what I did, there may be grime acting as ‘mortar’. It should be fairly similar, if not exactly the same as mine.
I would turn it over, prism side down (over a nice cushy towel) and tap-wiggle-tap-wiggle, (I would use the rubber end of a screwdriver or something to tap with) it isn’t glued in, it’s just a good tight fit. Keep in mind this prism can’t move at all or the focus would be off, requiring adjustment every time you use it.
Hi Richard,
Is the large prism a one glass element? I have a problem that my prism has haze in diagonal surface inside the prism. I can see that the prism consists of two glass elements, but they are probably not separatable. I need to clean the surface between them. Thank you
I’m not sure it has been years since I have been inside that camera