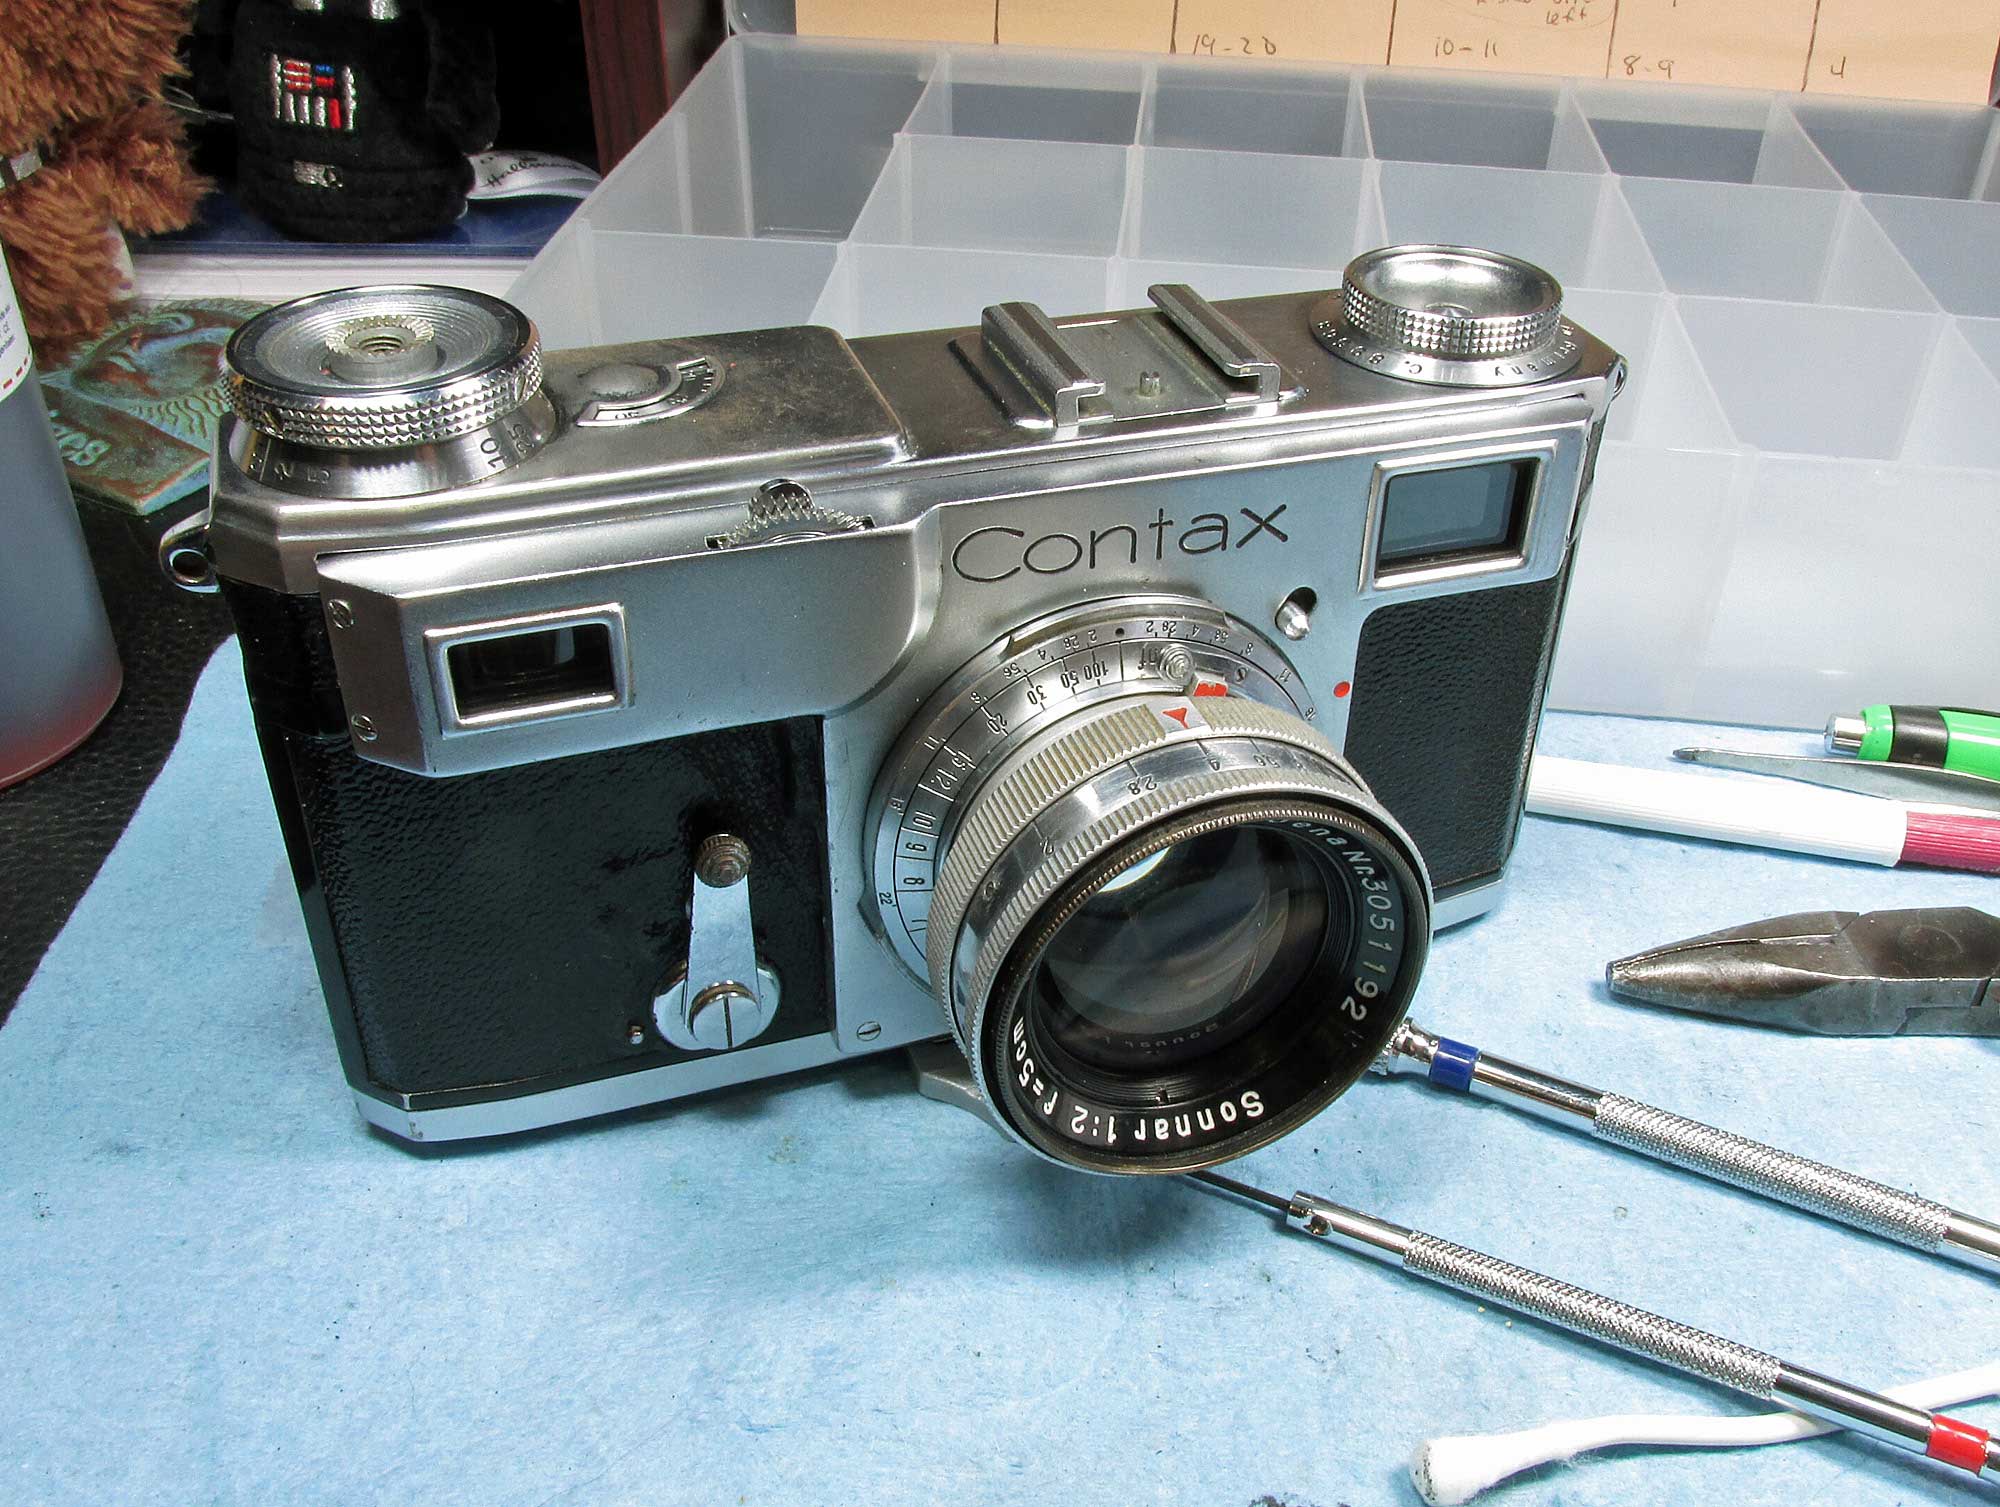
my 1937 Contax II came to me in pretty good condition. it just needed the shutter mechanism cleaned and lubed. and the optics in the RF/VF cleaned.
Giving my 1937 Zeiss Ikon Contax II as best of a CLA (clean, lube, adjust) as I could without dismantling the mechanism itself, I doused with lighter fluid twice, avoiding the shutter slats, tapes and glue, which is fairly easy as, everything is on one side. then I oiled a few choice spots, avoiding escapements.
With the help from forum friends, I fixed a problem with the Infinity on the RF, the previous hacker put the longer screws on the RF side of the front plate and they were preventing the plano-convex lens from traveling all the way to the side.
I also removed foam light seals from the film back surround. originally there were no light seals (so I’ve read} around the camera back. The Kiev clones used Yak hair as a seal. I’m opting to use my smaller size black yarn just to be safe on this 80 year old camera.
I re-glued a loose flap of leatherette and cleaned with Meguiar’s leather foam. I touched up some rubbed off chrome on the top plate with my faux chrome plating kit.
Here are the steps to open it up, remove the shutter cage from the frame and clean. I did not disassemble the shutter mechanism itself, it is for experts and usually is not necessary to clean it.
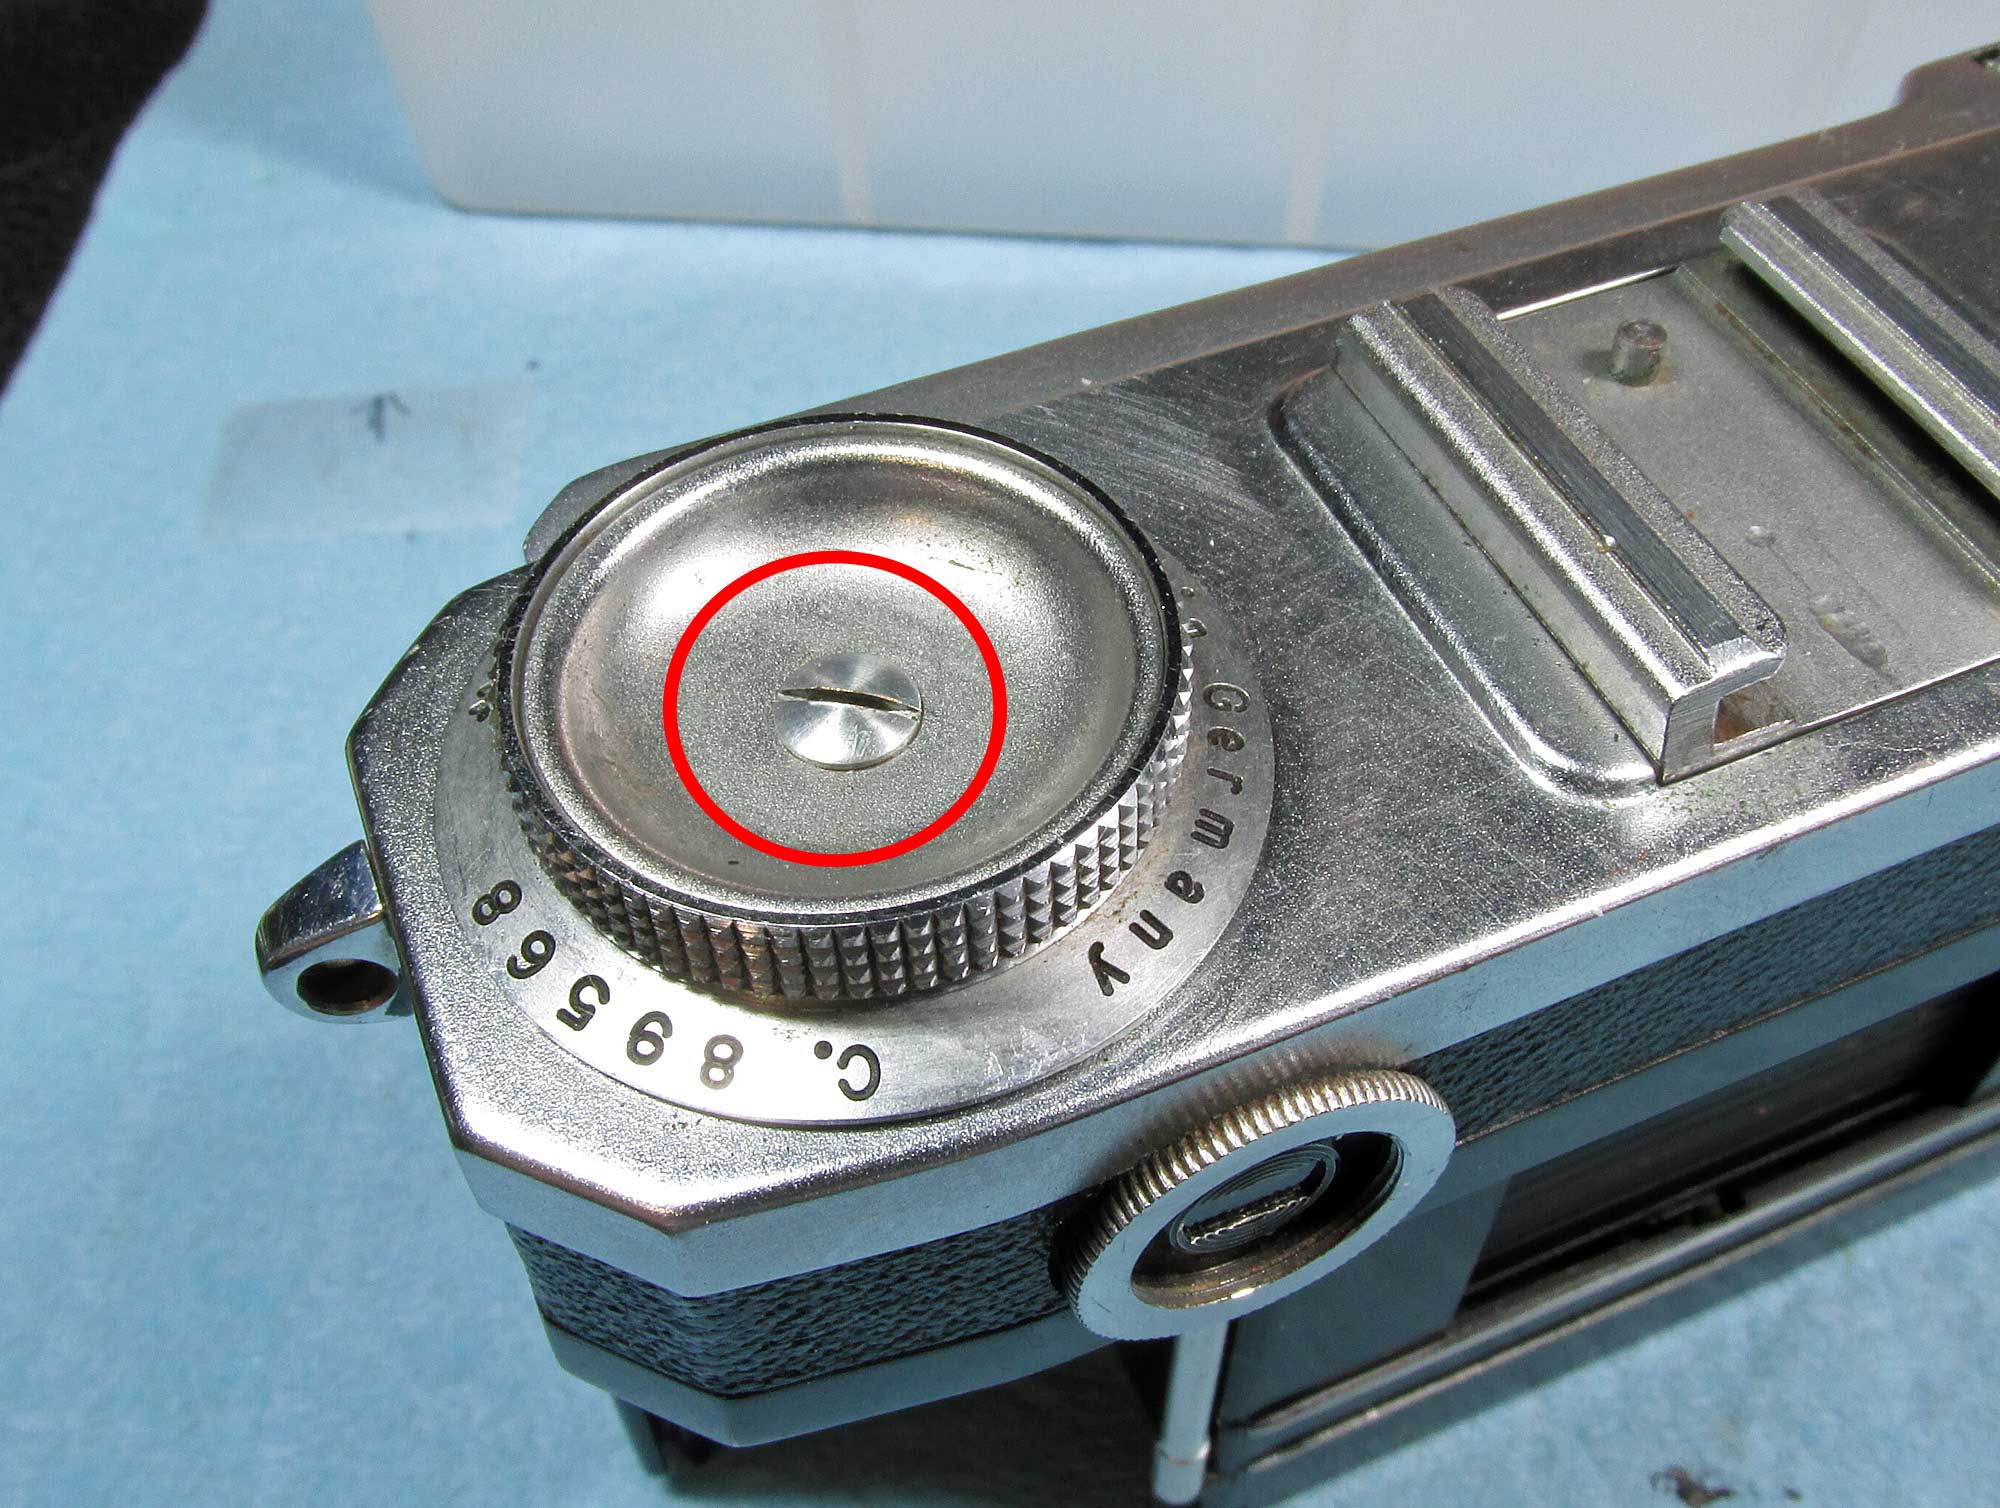
remove rewind knob
remove the single center screw
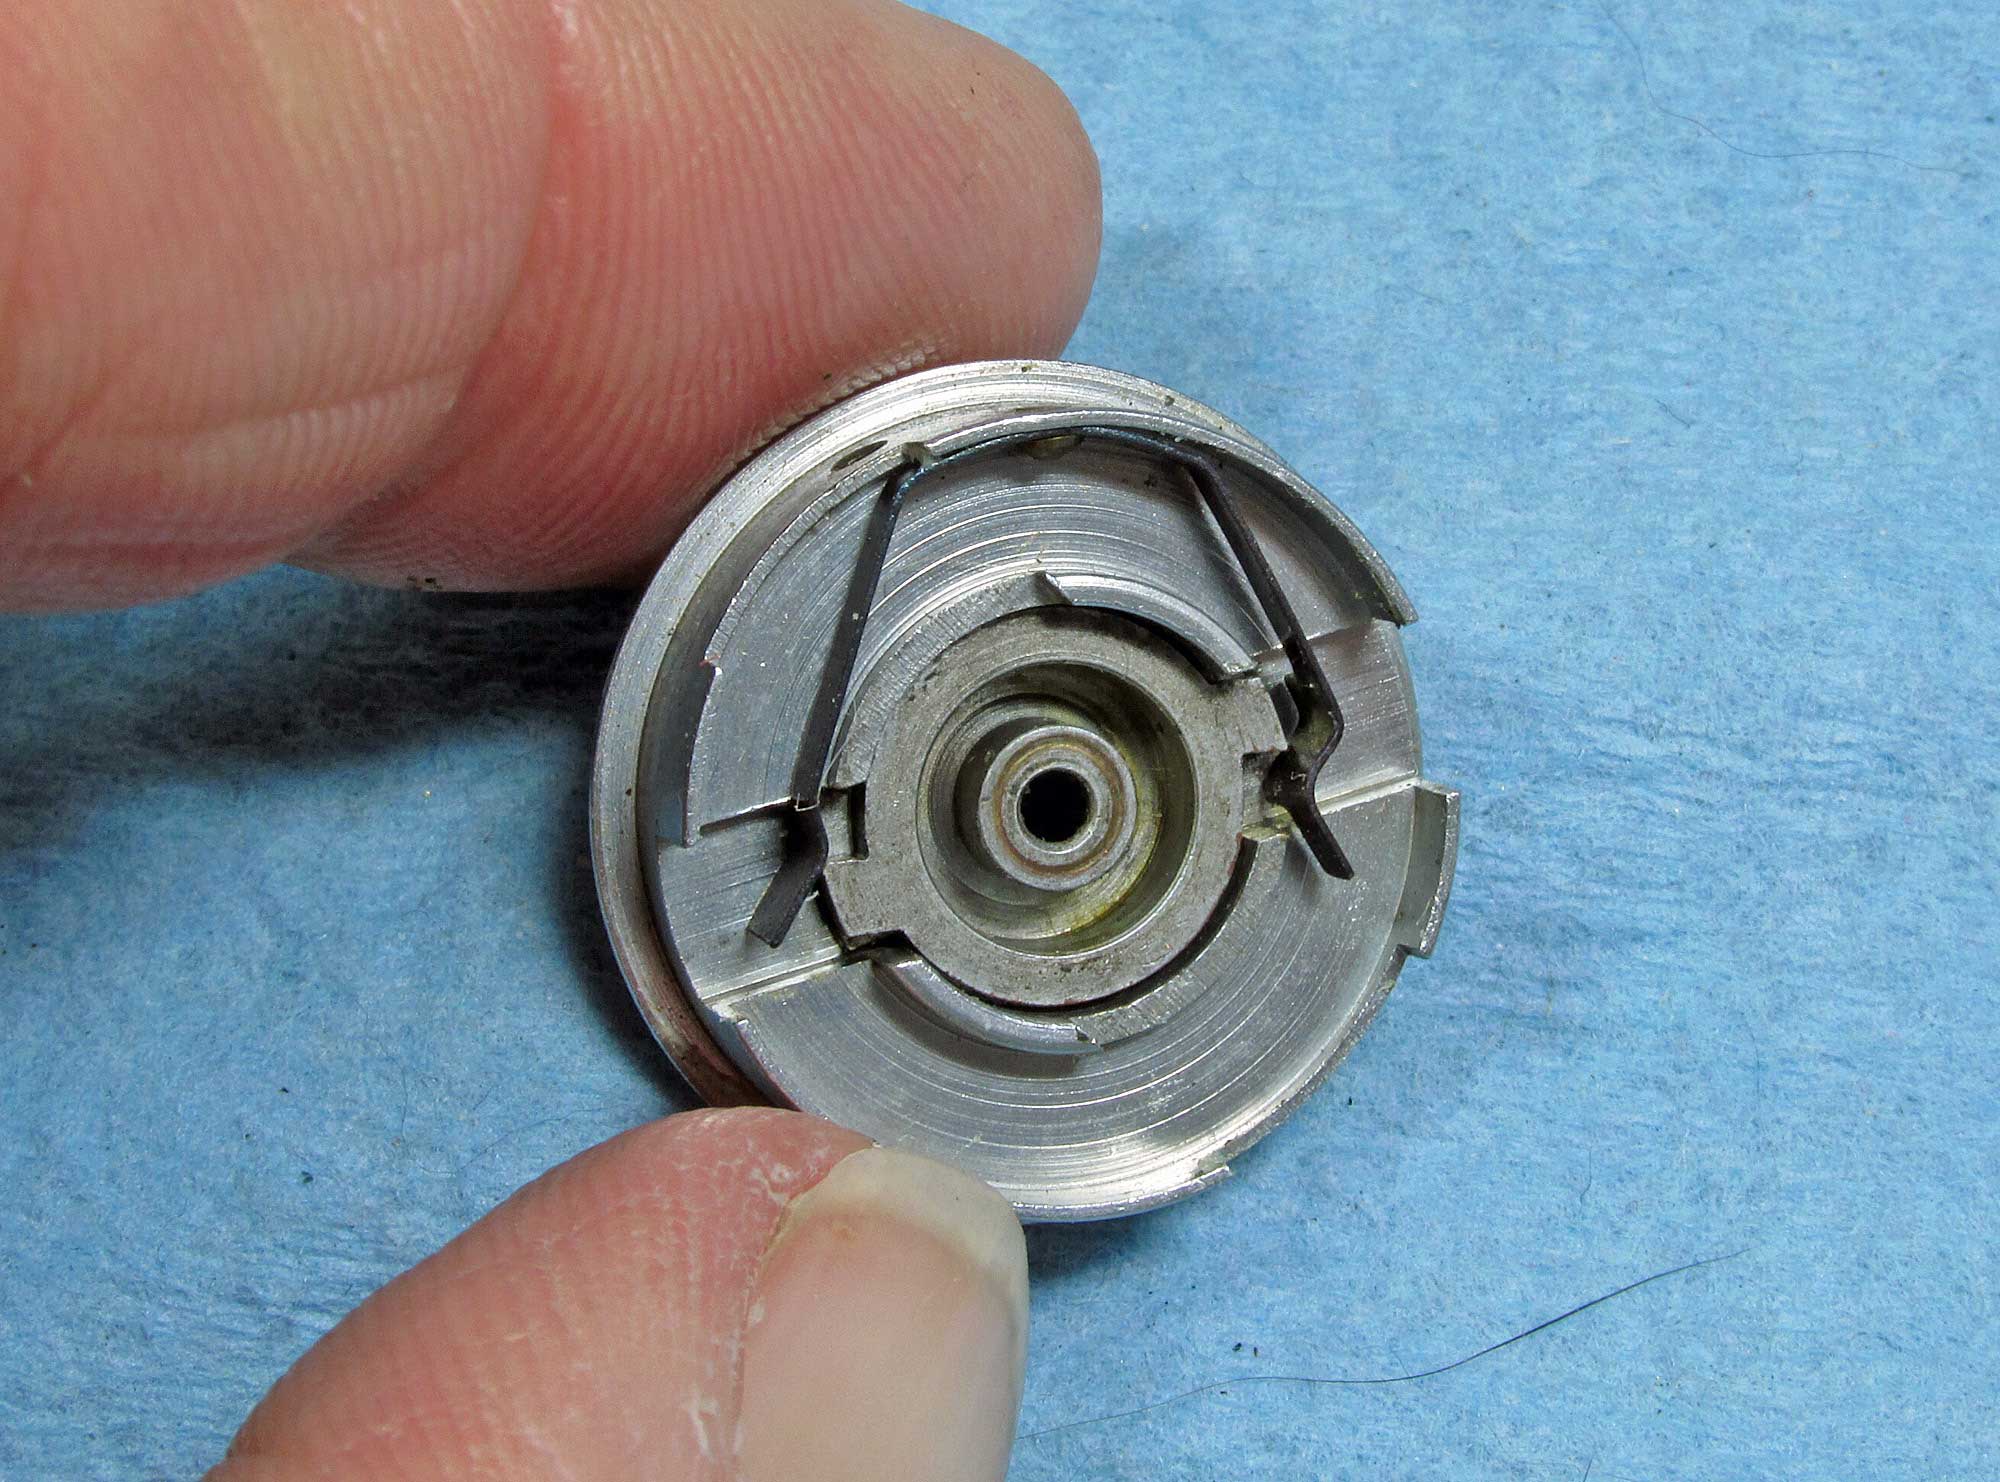
rewind knob removed
here are the rewind knob parts. the wavy washer goes back on bumps-up
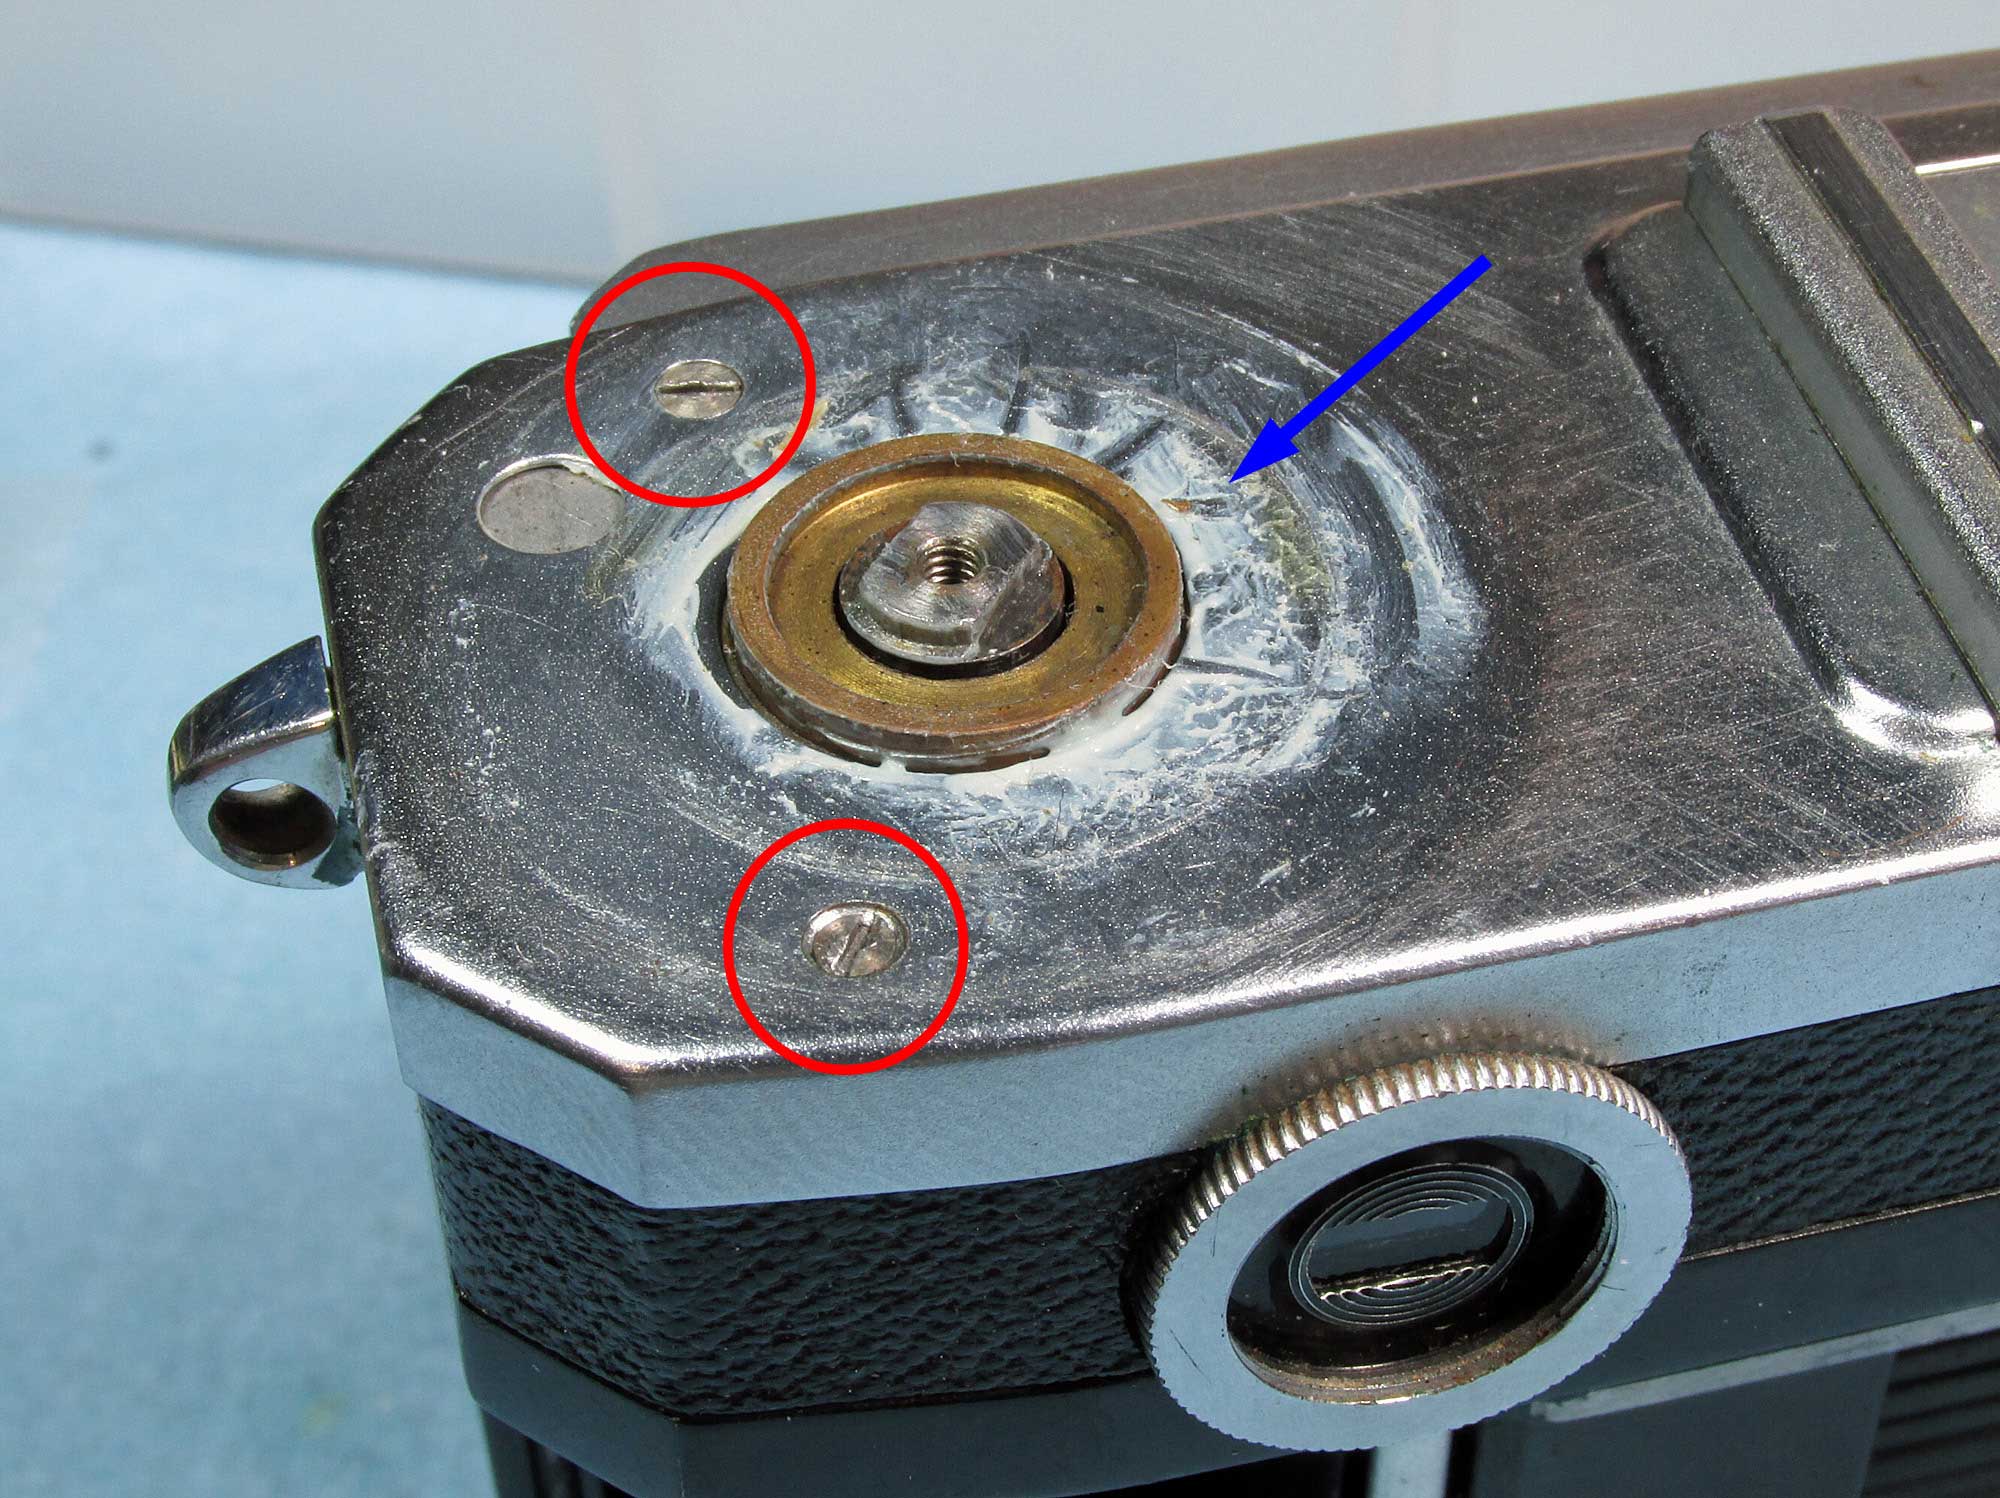
remove body screws
remove the 2 body screws that were under the rewind knob (circled). note the excess grease put on by a previous owner (blue arrow), The knob had it too. There is no need to grease this knob here.
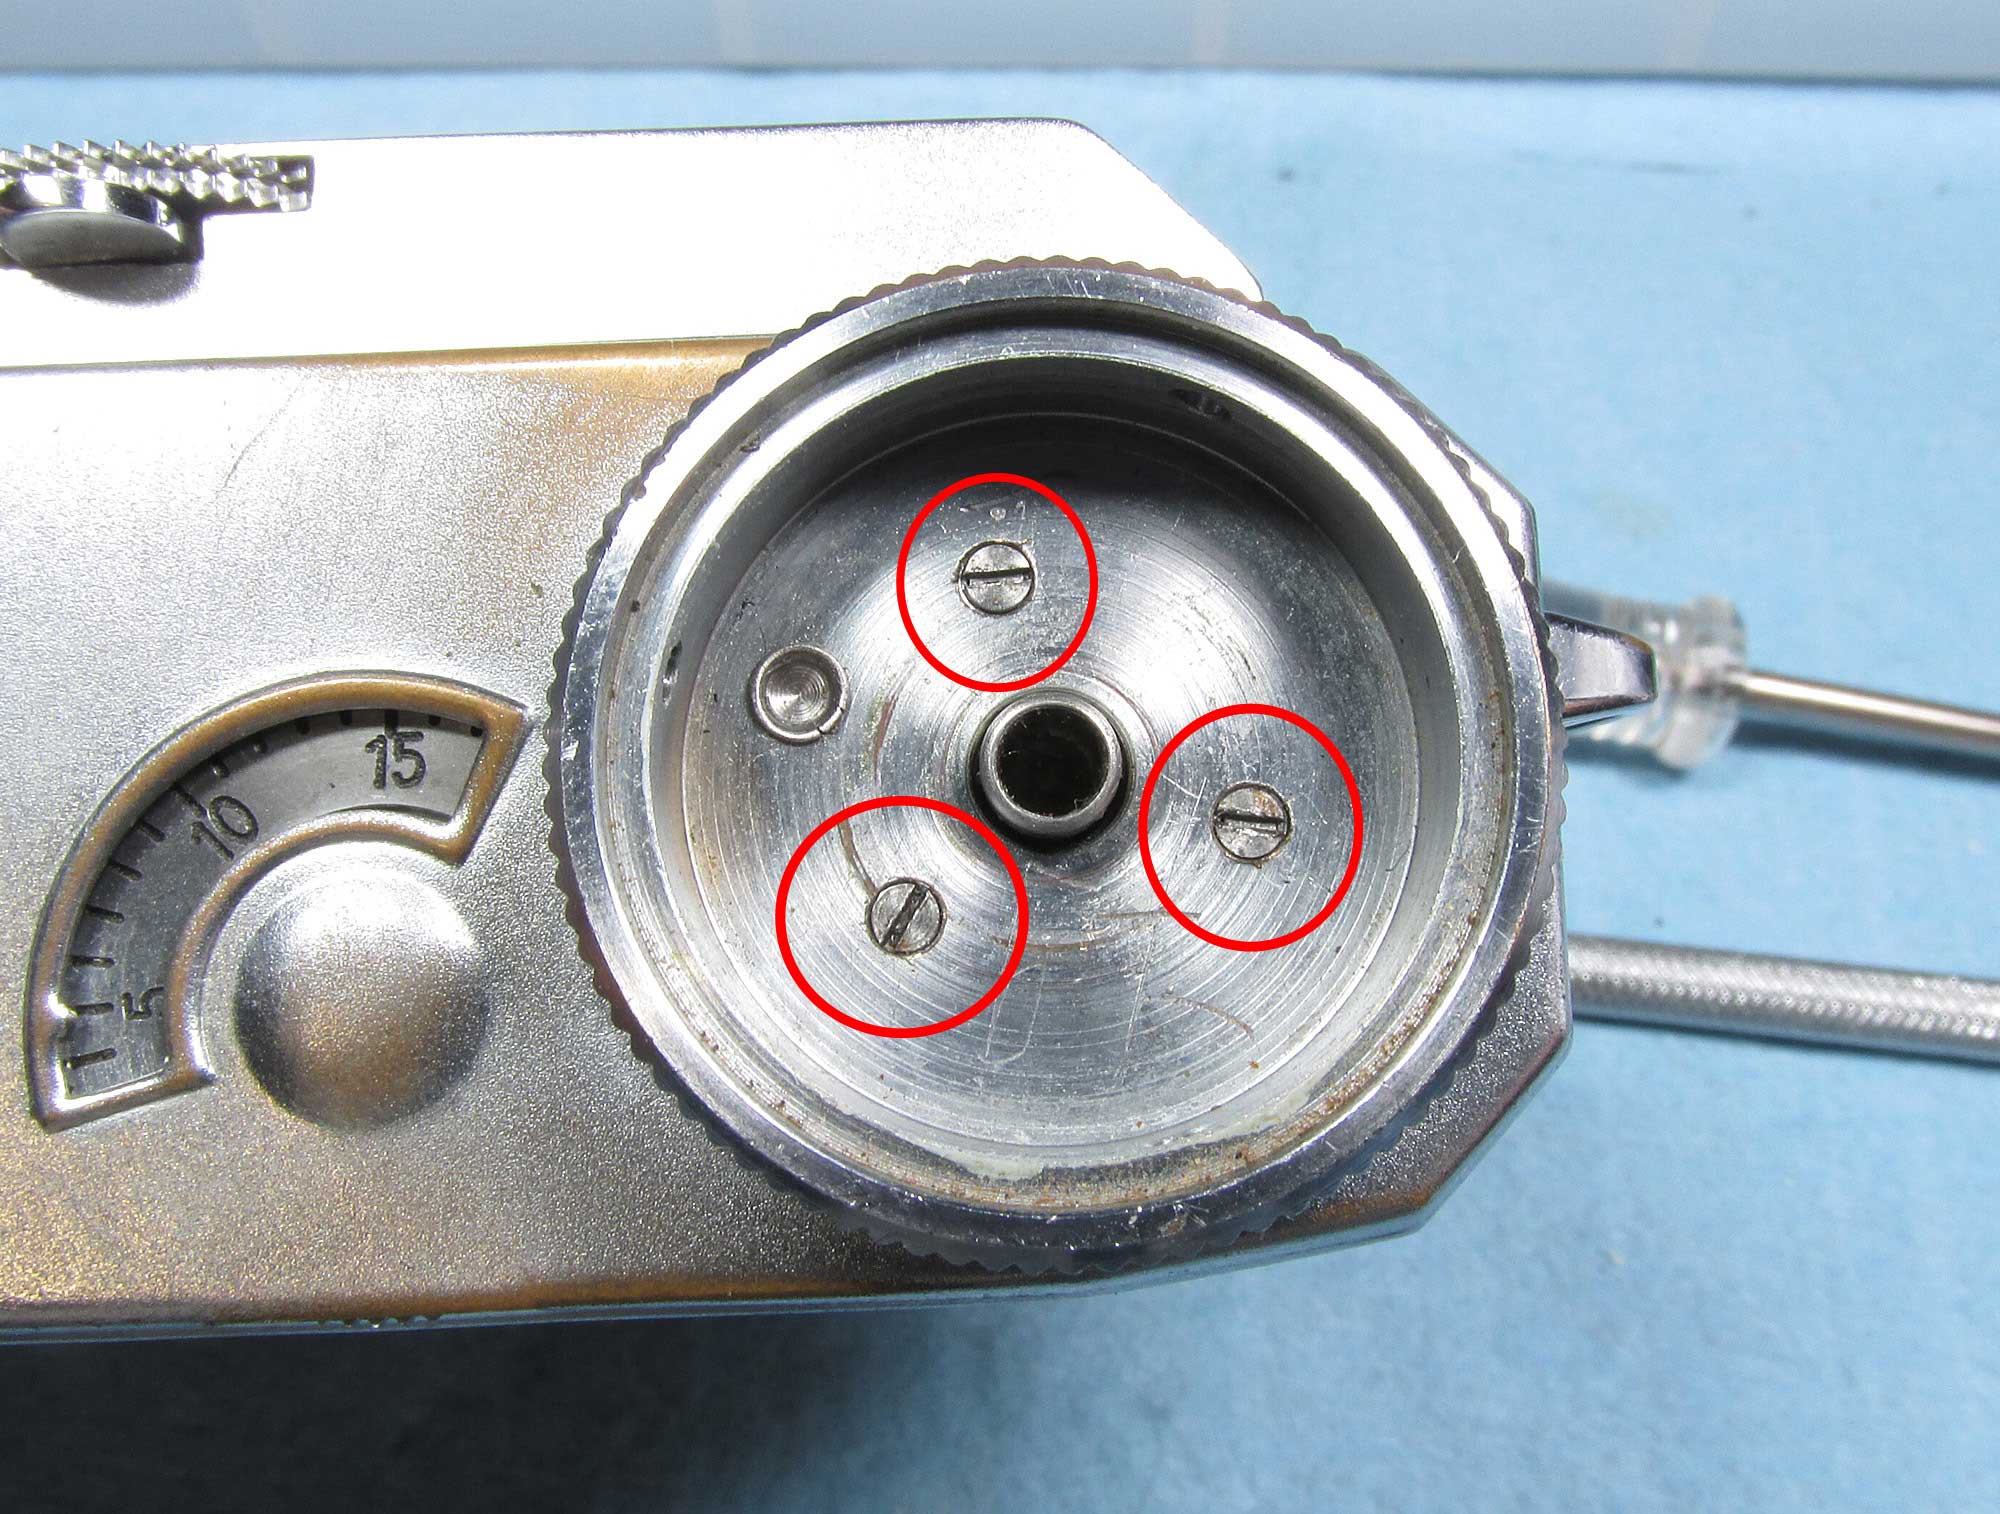
remove winding lever center
there are 3 screws around the knob. remove all three, not just loosen. carefully lift off the center disc, there is a spring for the shutter button underneath.
shutter buton
here is how the shutter button goes back in the knob for reassembly. note the grooves and blade spring
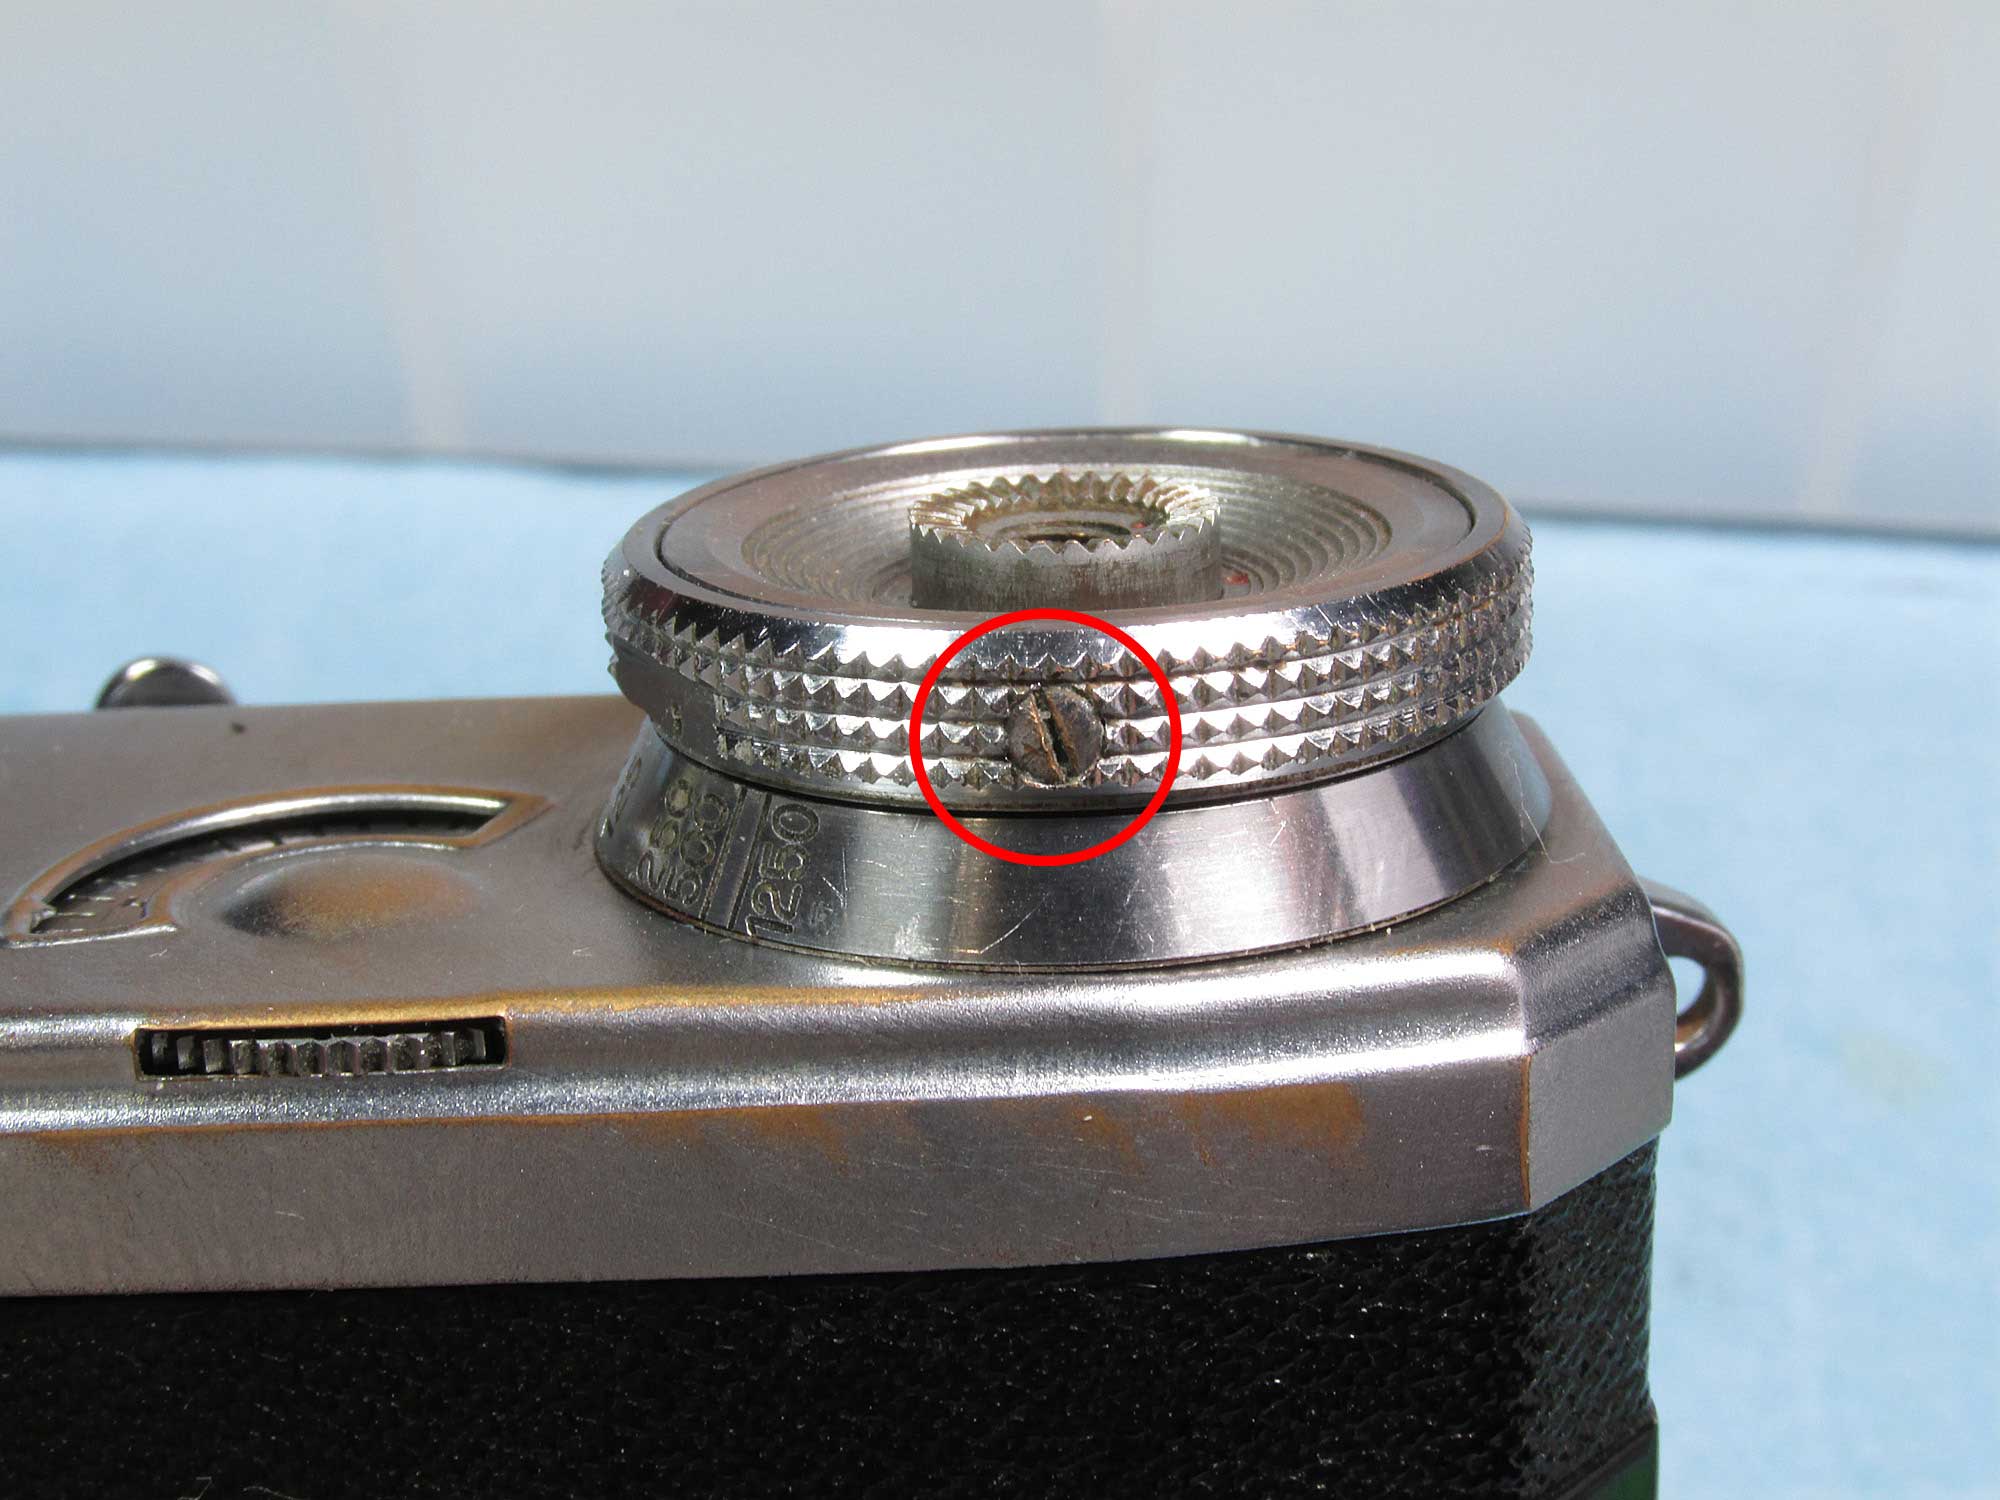
remove advance knob
remove the 3 screws (circled) for the film advance/shutter speed select knob.
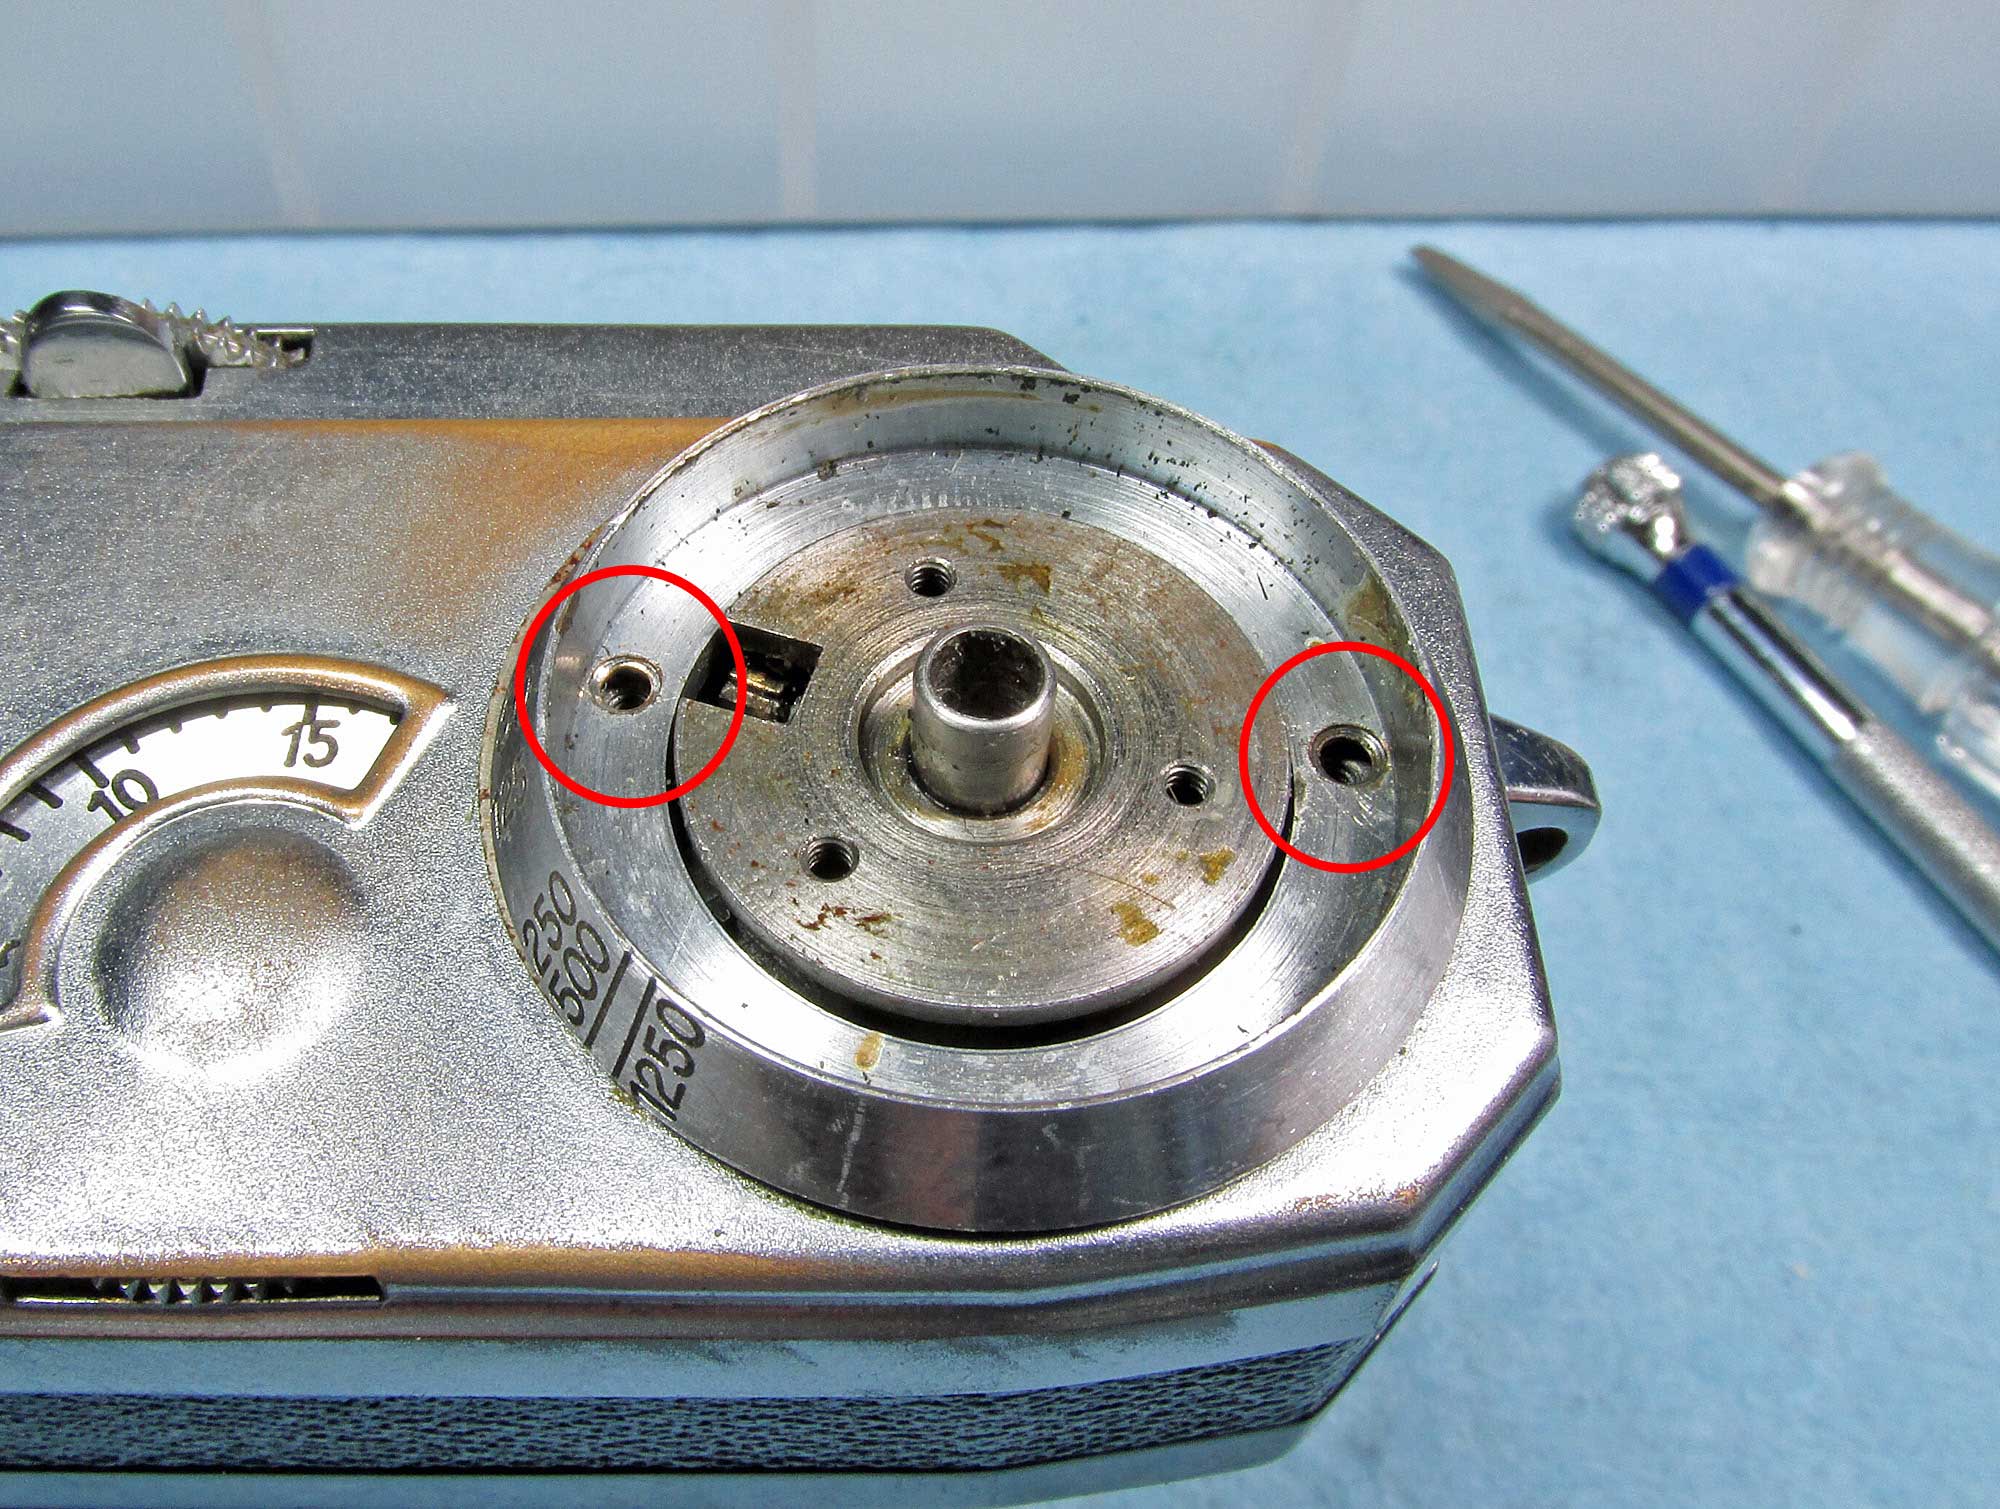
remove speed scale
remove these 2 screws (circled) and remove the shutter speed scale disc. There is a washer under (2? mine had 1 but the Kiev had 2)
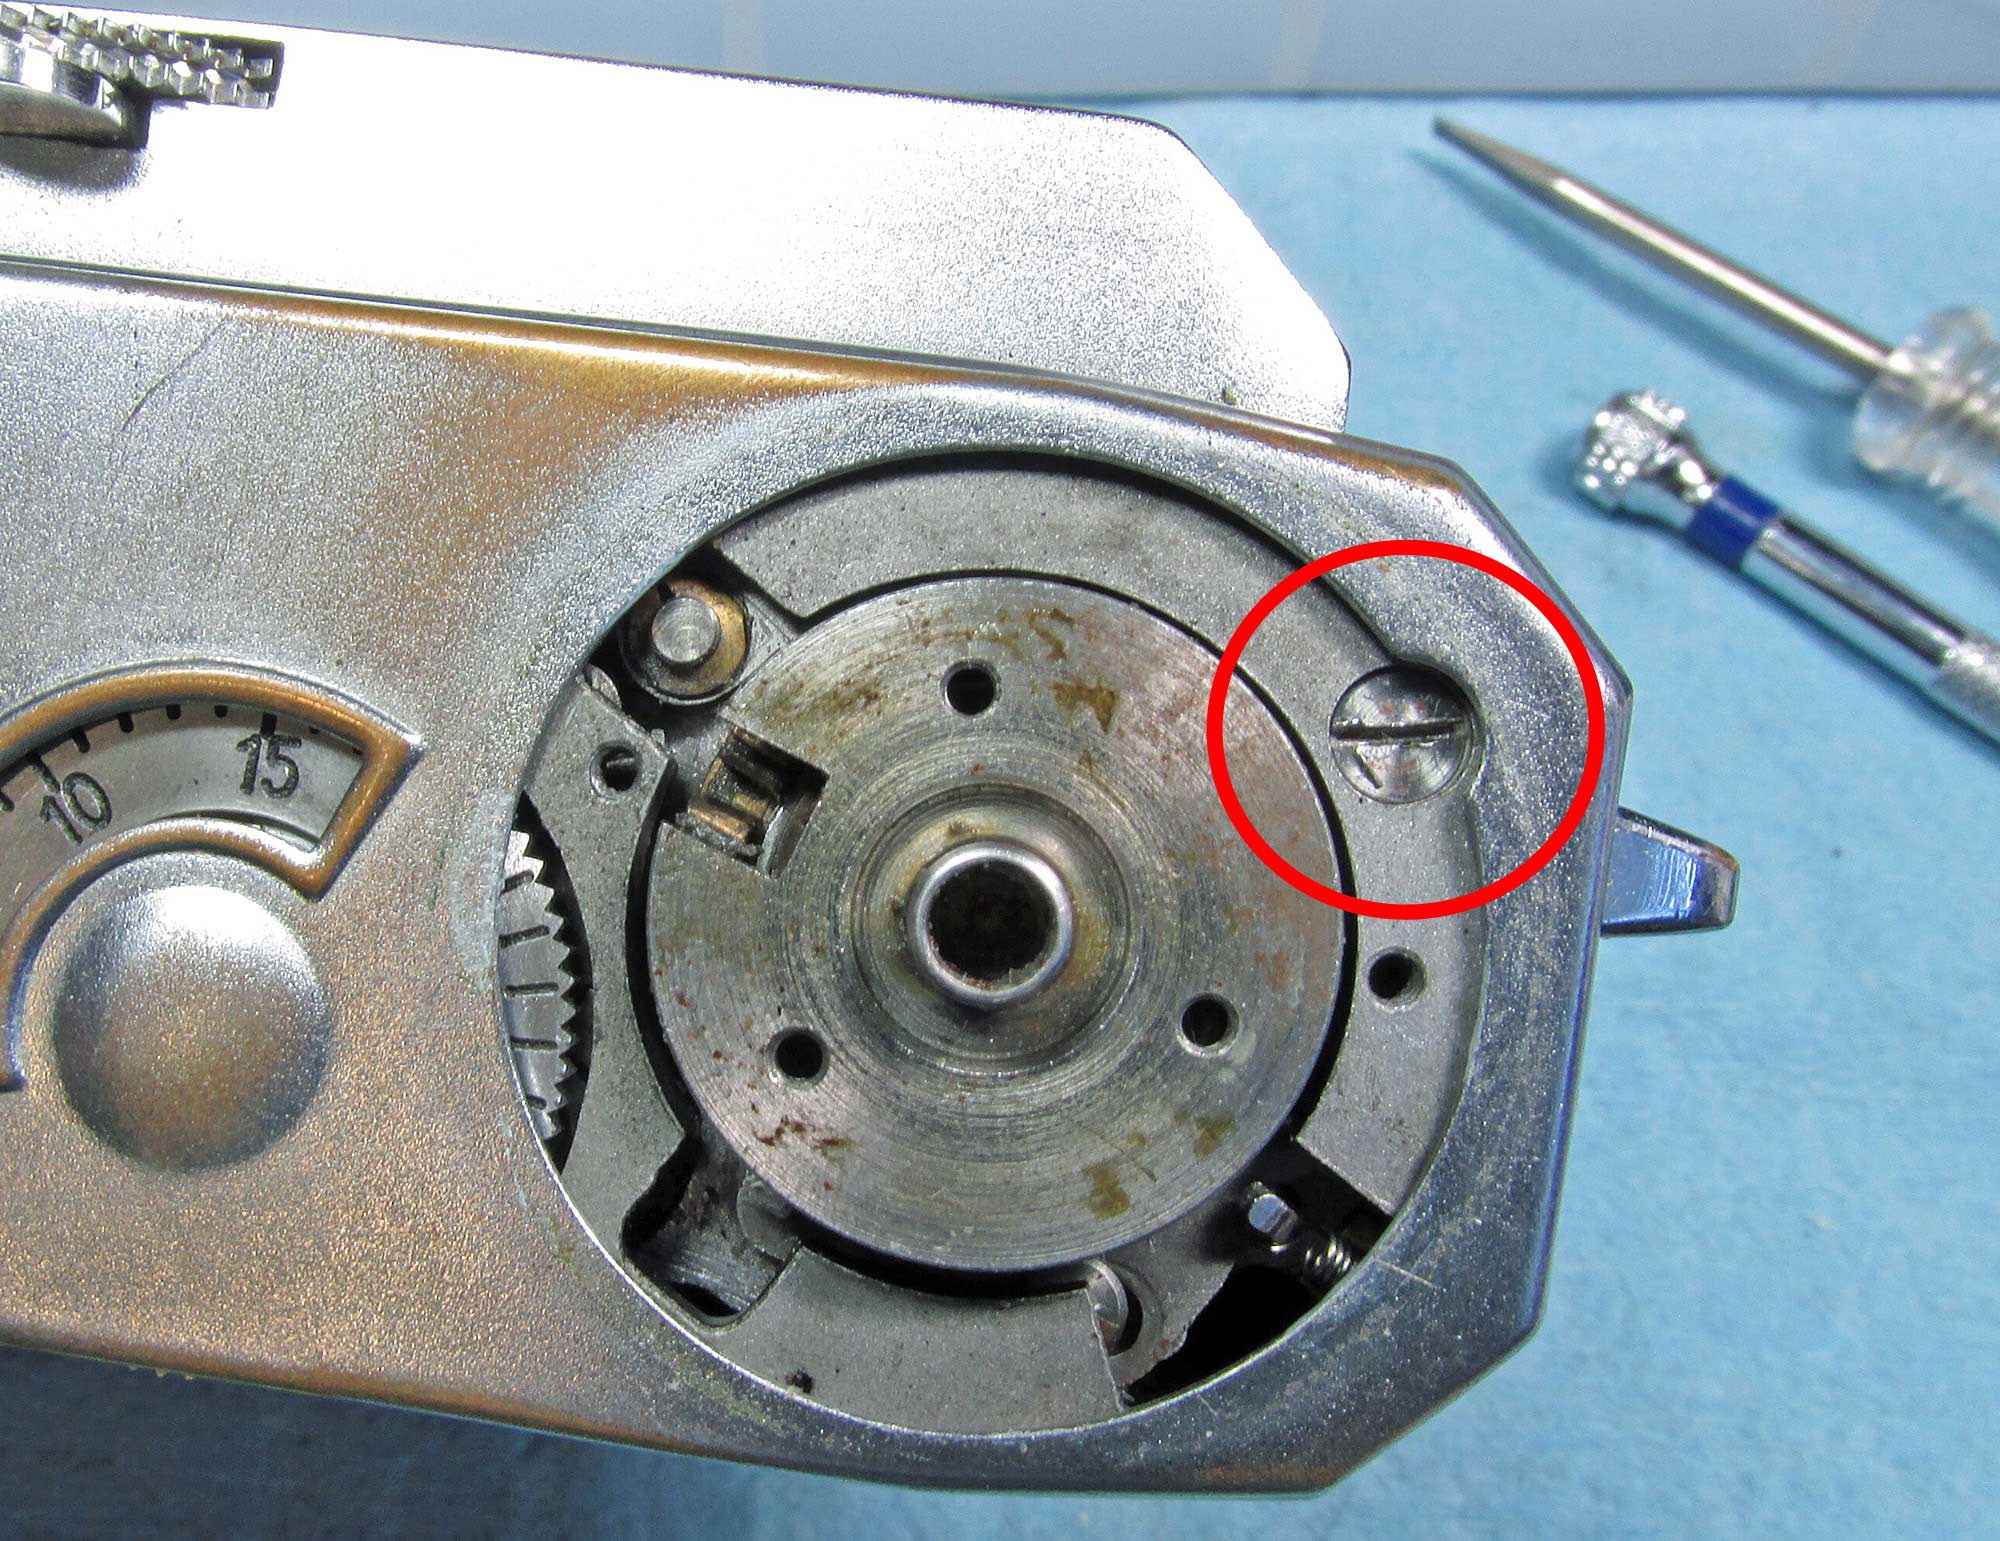
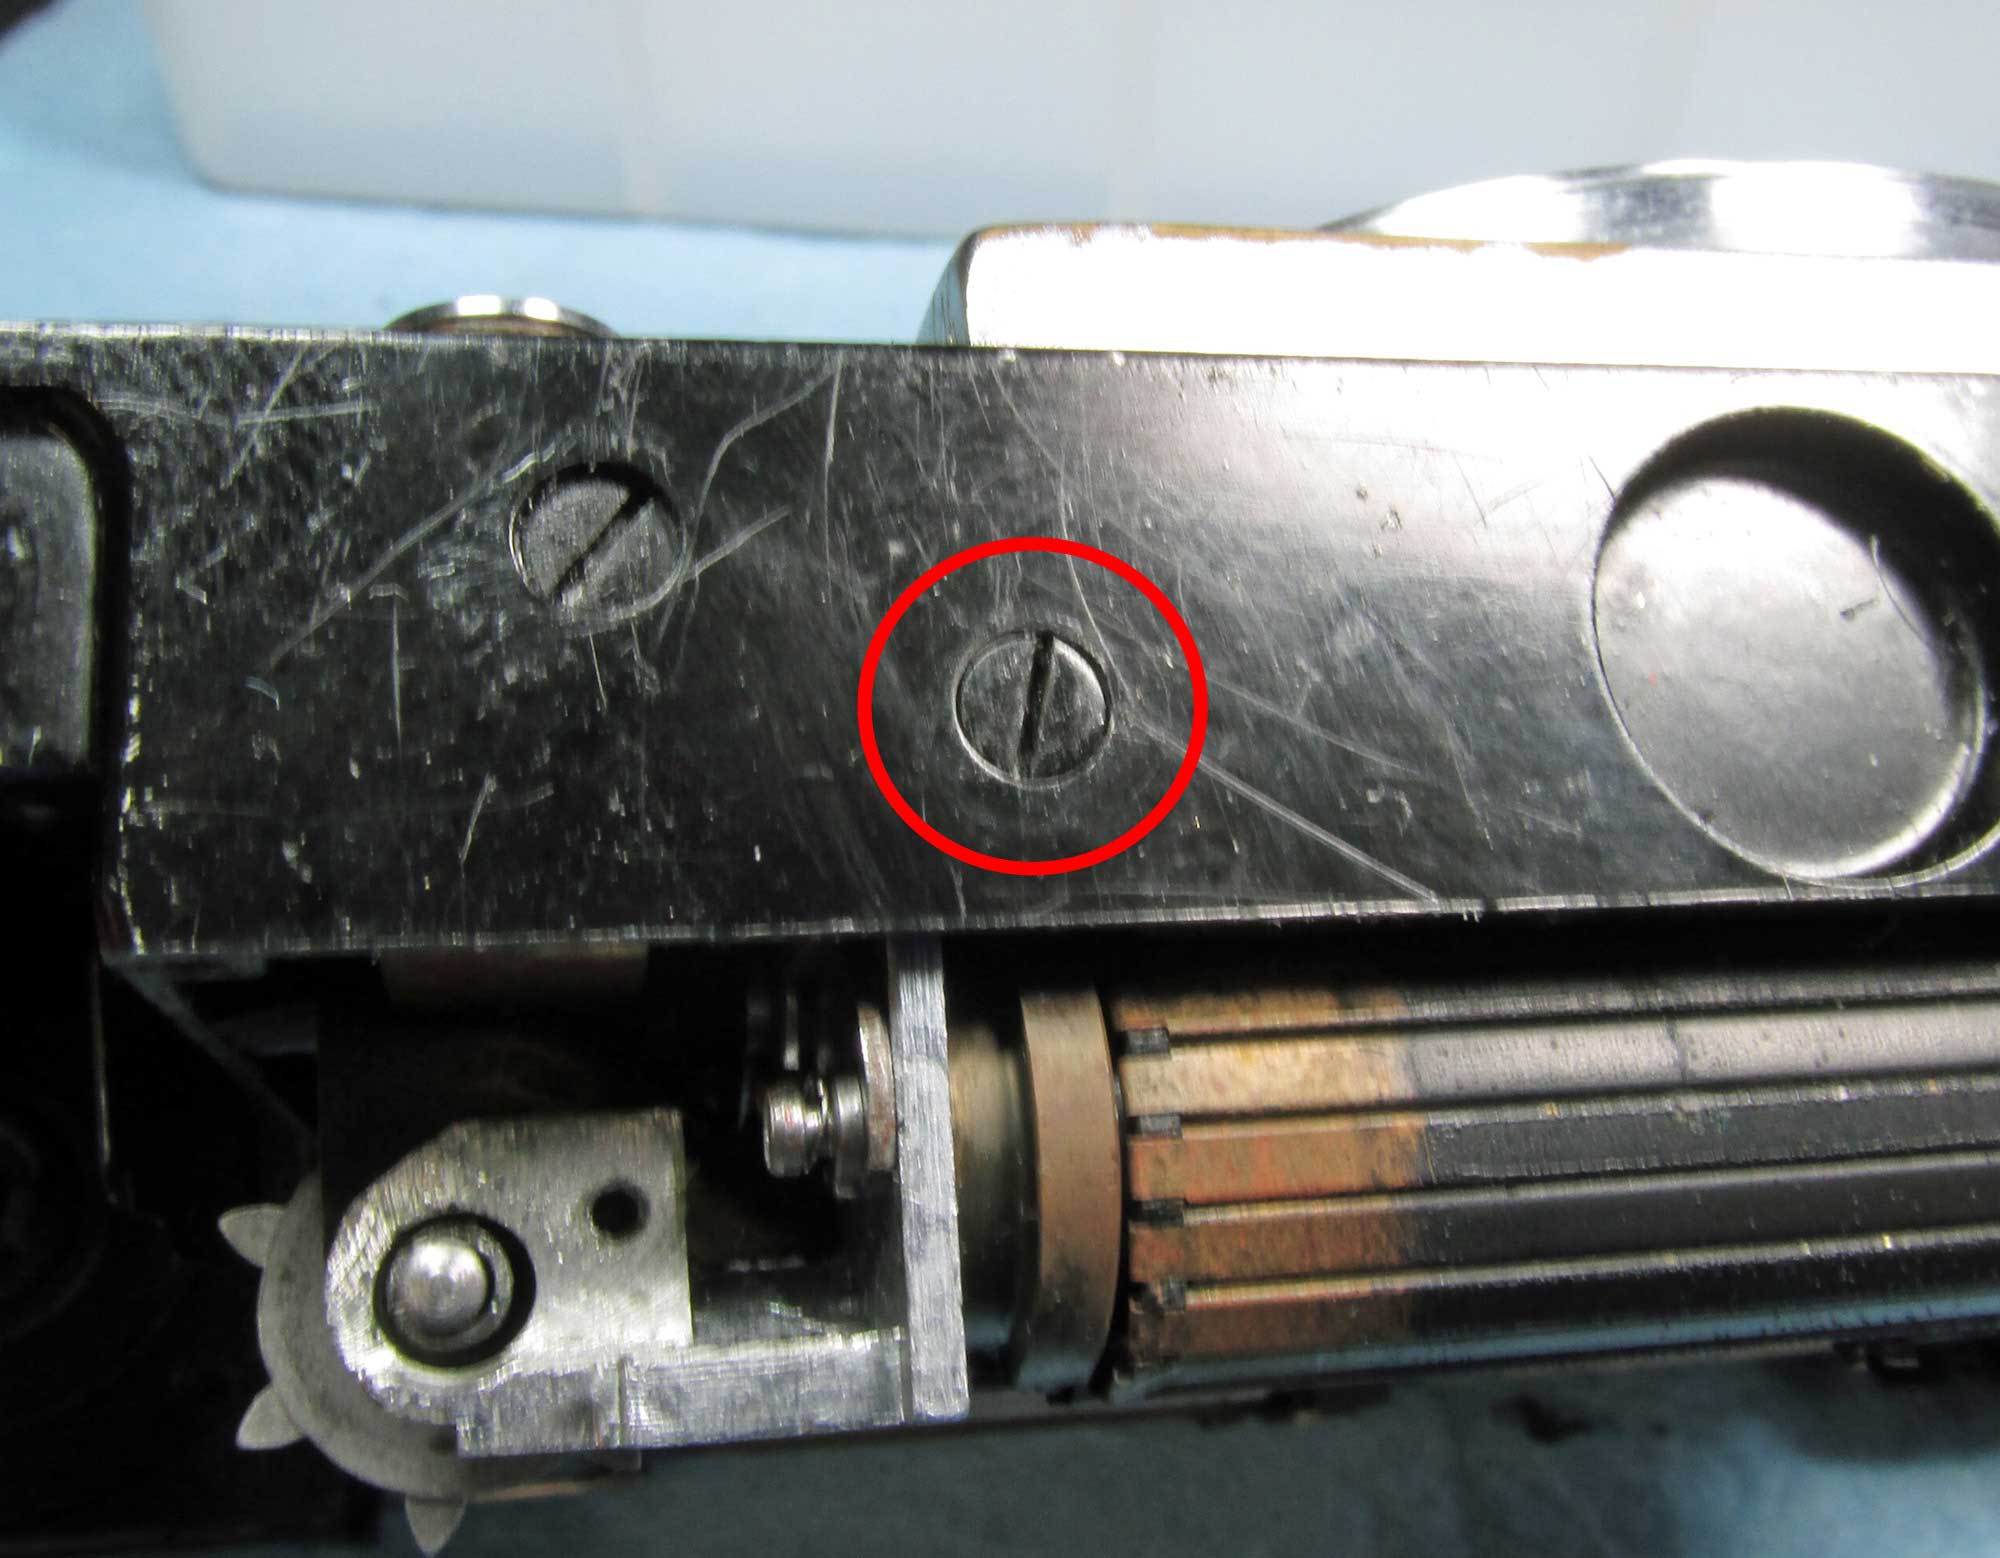
remove single screw
this screw (circled) is under the frame advance/shutter speed select knob.
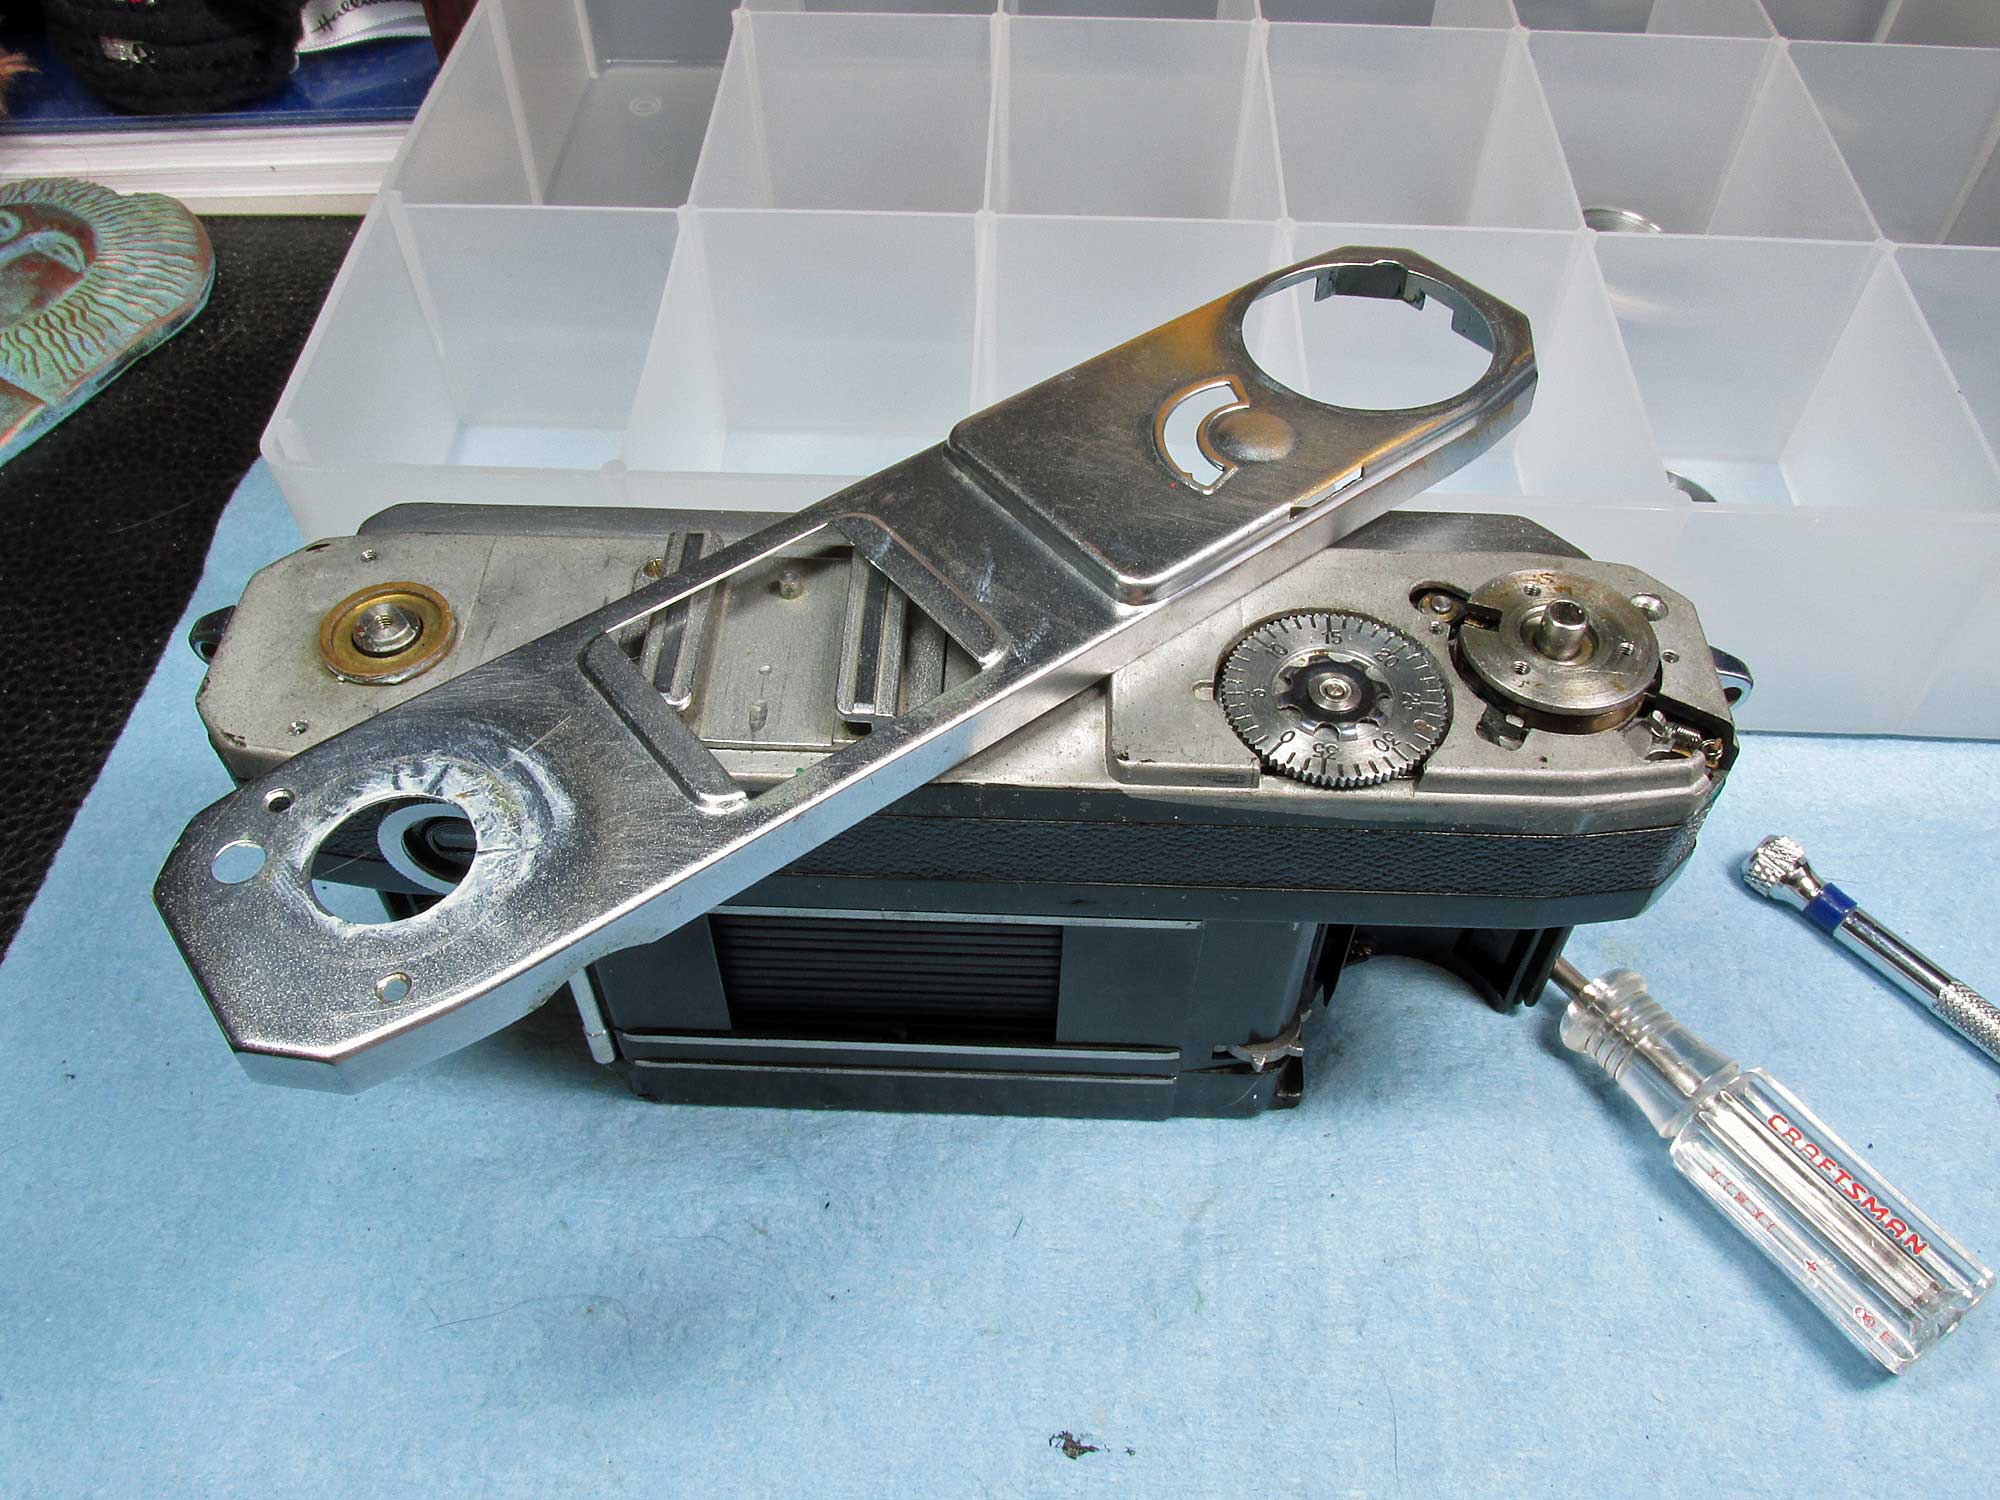
lift off chrome top plate
gently lift off the chrome top plate, watch out for the frame counter disc, it may fall out.
frame counter disc
here is how it goes back on for reassembly if it fell off. remove it now if it didn’t fall off
remove cast top plate
remove the 2 black screws (circled)
remove cast top plate
remove these 2 black screws, the one on the upper left is different than the other so make note.
cast top removed
carefully remove the cast top plate. there is a gear that might fall out.
loose gear
this probably won’t fall out but here’s where it goes on reassembly if it did. if it didn’t fall out, remove it now.
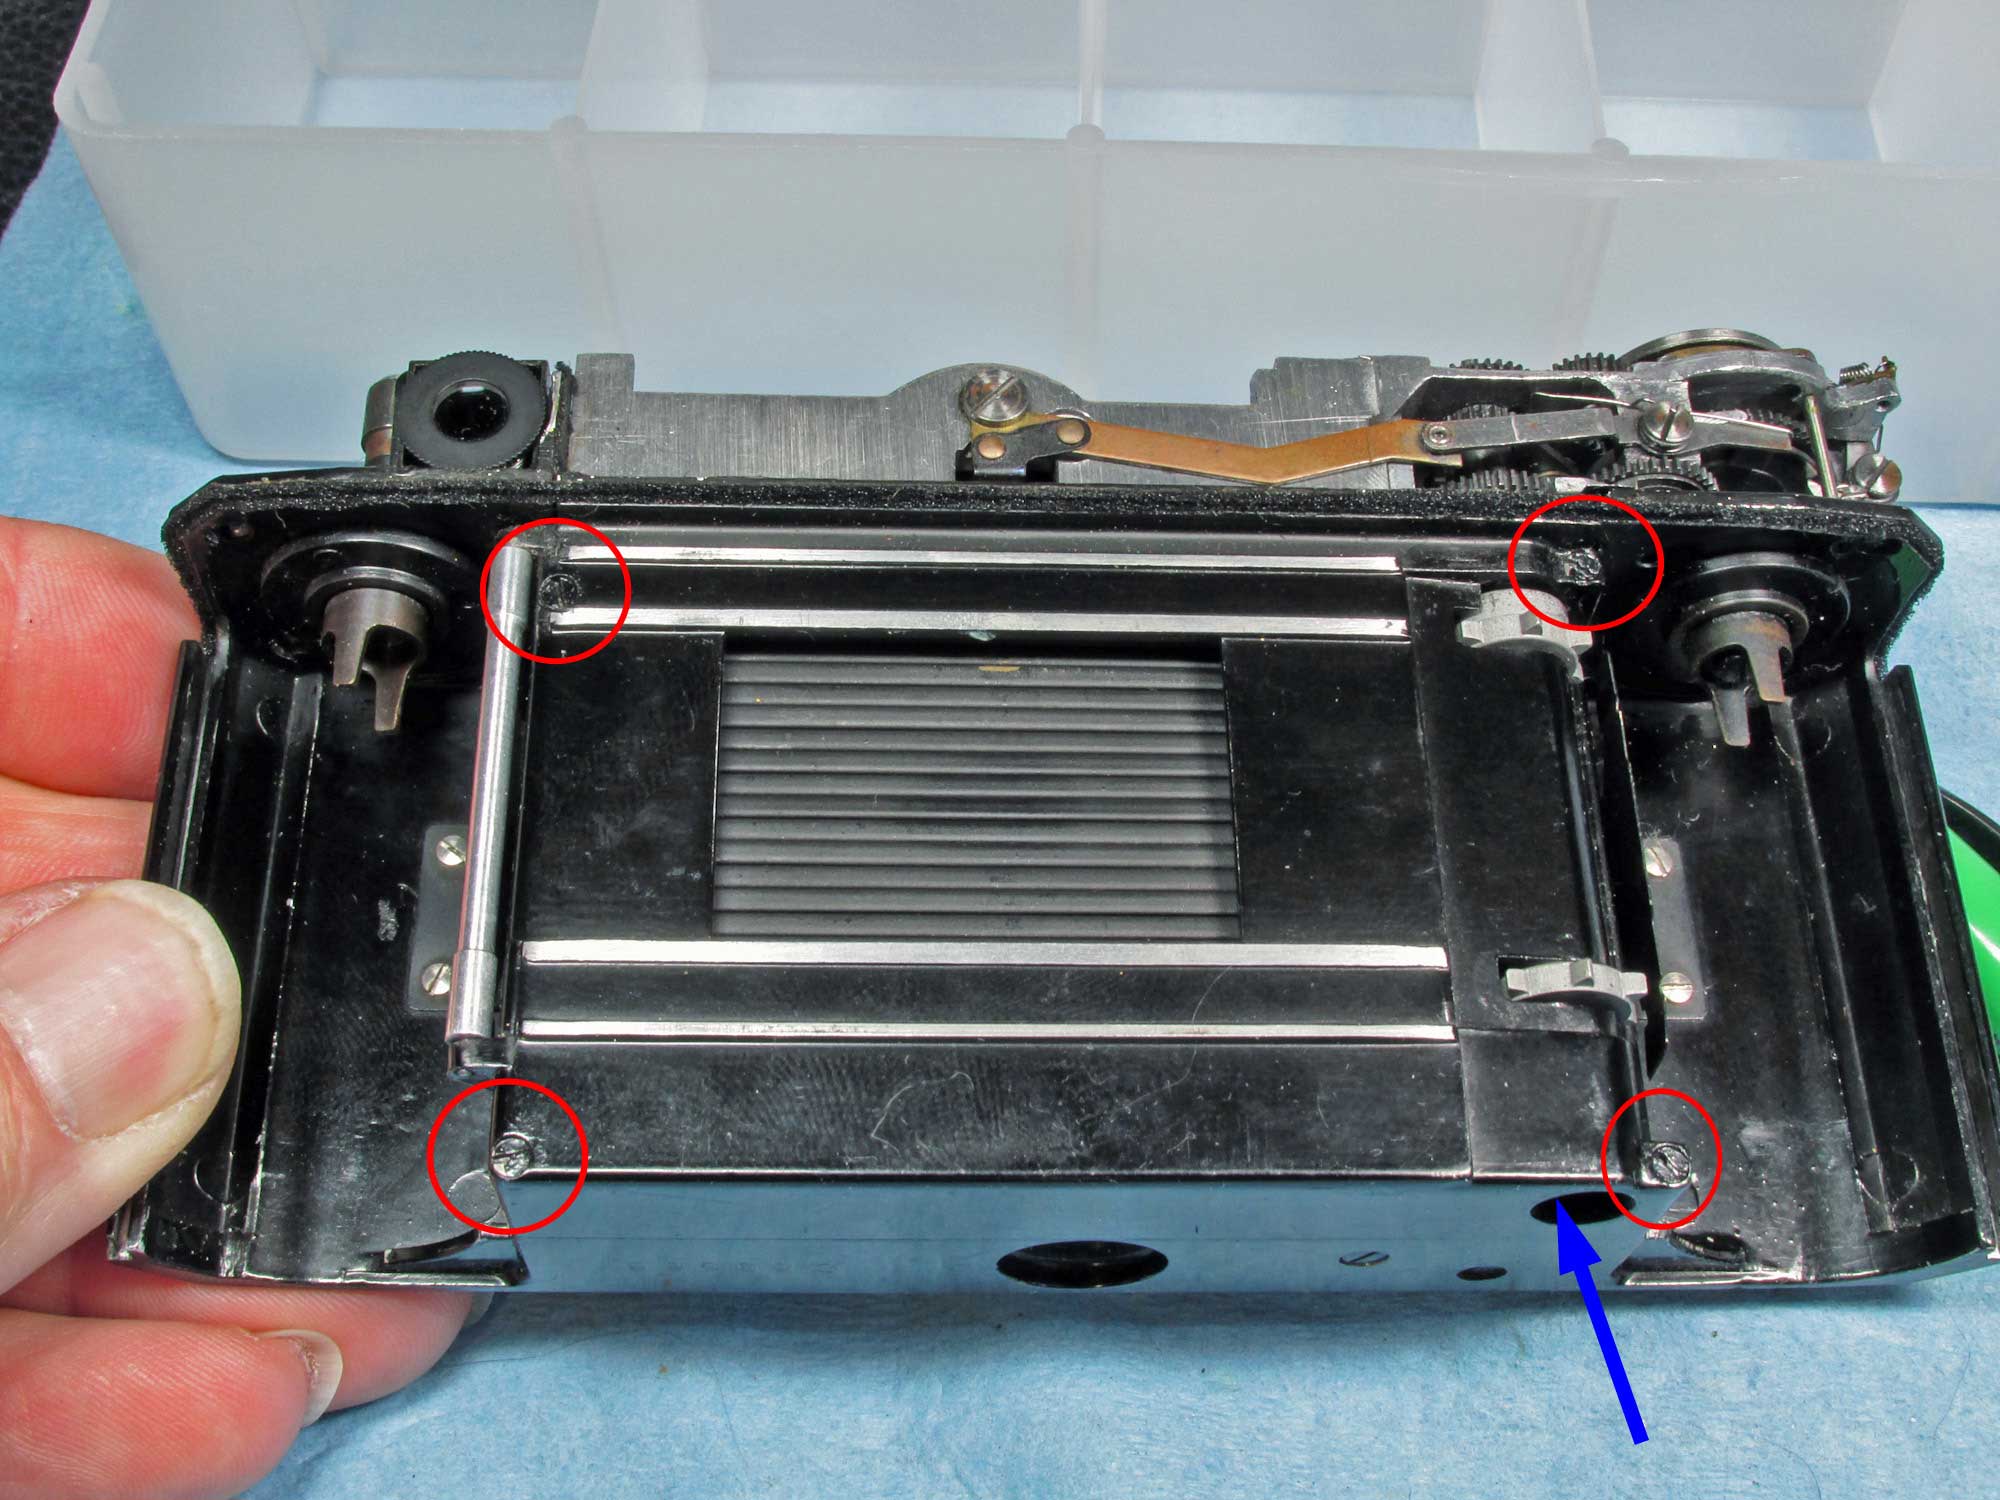
remove shutter cover
remove the 4 screws (circled) and make note of any size differences. there is a persnickety screw inside the hole (blue arrow) that holds the sprocket roller bracket. It must be carefully removed so the bracket is loose so you can slide the cover downward as you lift. like I said, lift the bottom of the cover slightly as you slide downward on the shutter cover box, then lift off.
sprocket bracket
you may want to put it’s screw back in temporarily so you can play with the shutter later while cleaning and testing.
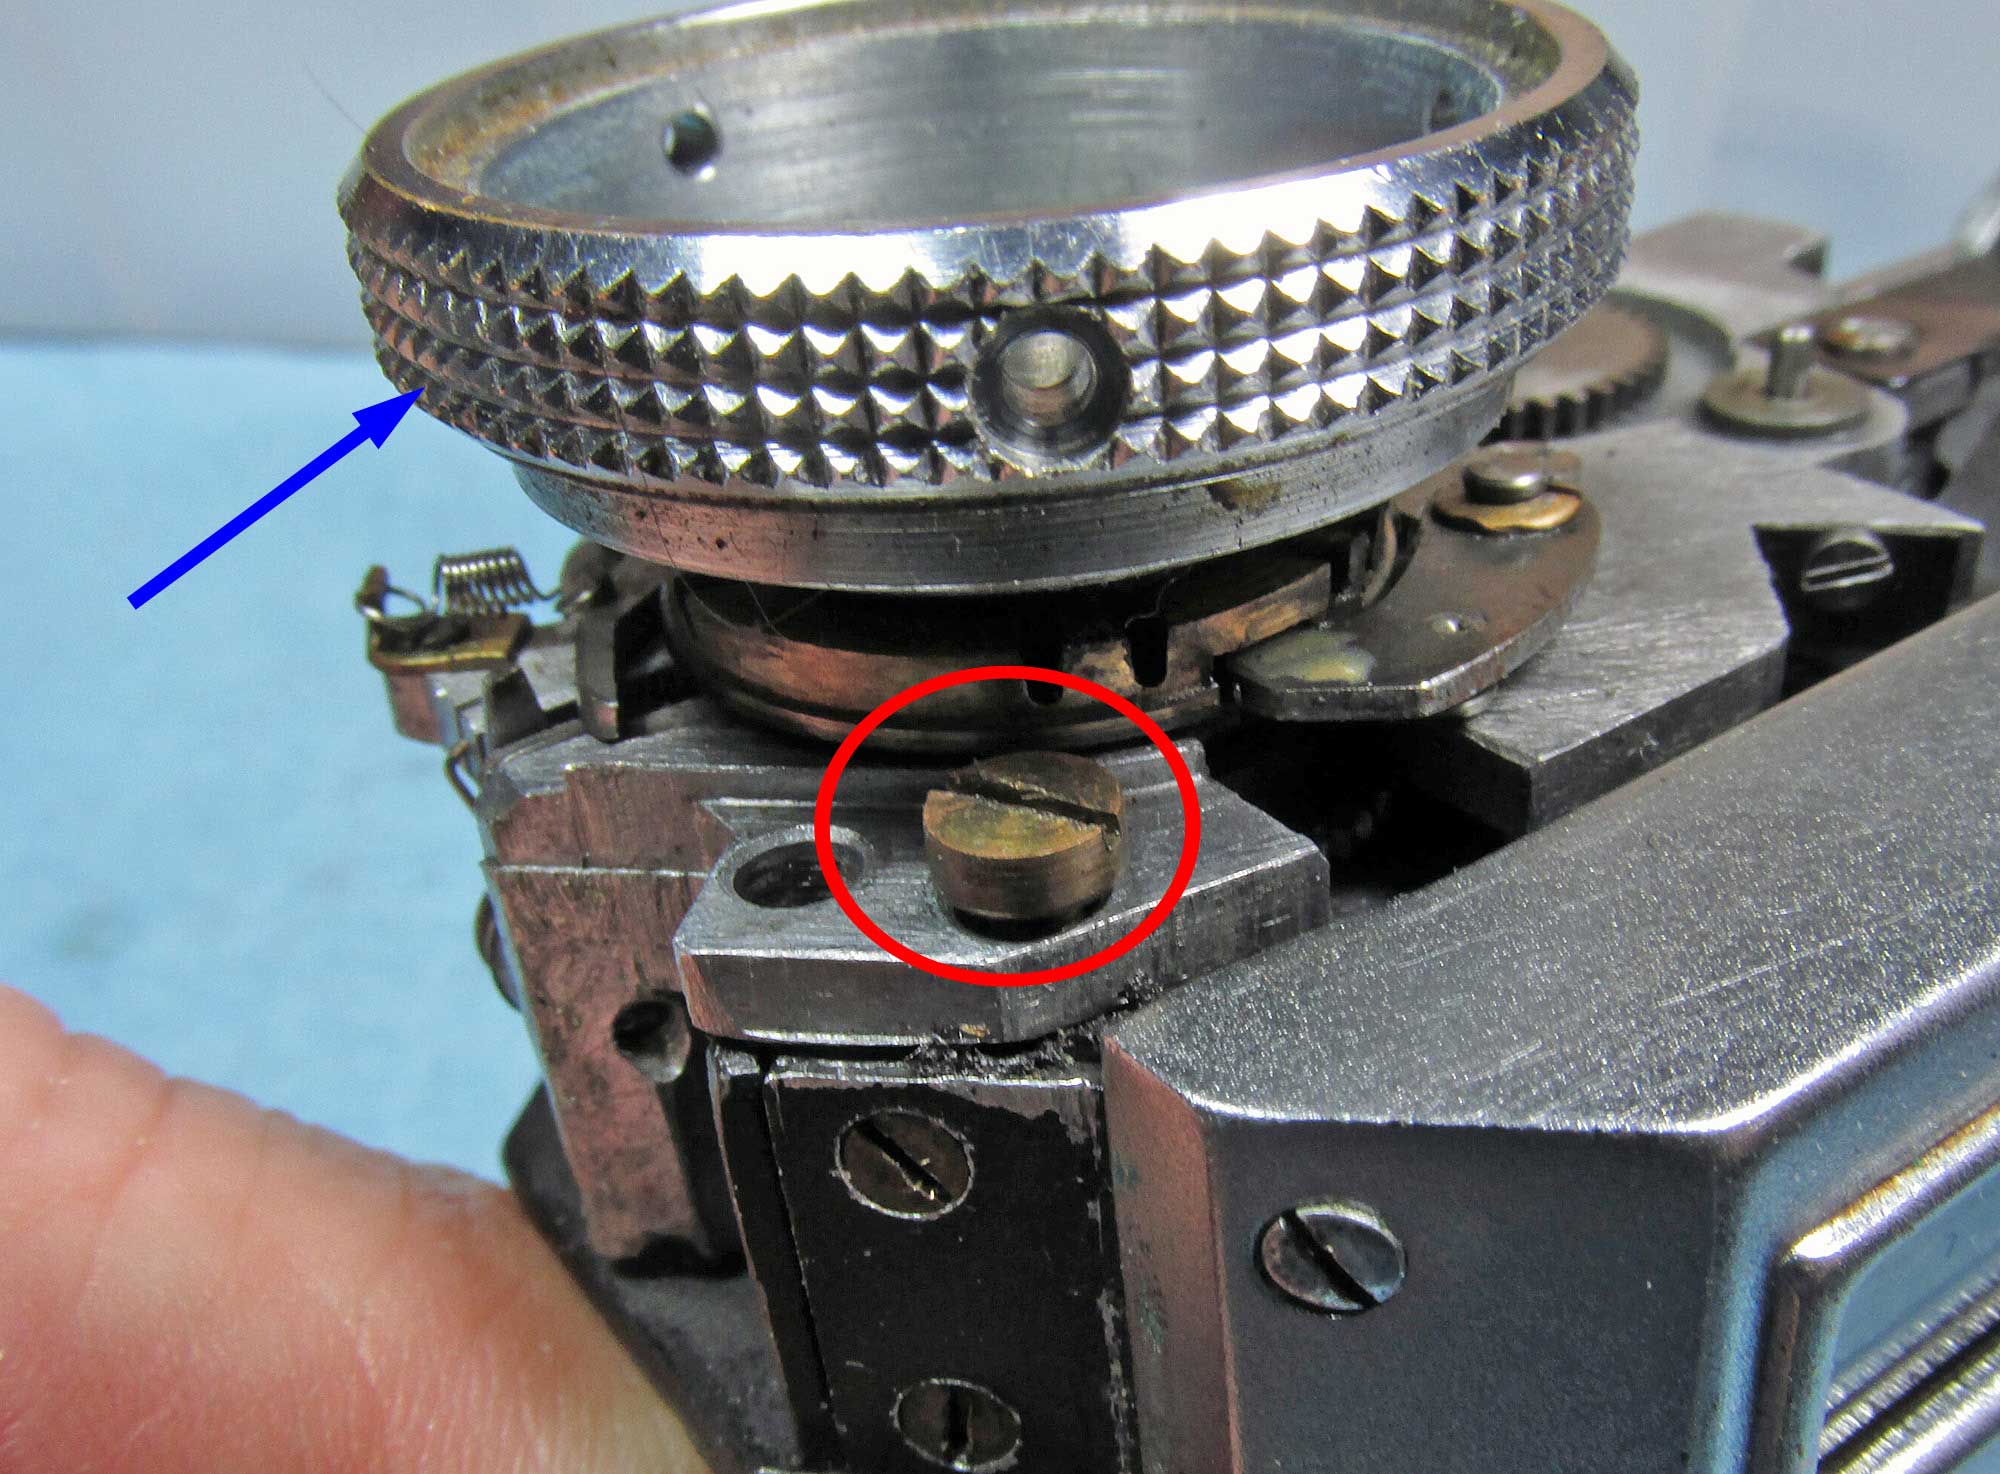
remove screw here
notice I put the winding knob back on. this makes a nice handle to hold onto as you lift out the shutter cradle. you can take the screw out (circled) first if you like, it was kind of tricky with the knob in the way.
remove screws
remove these 2 screws and make note of the size differences
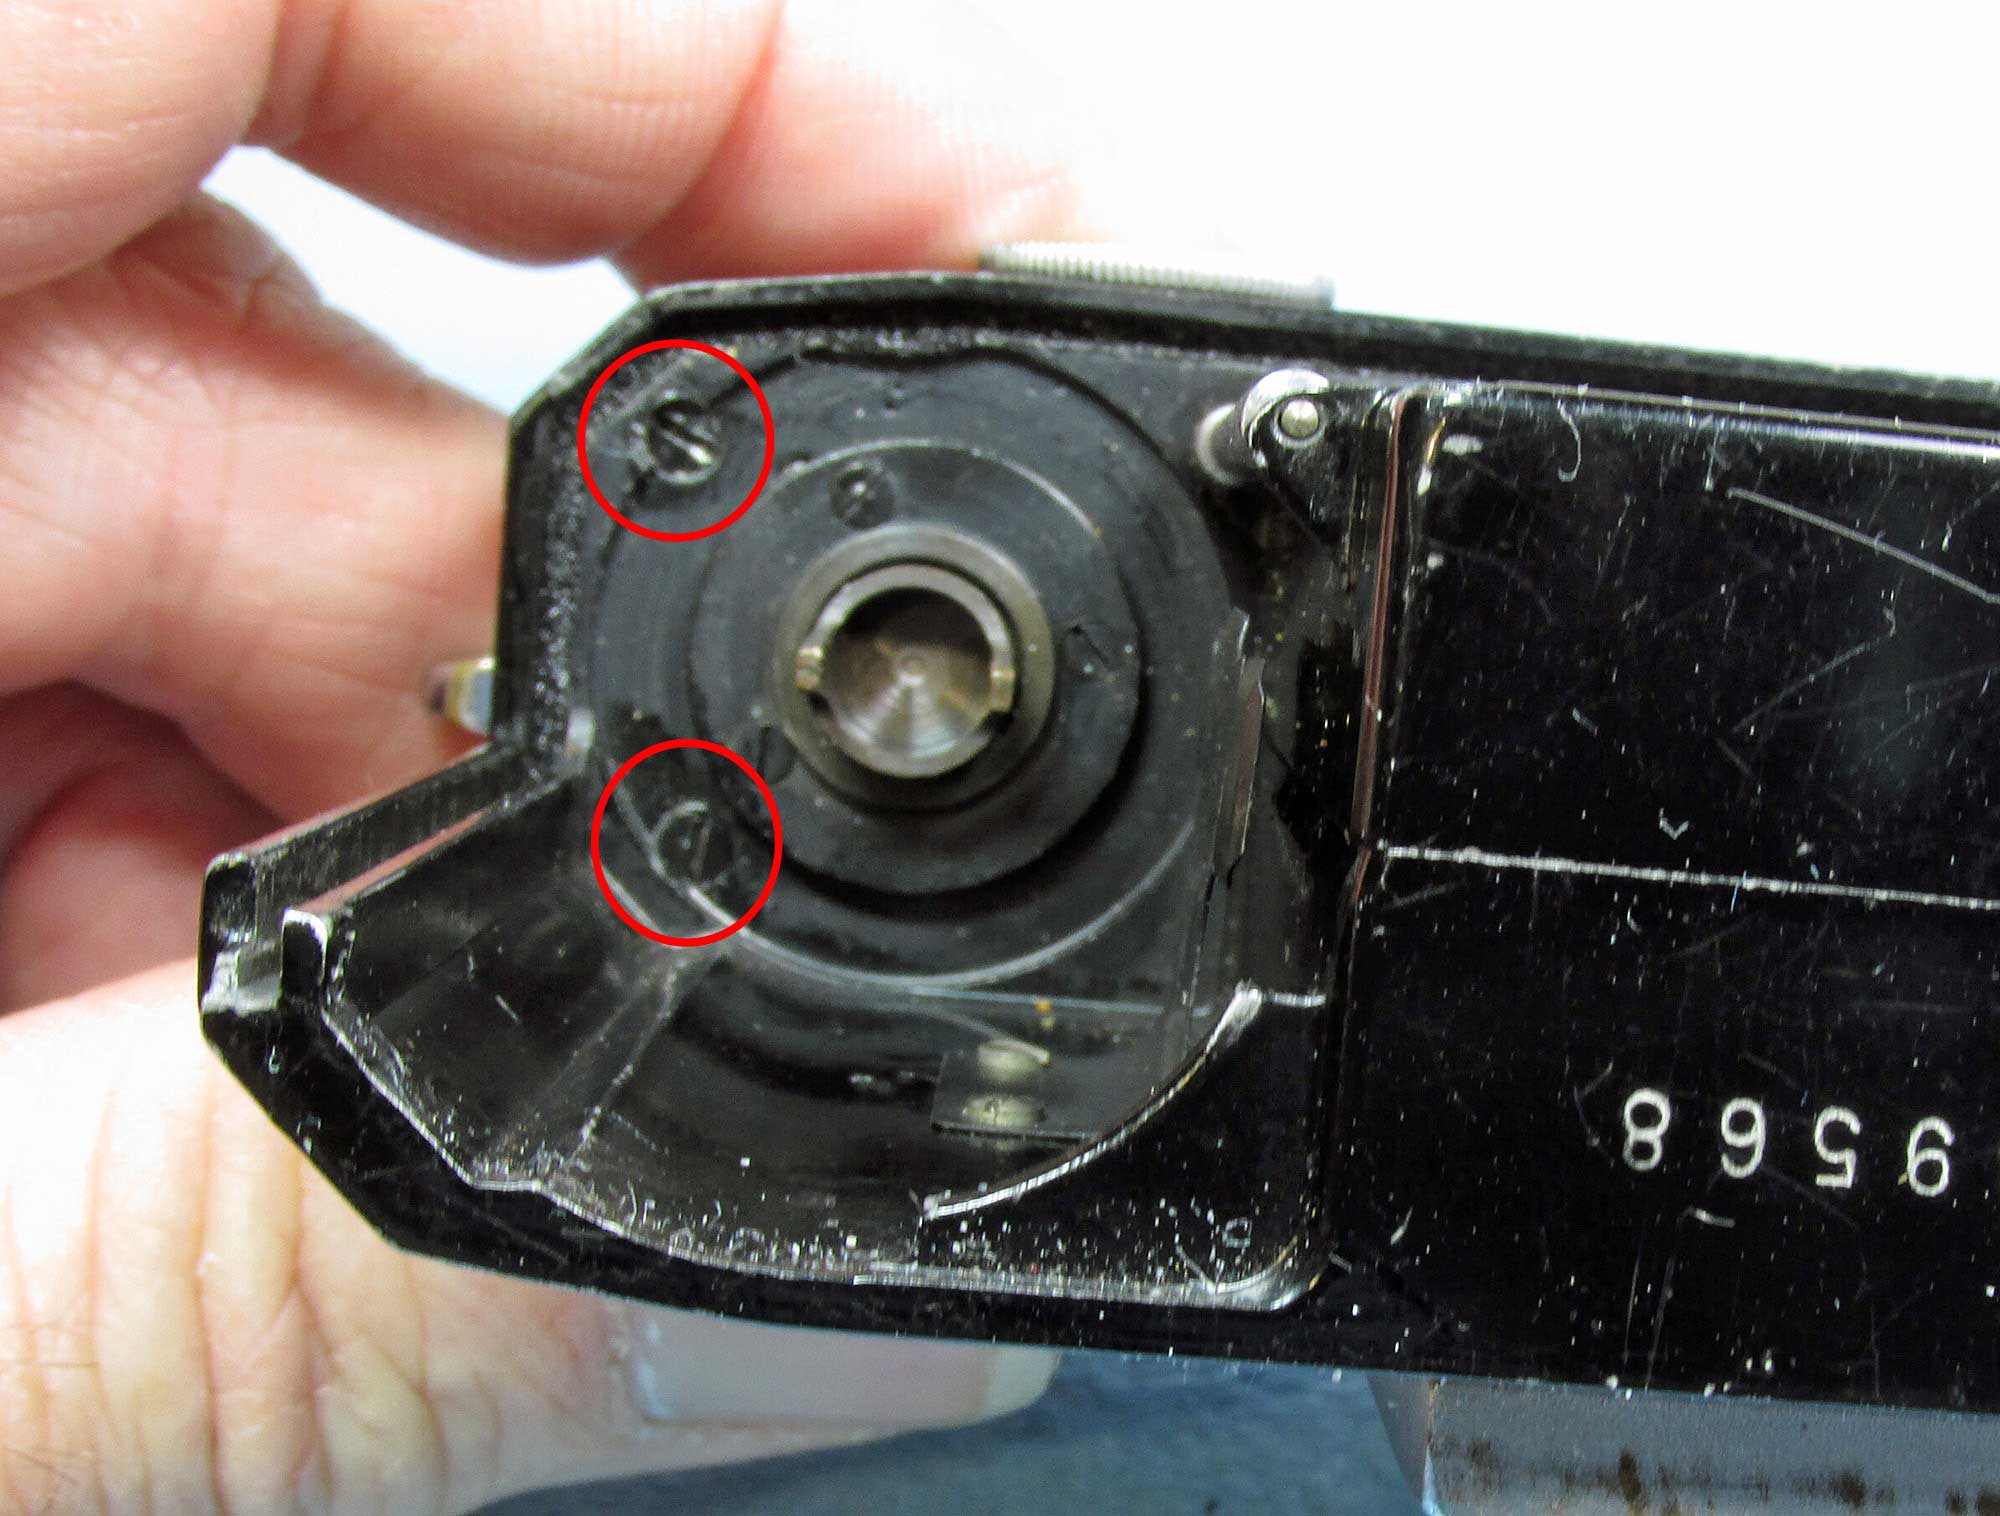
remove this rod-screw
from the film chamber side, remove this support rod-screw
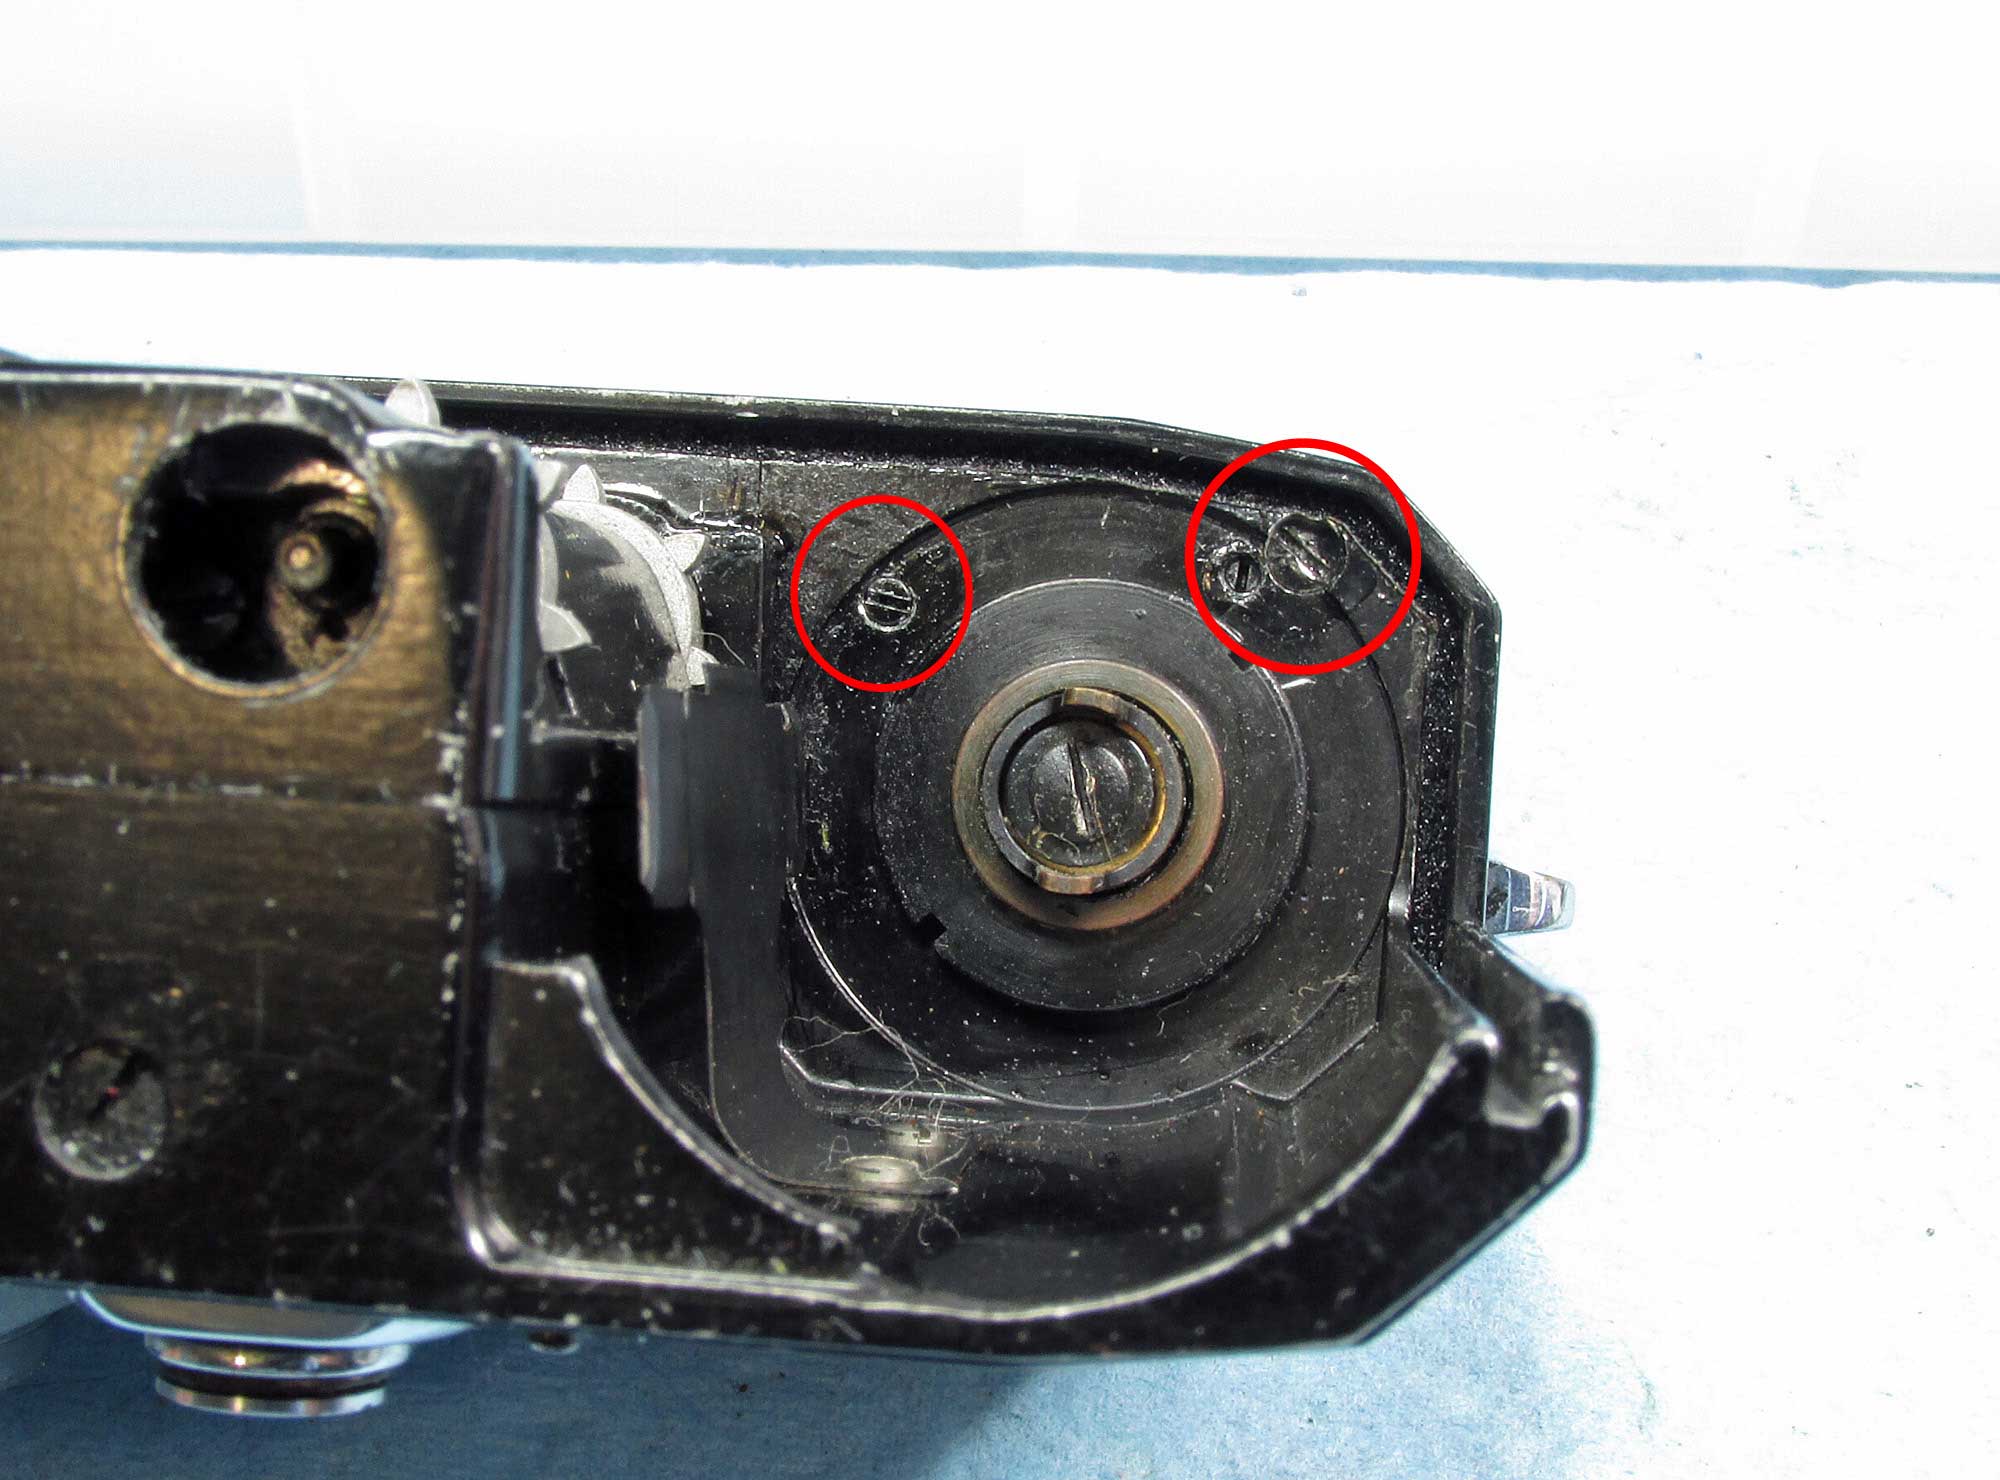
bottom screw
remove this final screw on the bottom
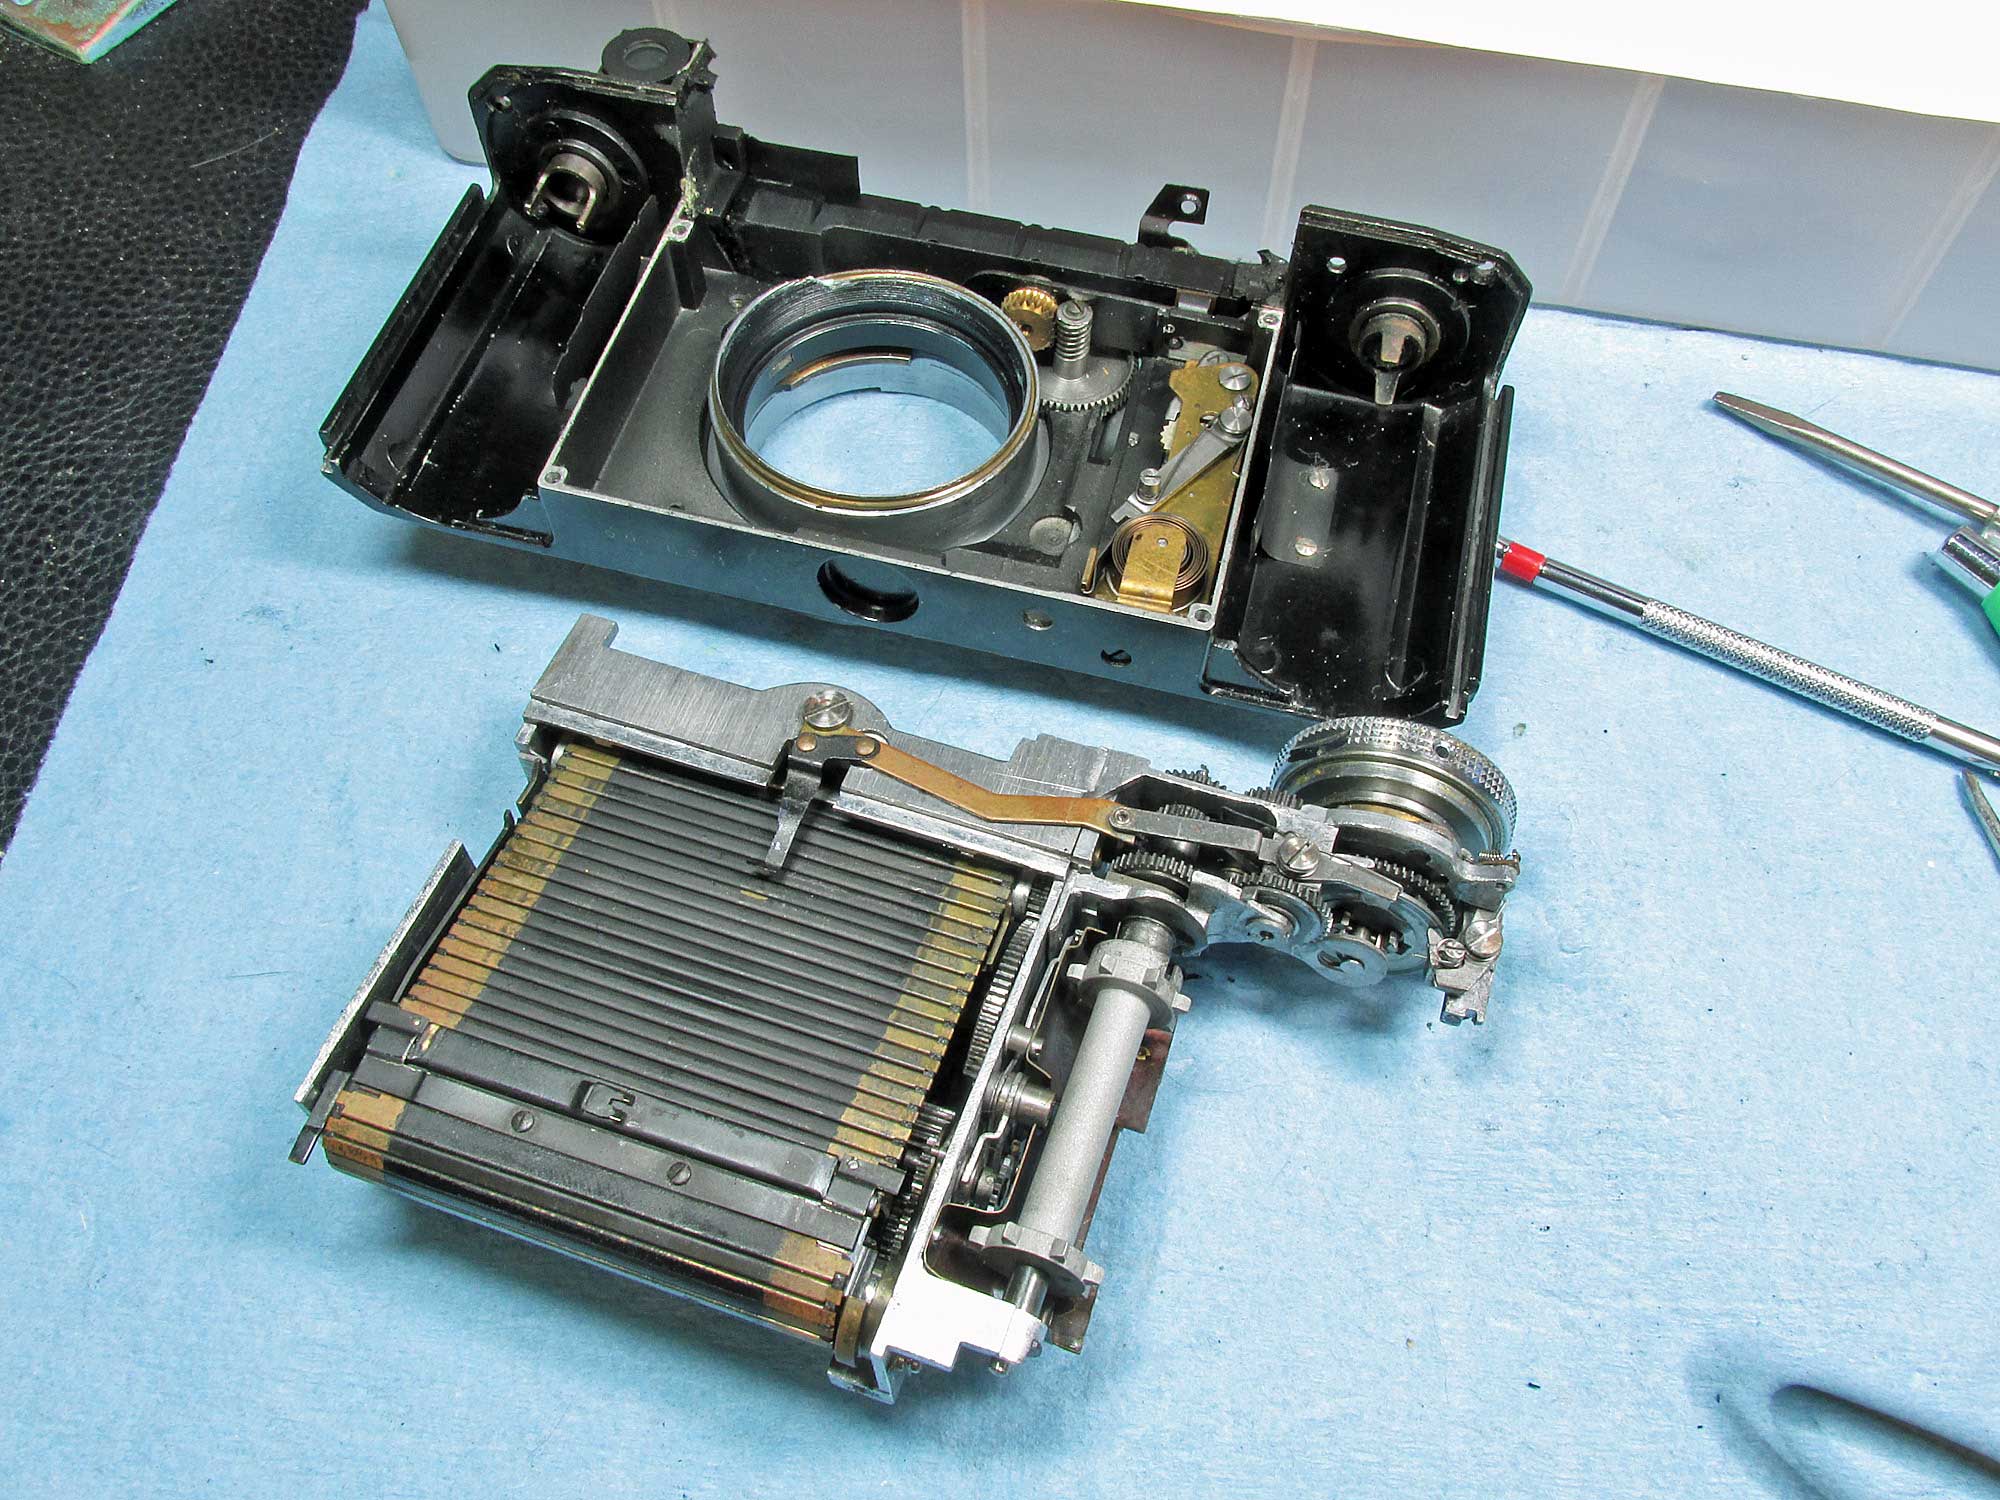
lift out cradle
gently lift out the shutter cradle, there are no springs or anything that will fly across the room so don’t worry. You will however hear a slight click, this is the arm of the self timer coming free.
self timer
here is the self timer. feel free to test it and clean it if necessary. mine worked fine so I left it alone
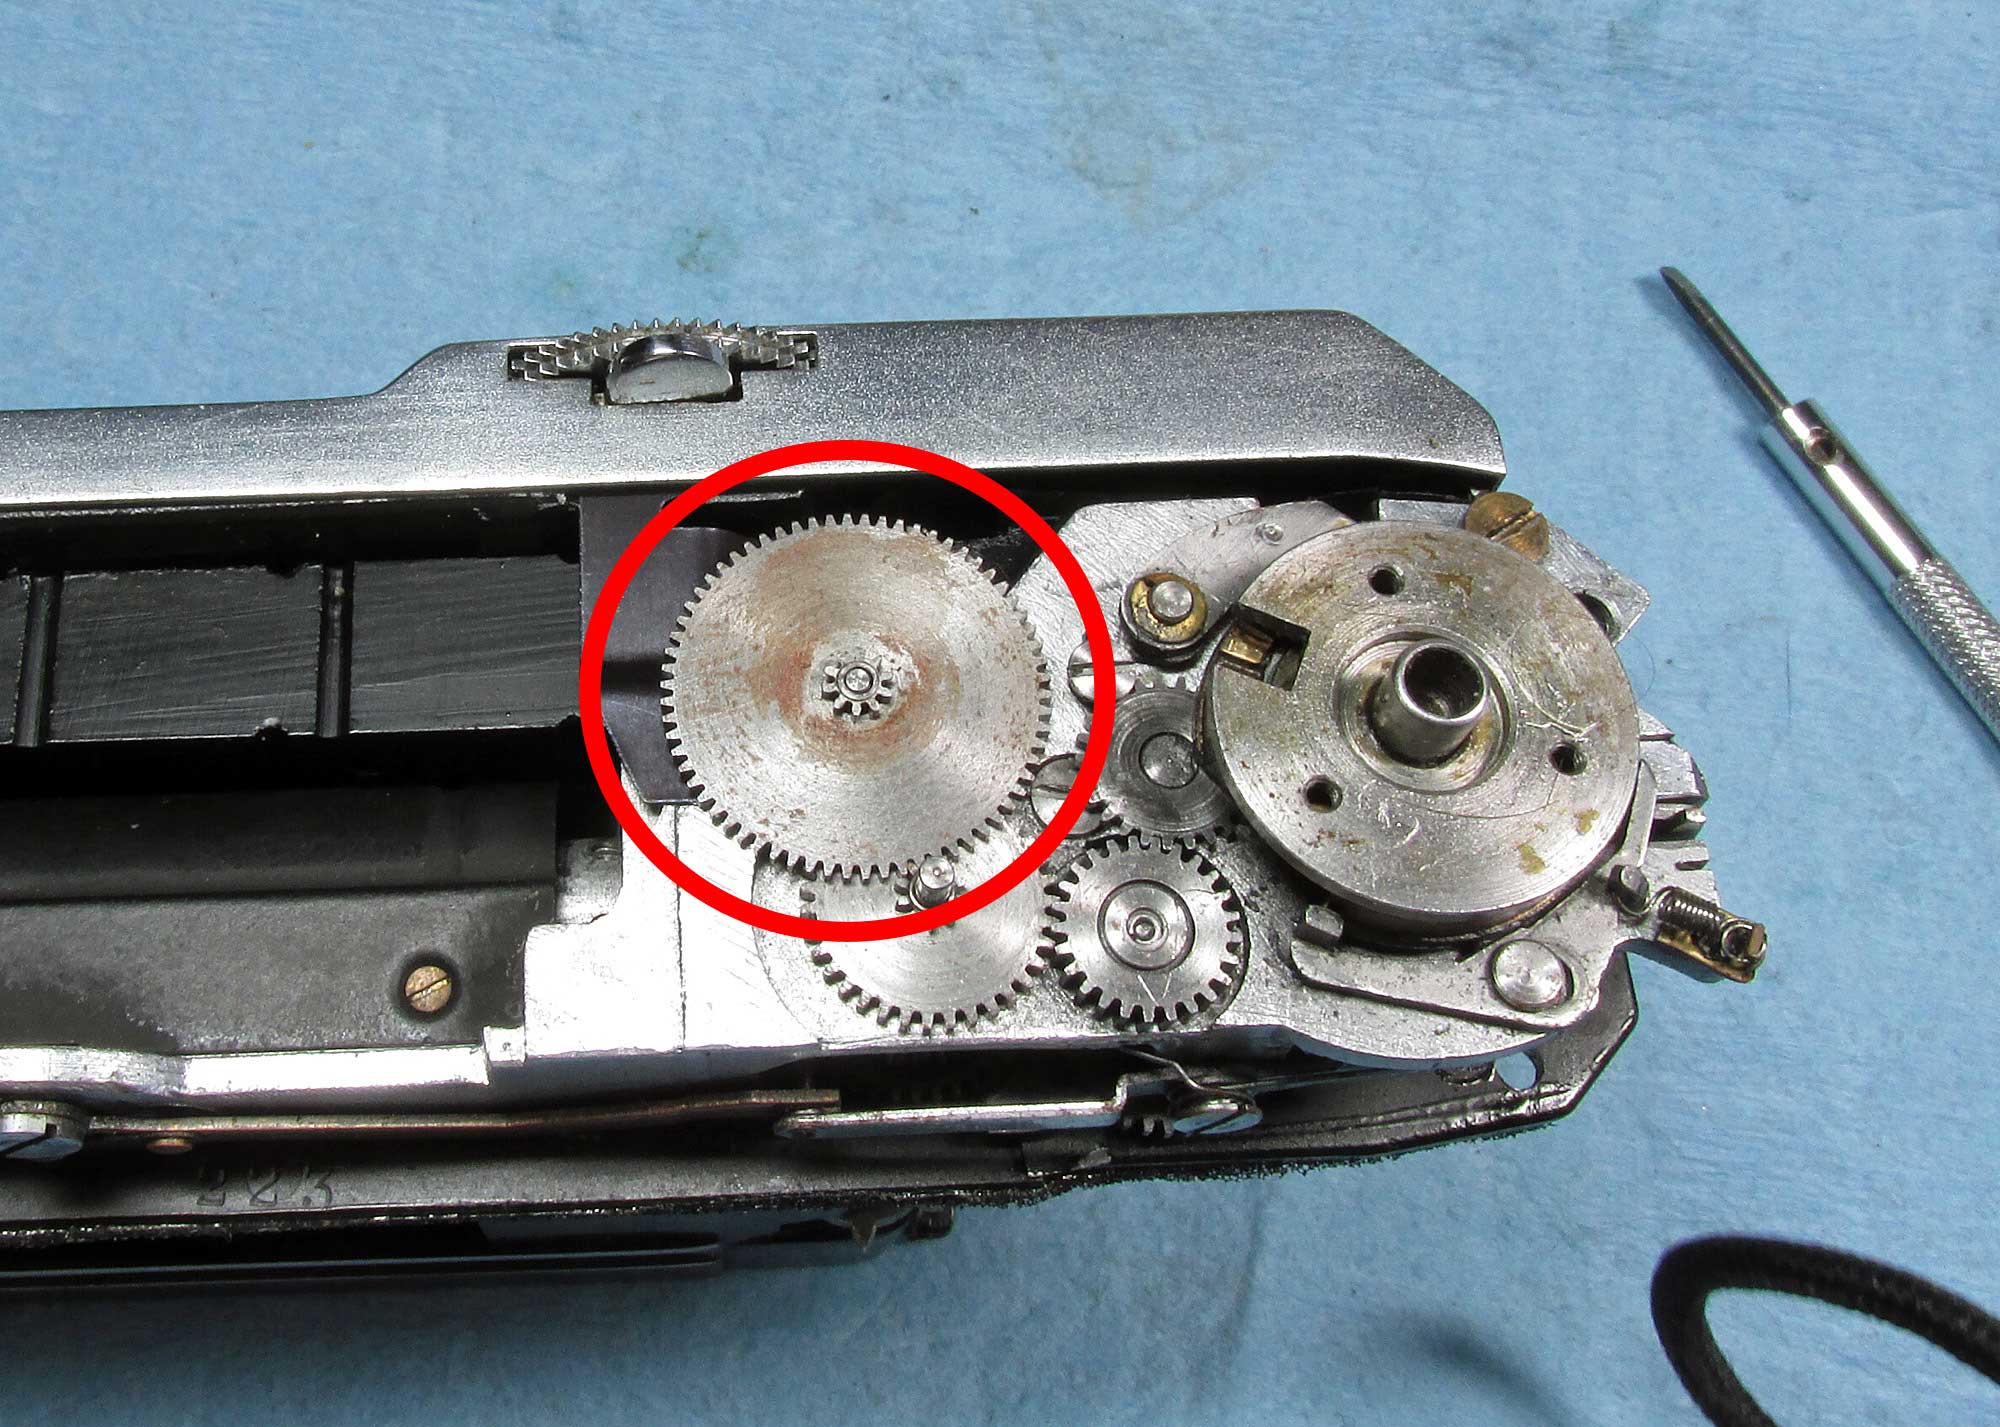
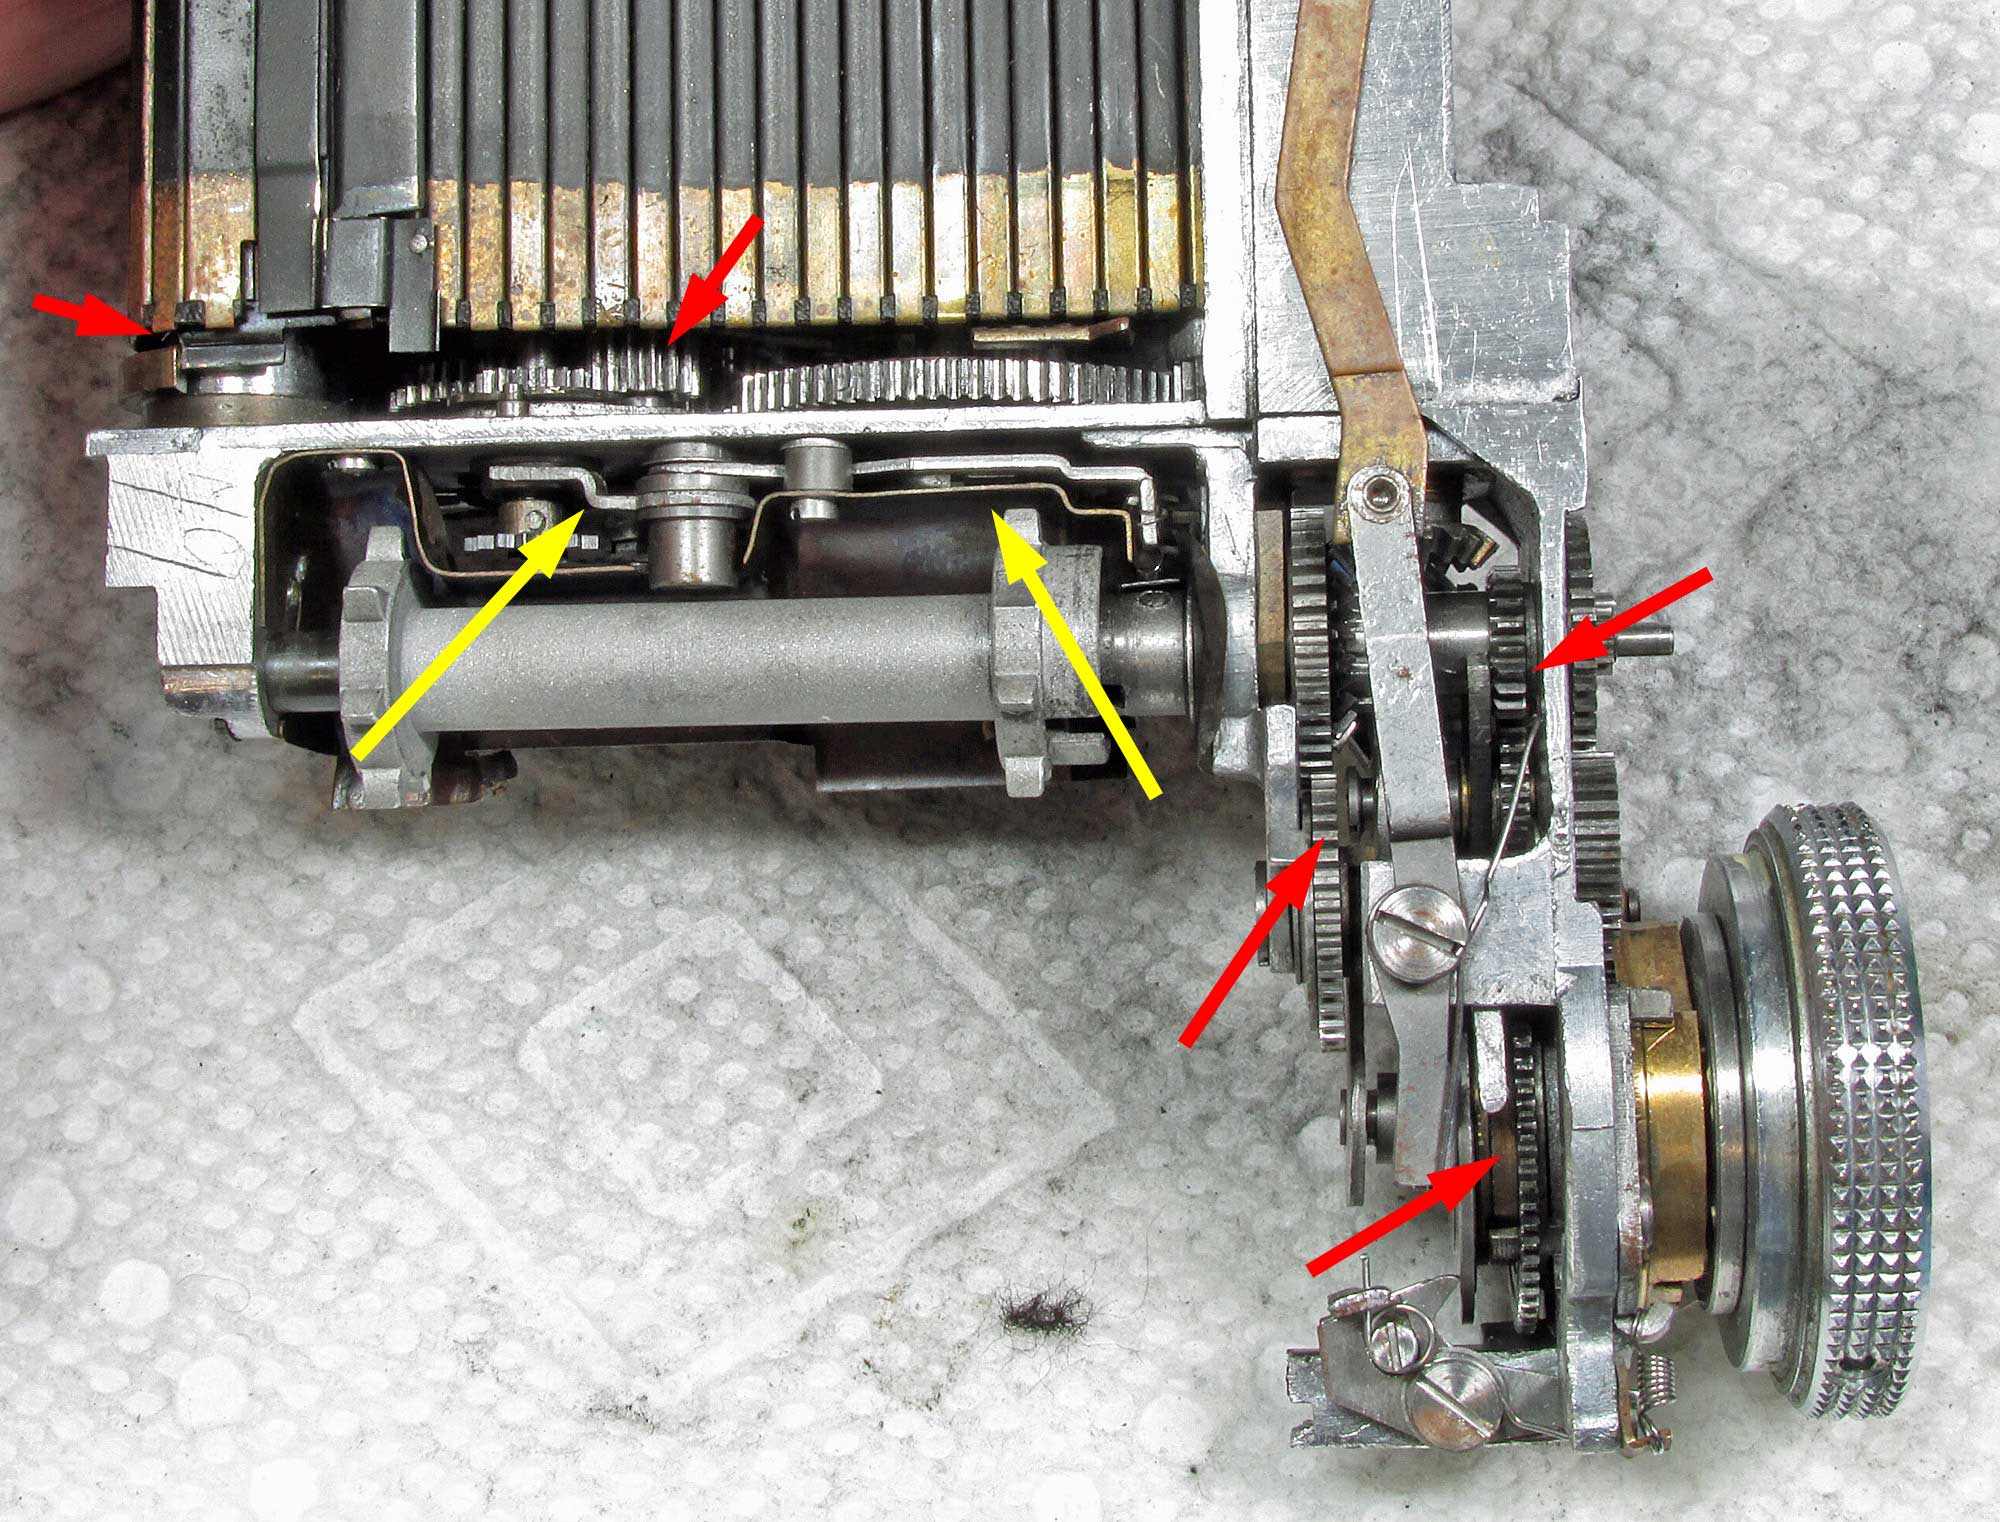
shutter gears
I doused everything you see here with Zippo fluid, avoiding the shutter tapes and glued areas of course. later I oiled a few choice spots with singer SM oil. (red arrows) use just a tiny bit, like half of a drop and work the gears after each drop. Avoid the slow speed gears (yellow arrows) you don’t want them to gum up.
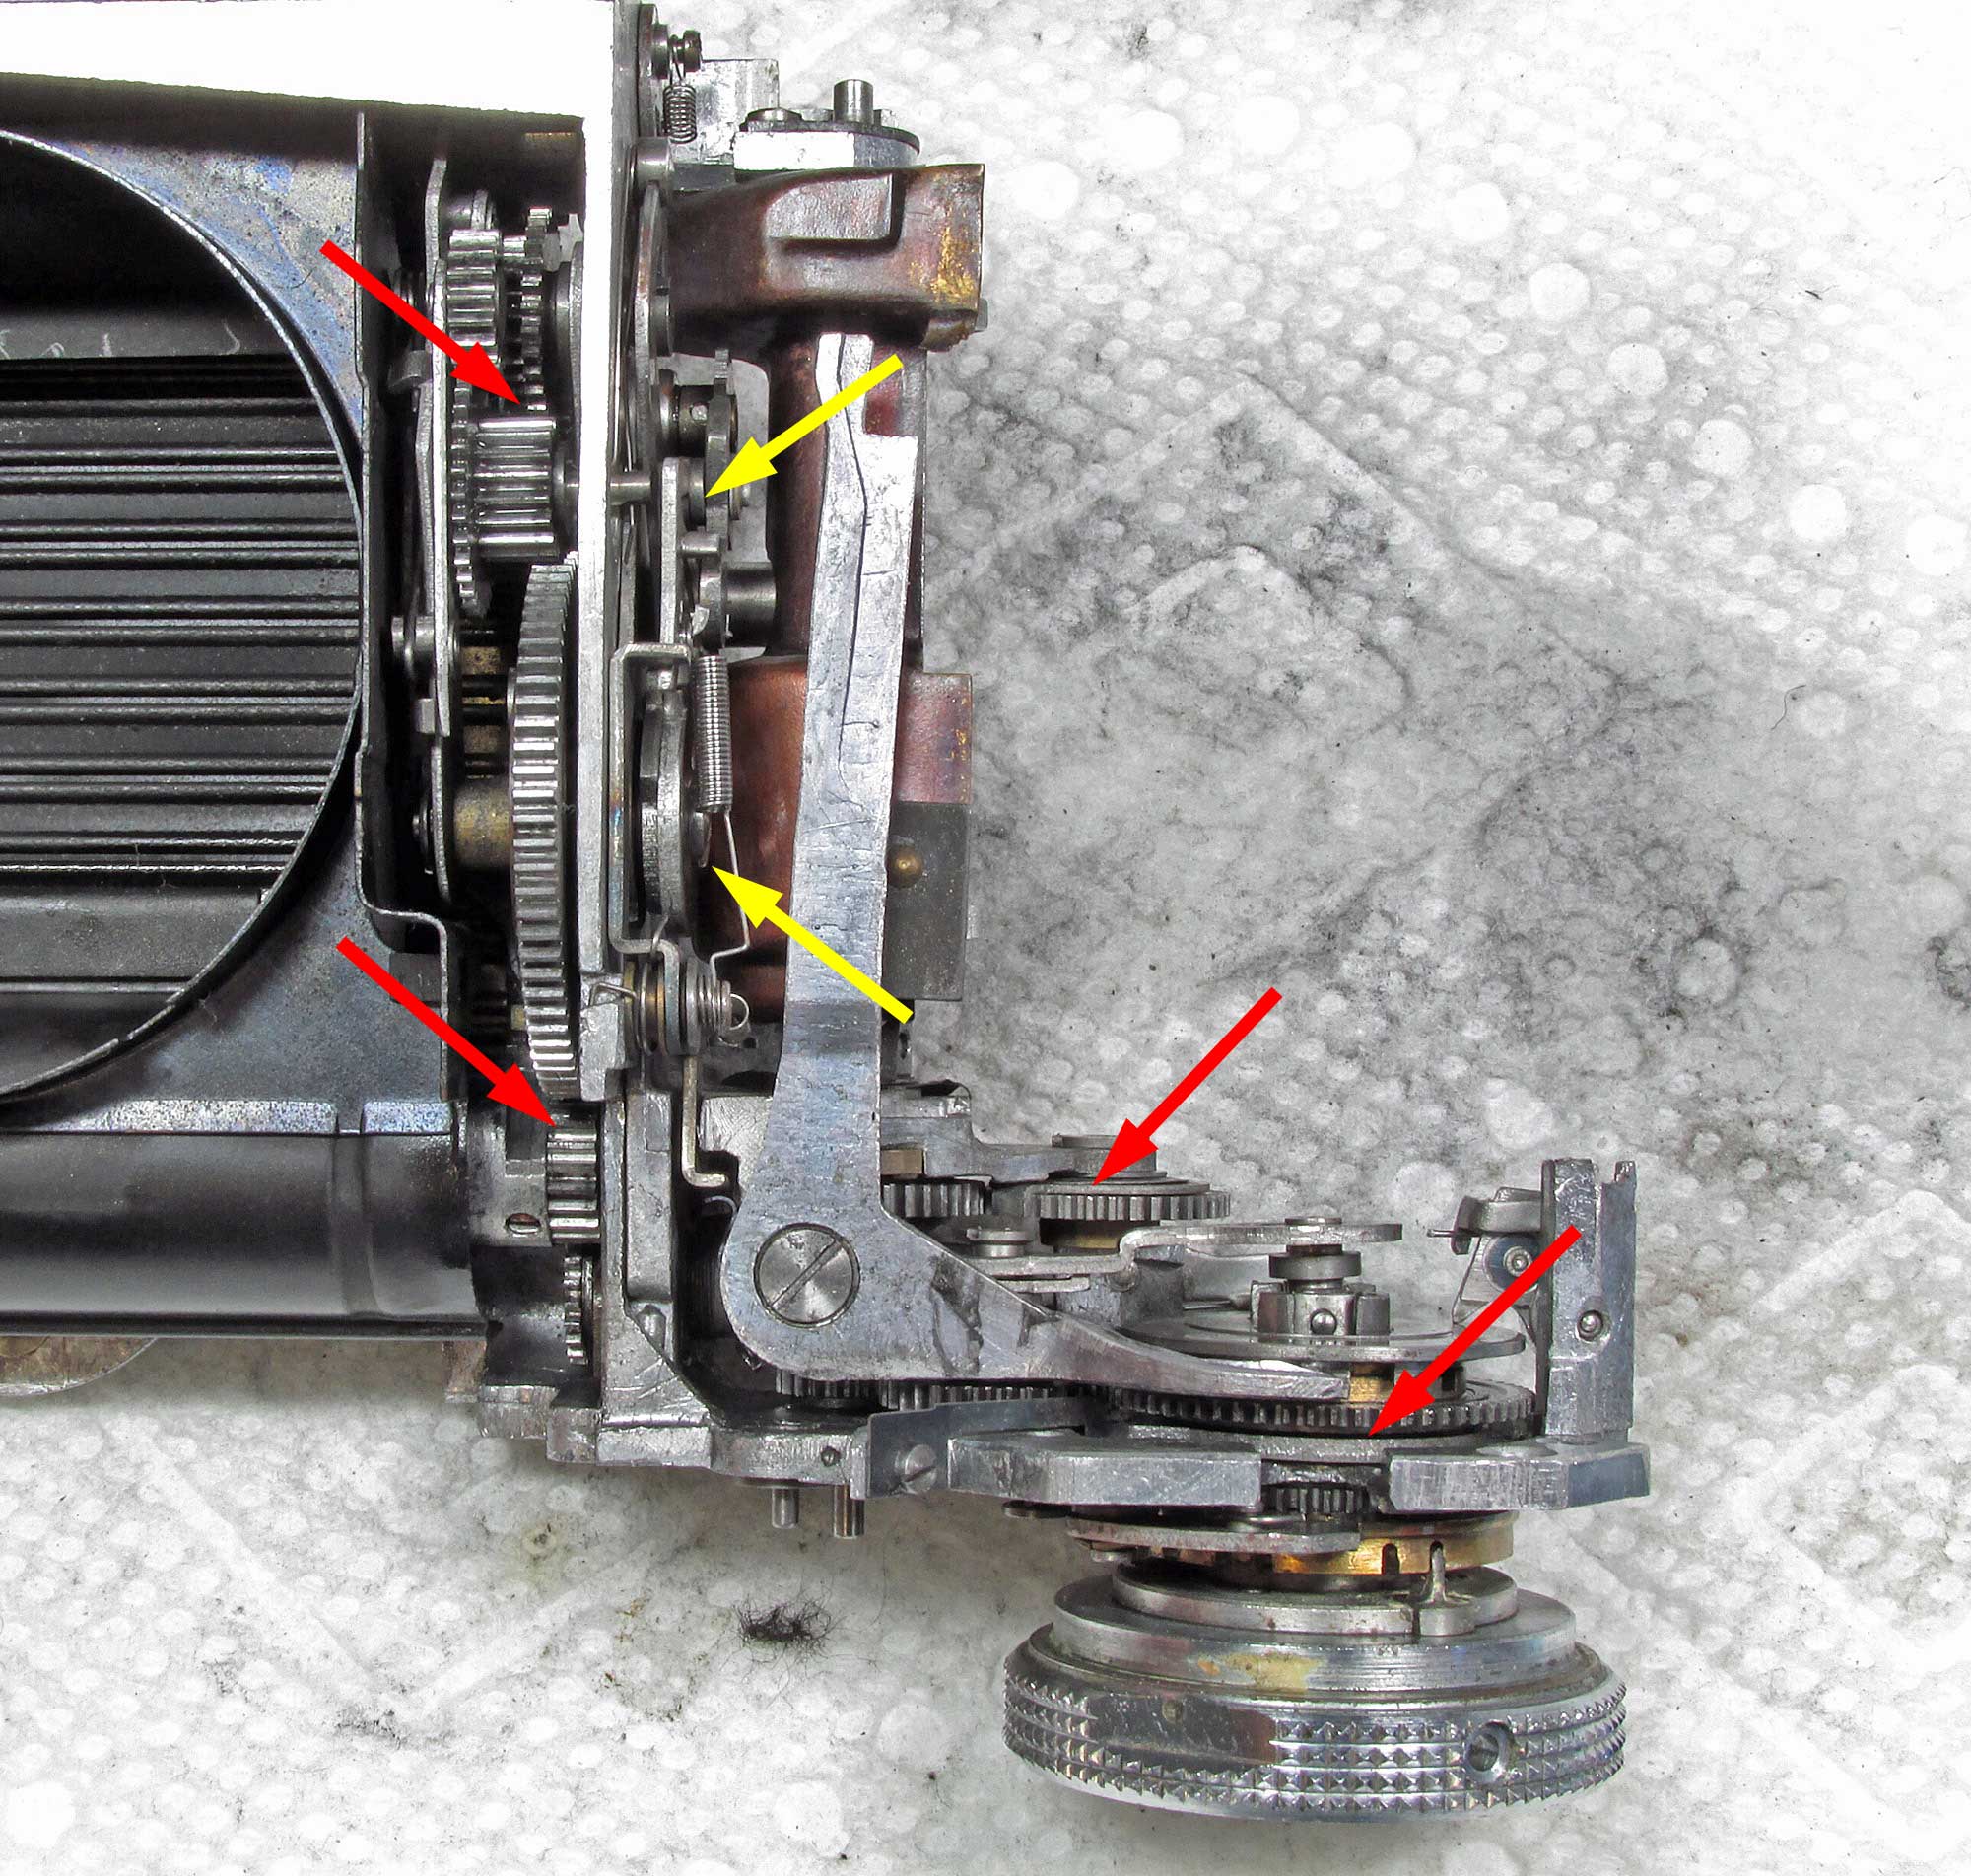
shutter gears
other side, here too I doused everything you see here with Zippo fluid, avoiding the shutter tapes and glued areas of course. later I oiled a few choice spots with singer SM oil. (red arrows) use just a tiny bit, like half of a drop and work the gears after each drop. avoid the slow speed gears (yellow arrows) you don’t want them to gum up. while testing the shutter, you may want to hold the shutter cover box on over the back as if it were screwed on, otherwise you have to keep manually putting the lower and upper shutter back together to wind it (you’ll see what I mean, don’t let it scare you, you can’t break it really)
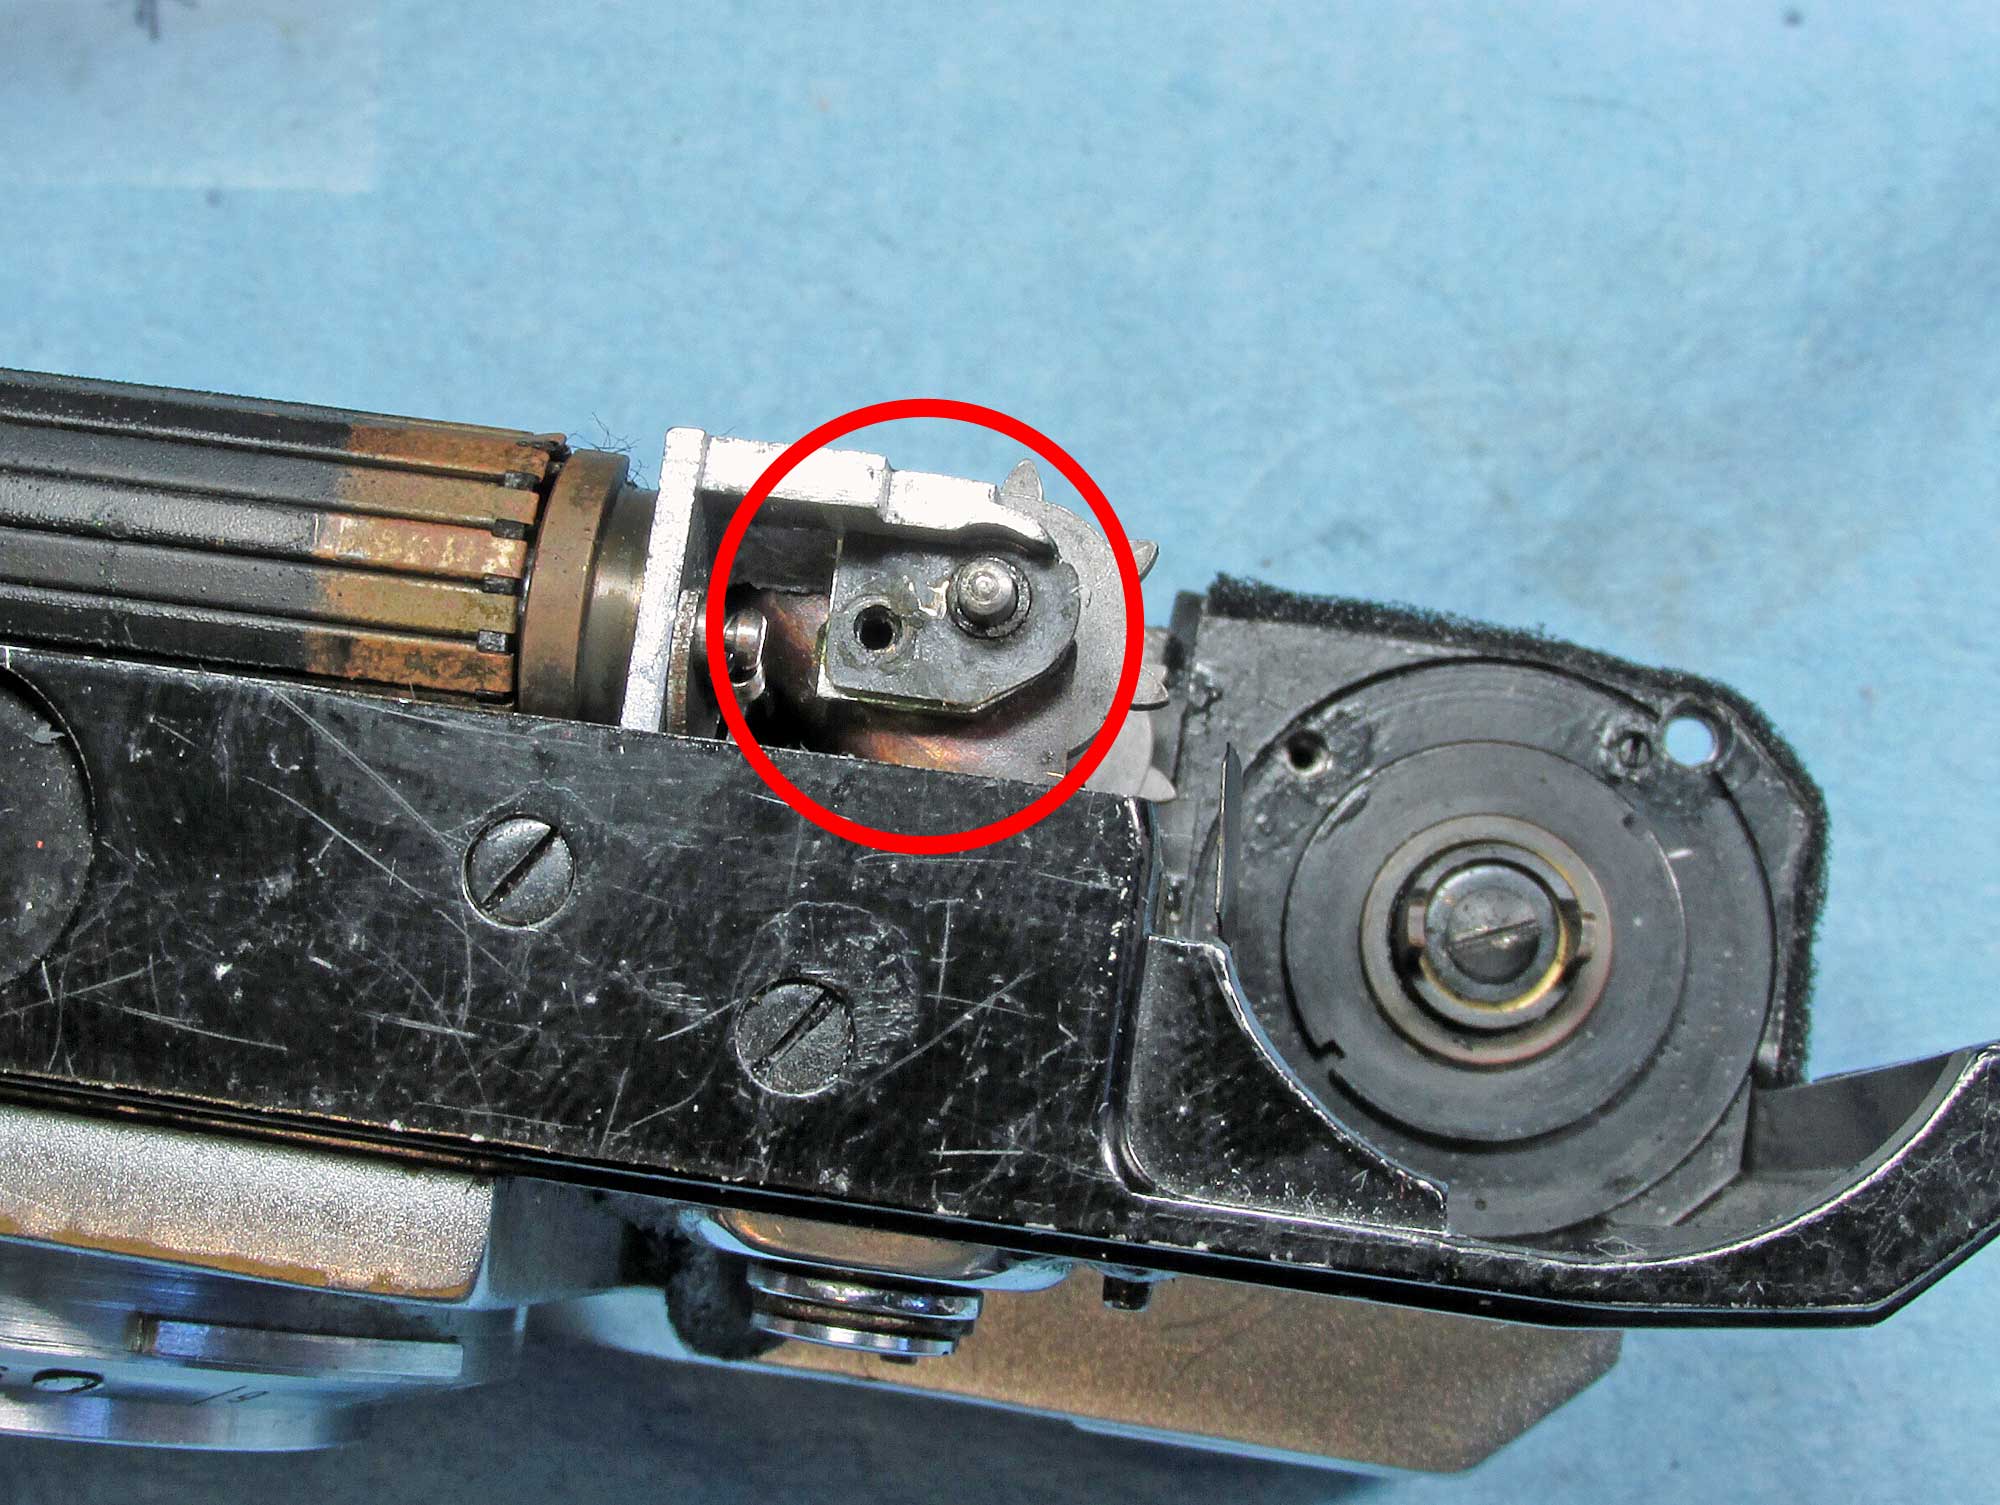
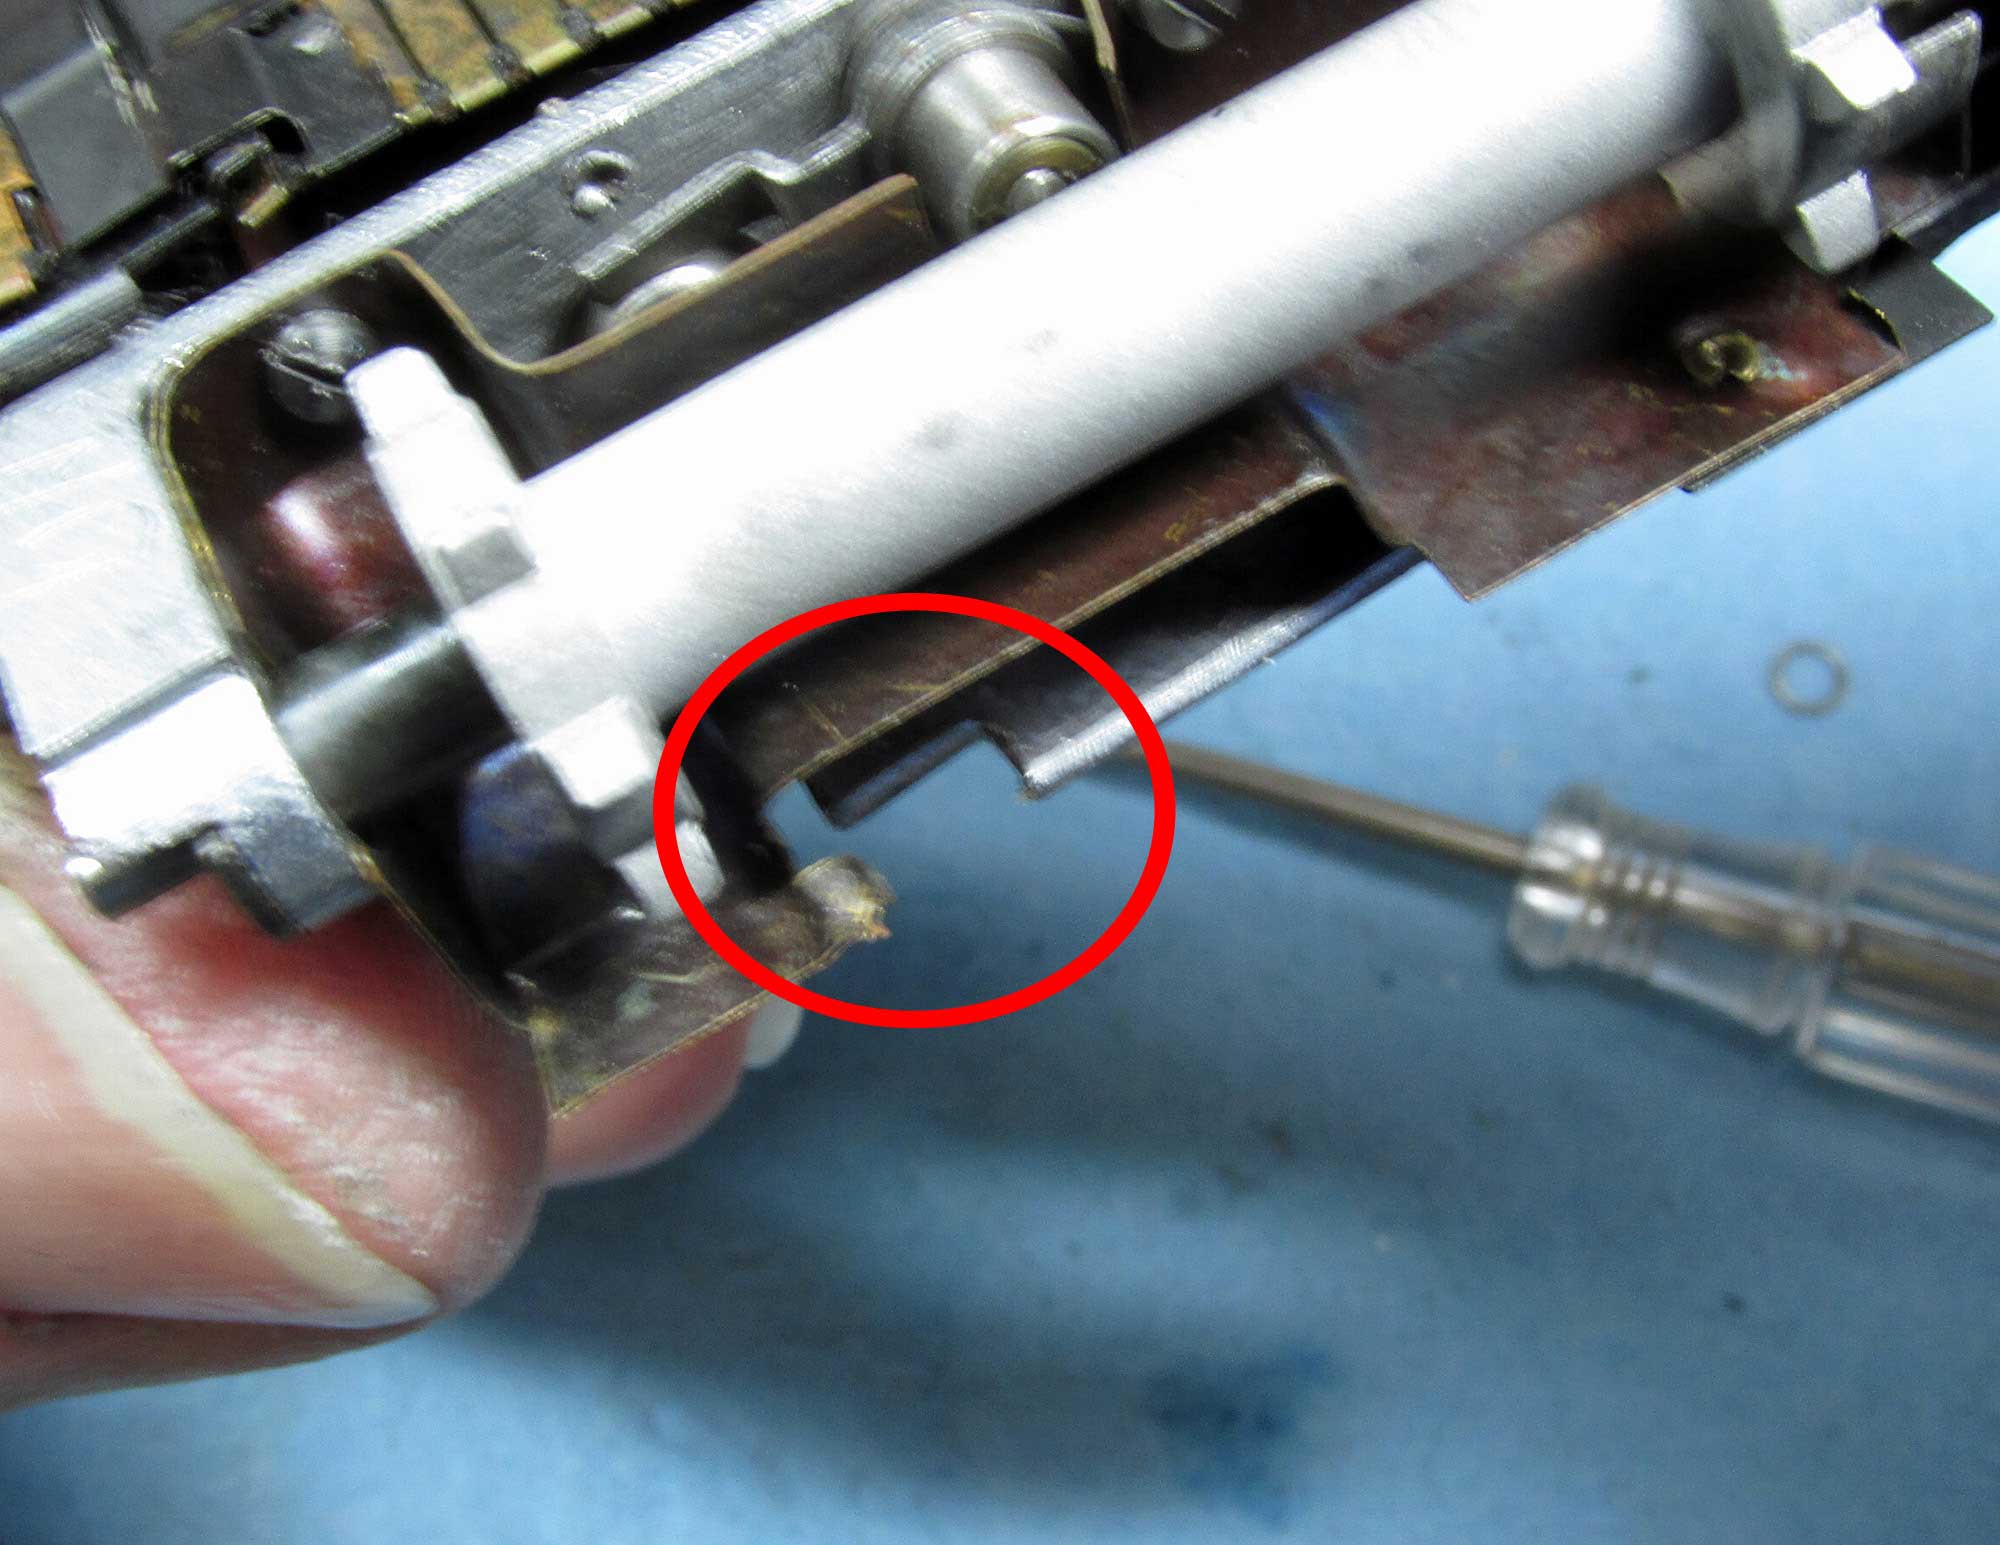
self timer lever
when putting the shutter cradle back in, make sure you slide the lever all the way against the wall so it clears the cradle’s release lever
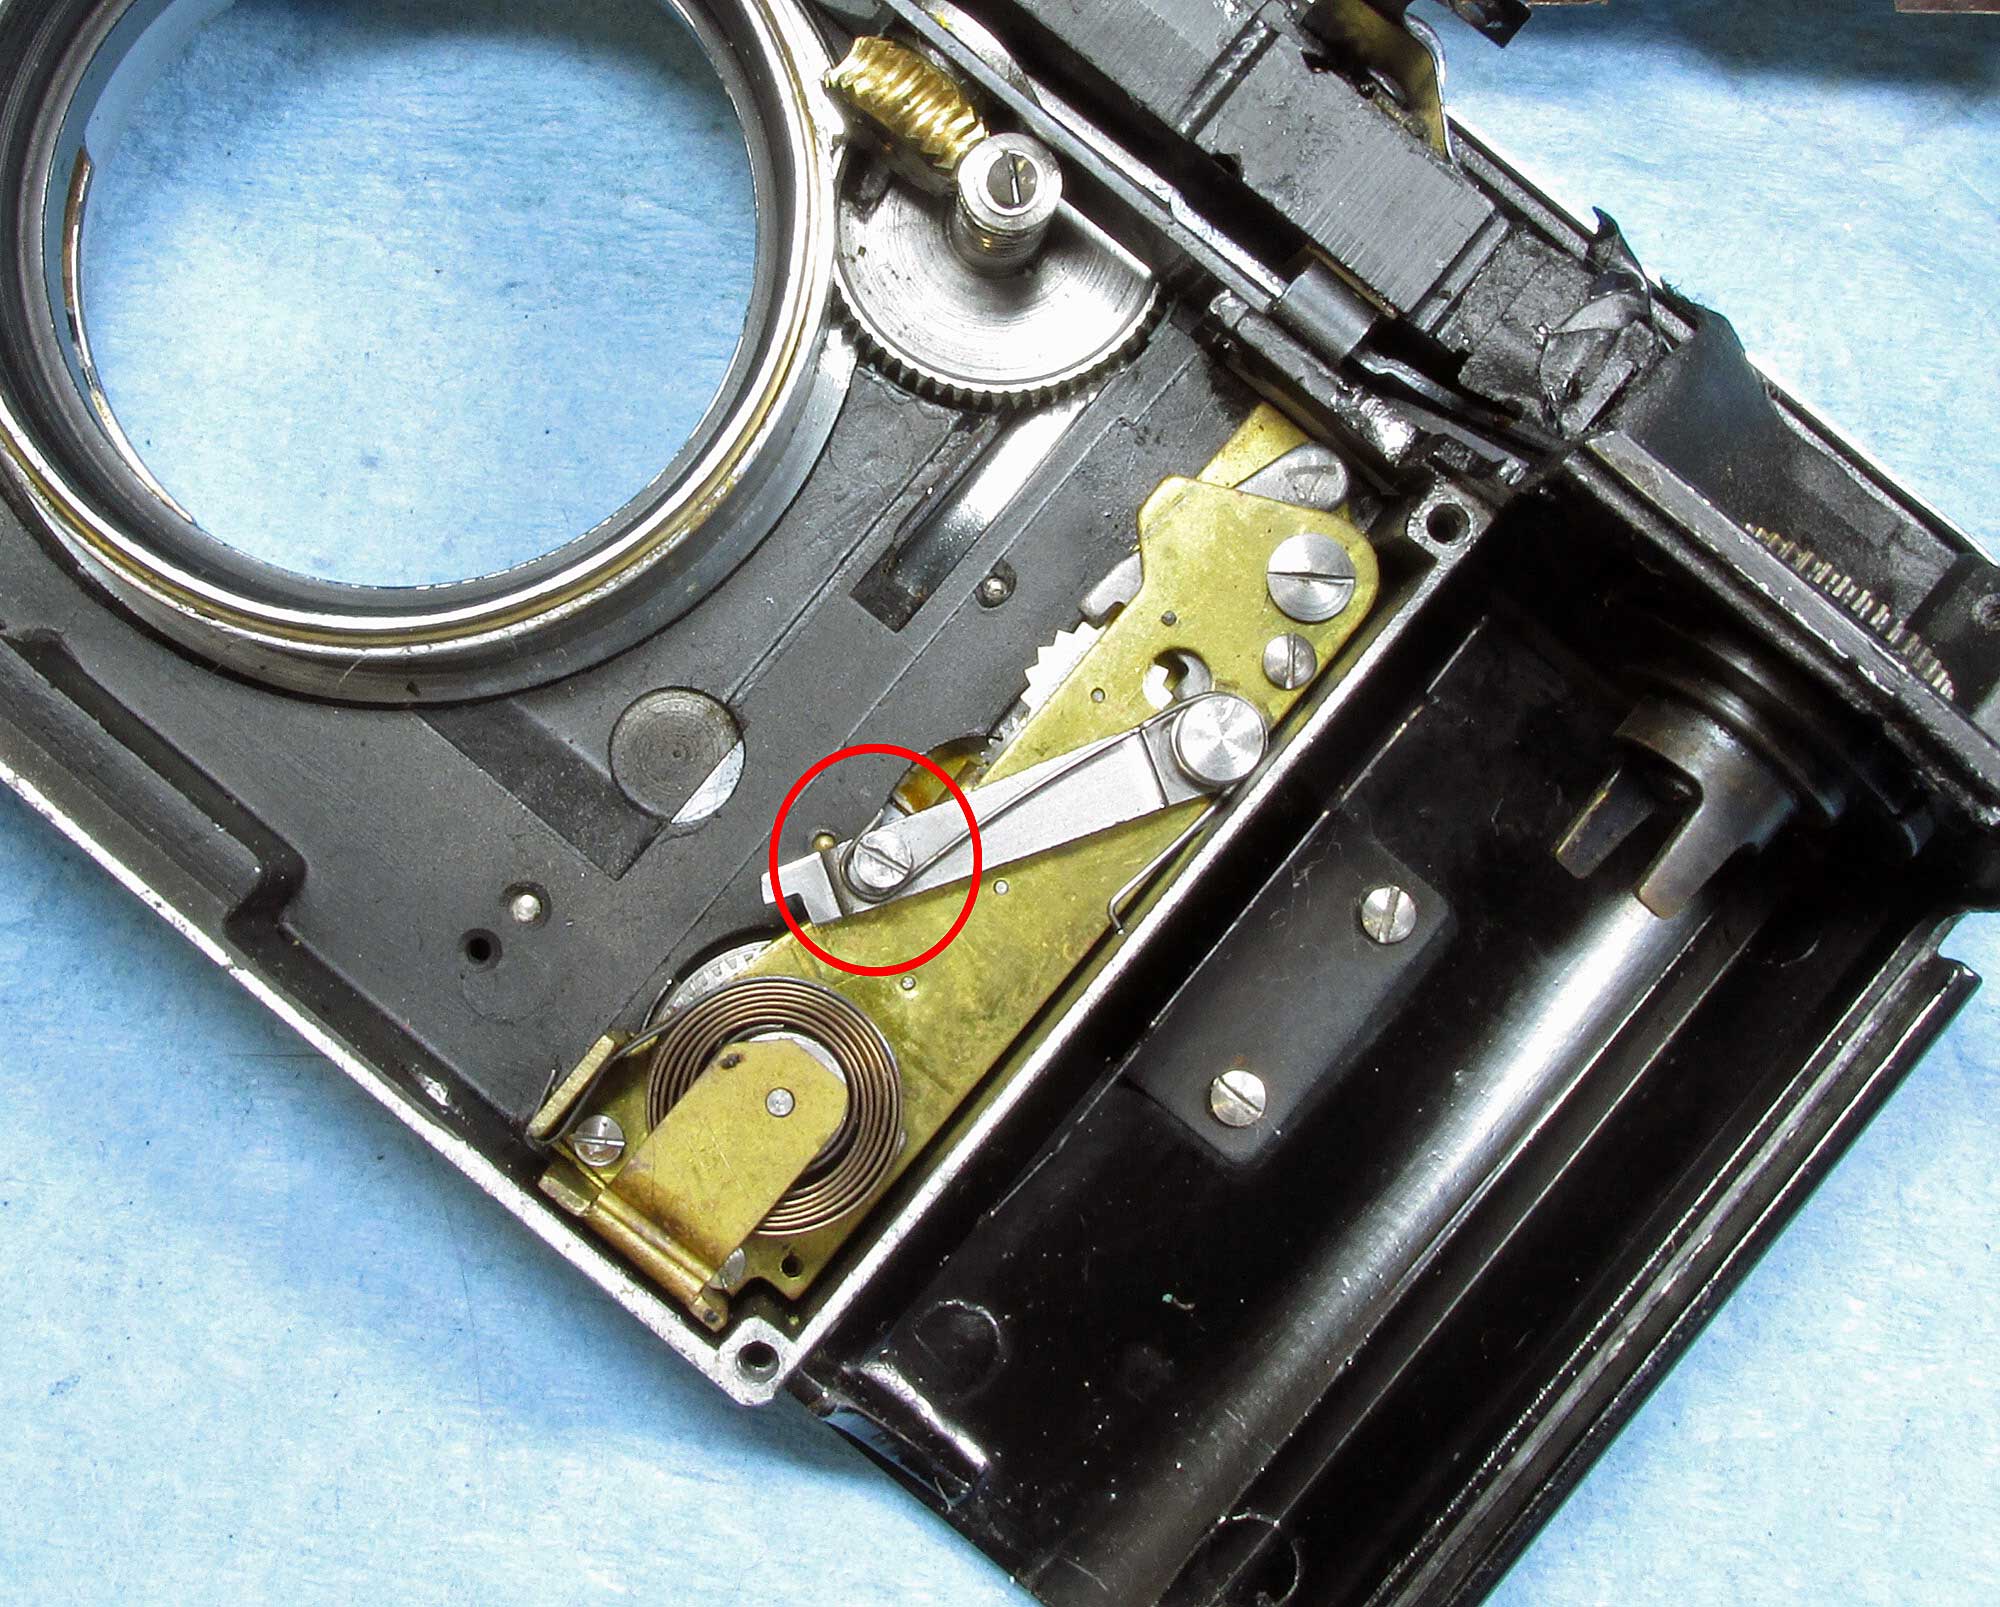
release lever
here is the shutter release lever associated with the self timer, just make sure the screw (previous photo) clears this notch as you put the cradle back in. It’s not as difficult as it sounds, just start on the far side with the cradle, then peek in and slide the lever over with your screwdriver as you lower this side
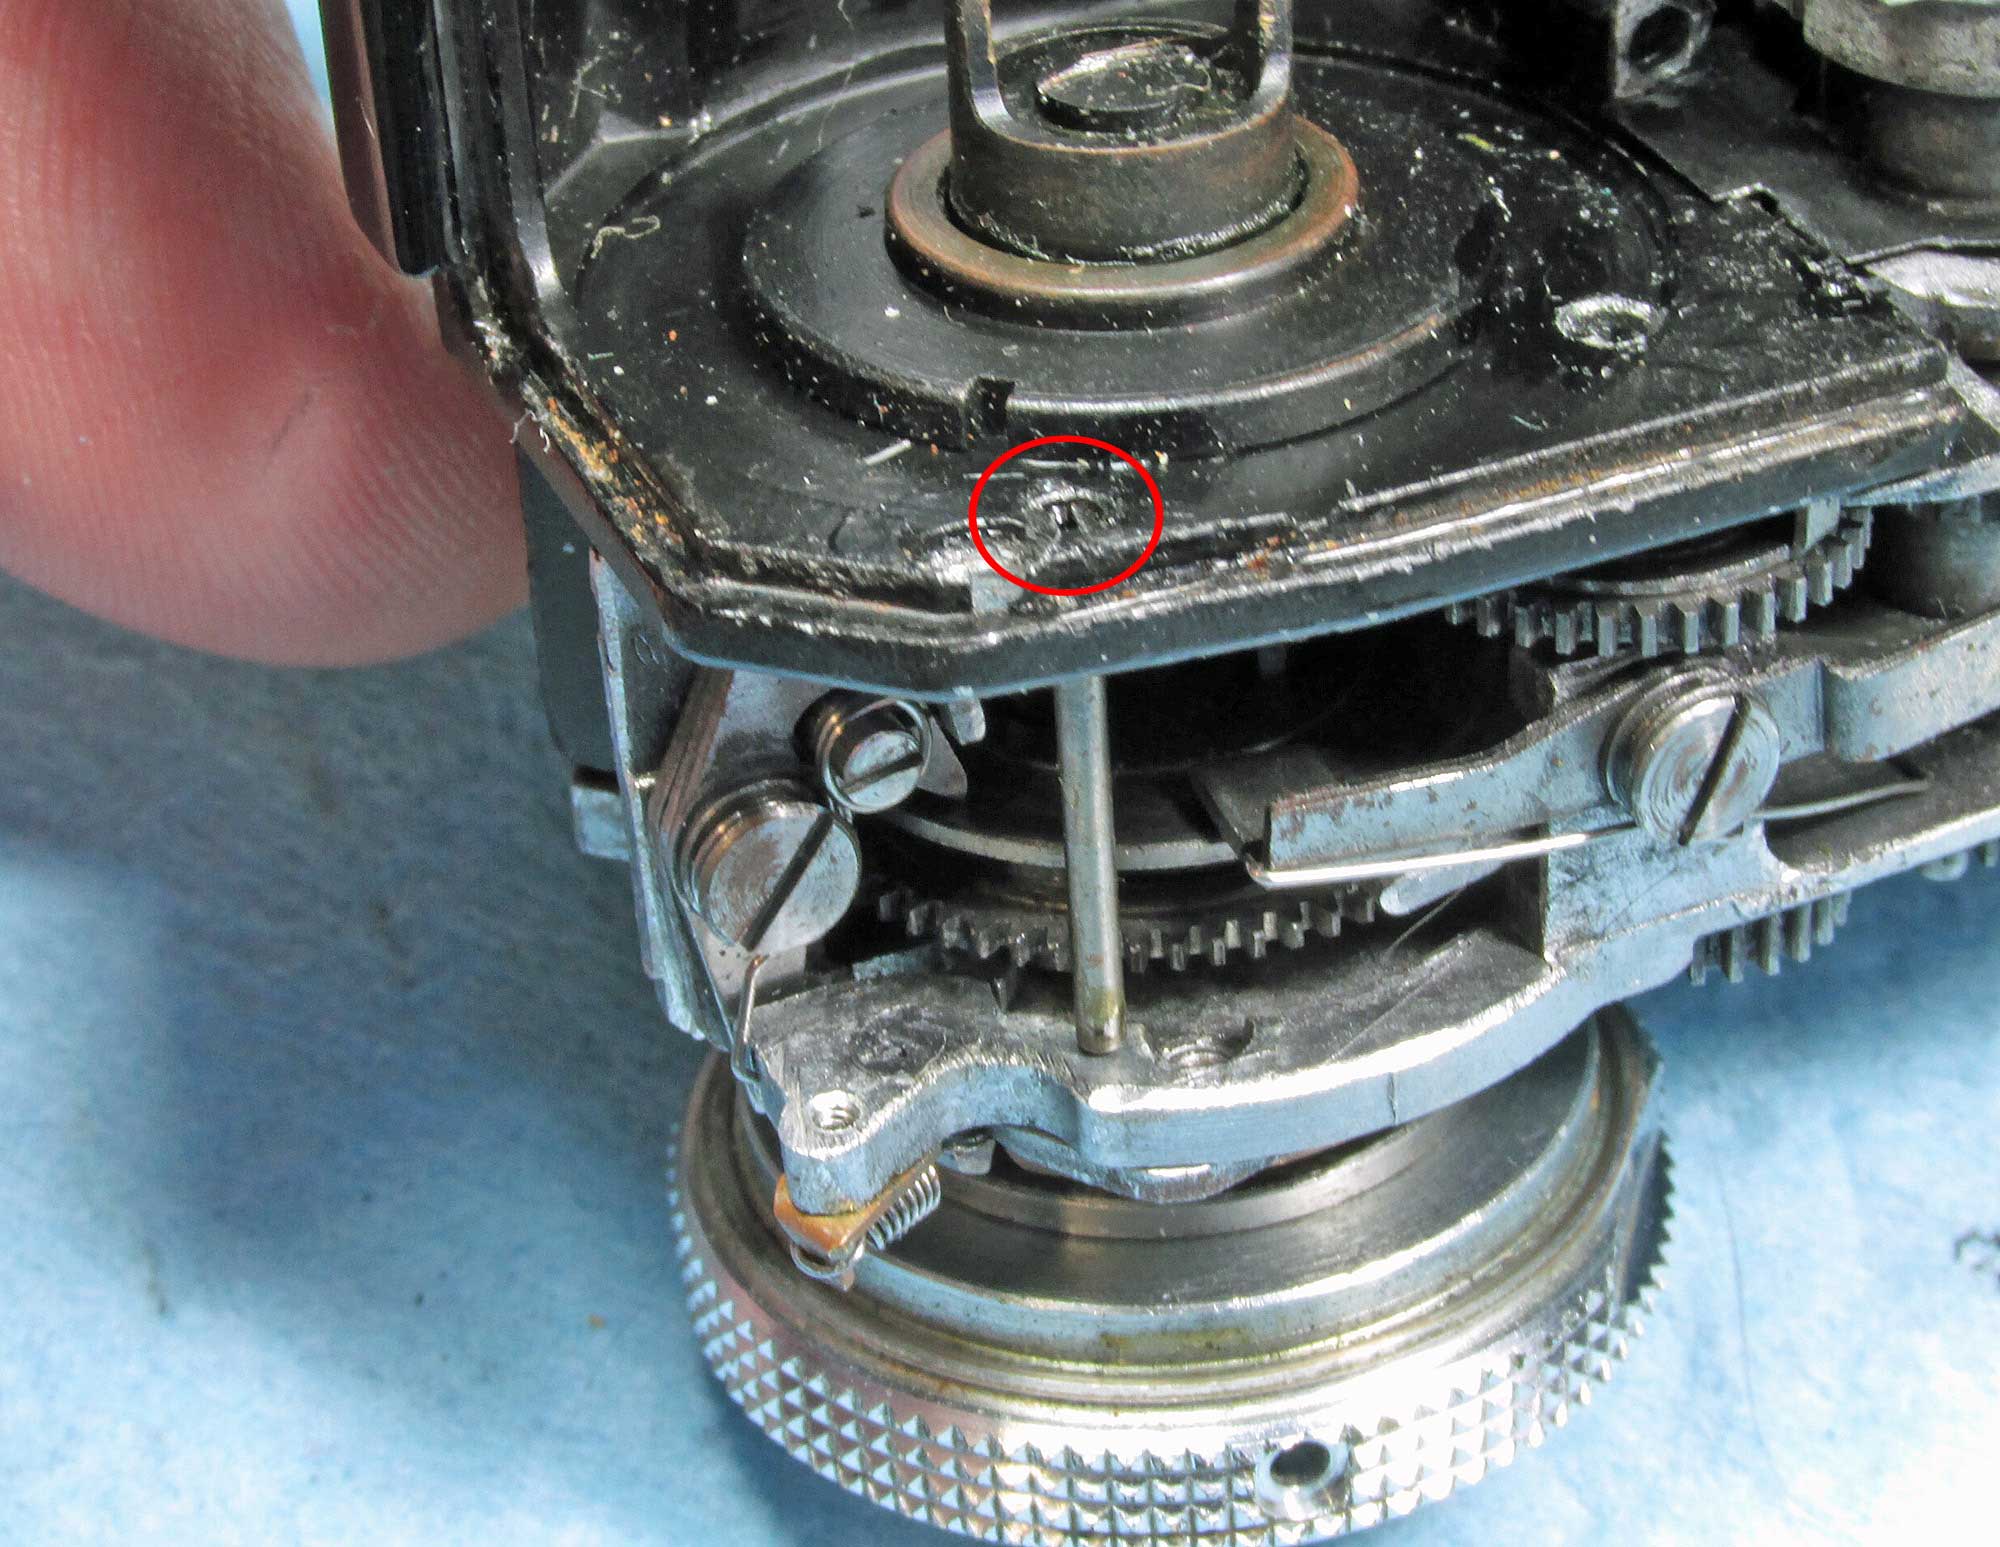
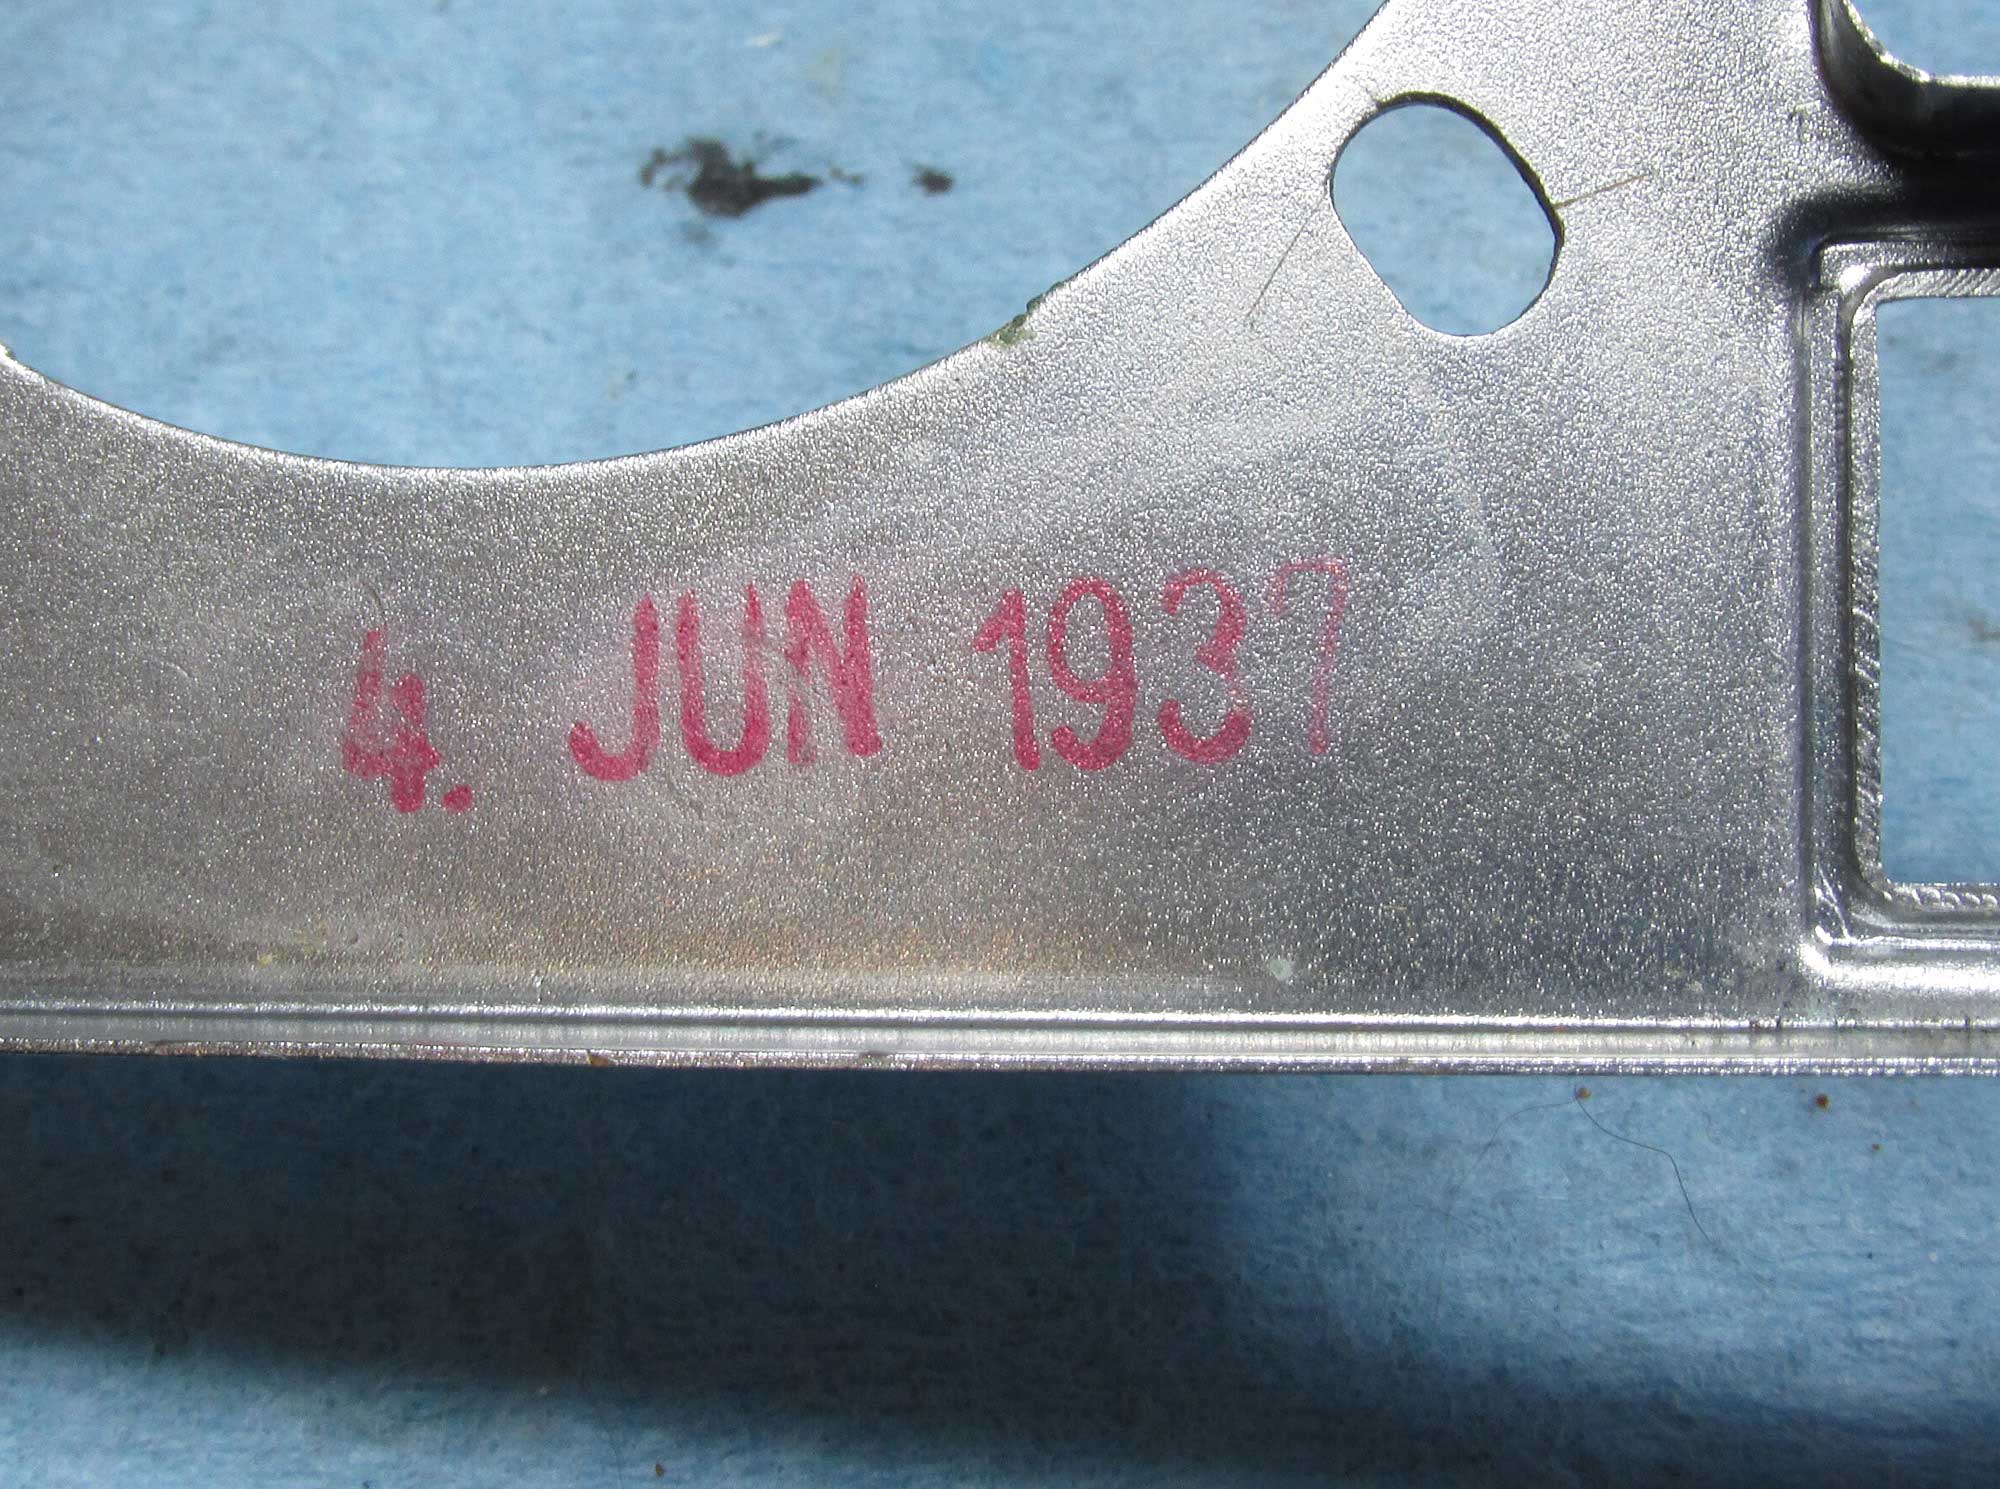
mystery solved
made in 1937. the serial number chart states this as “1936 to 1937”. here is the date stamped on the front plate I removed, it was also under the top chrome plate
I use Zippo lighter fluid (any brand will do) for flushing and cleaning the gears and other parts. just be careful to keep the fluid off of the shutter curtain ribbons, they are glued on and could become unglued by the lighter fluid.
For the oil, I use sewing machine oil. You can use watch oil or any light oil of that type. use very sparingly and never use it on the gears of the slow speed escapement.
2 thoughts on “1937 Zeiss Ikon ~ Contax II CLA”
hello, I am recently working on a beat up Contax II, and your post is a great source of information for me.
However, could you please mark the exact parts of the shutter escapement where you have lubricated? I am having trouble in its lubrication right now.
Thank you!
I updated the shutter housing images with arrows… the arrow placement isn’t exact, basically get those areas with the oil (red arrows) just a tiny tiny bit, working the gears as you go. Avoid the slow speed gears (yellow arrows) as the oil can gum up those gears.