I’ve given my 1953 Leica IIIf “red dial” a CLA, or Clean Lube and Adjust and now I need to replace the half-mirror, or beamsplitter in the rangefinder. The beamsplitter gives the double image that moves back and forth as you focus the lens until the two images become one, then it is focused. On older cameras, the beamsplitter, which is a half-mirror, or partially silvered so it is transparent as well as reflective, looses some it’s reflectiveness and is hard to focus.
After getting the top off I was able to get to the rangefinder.
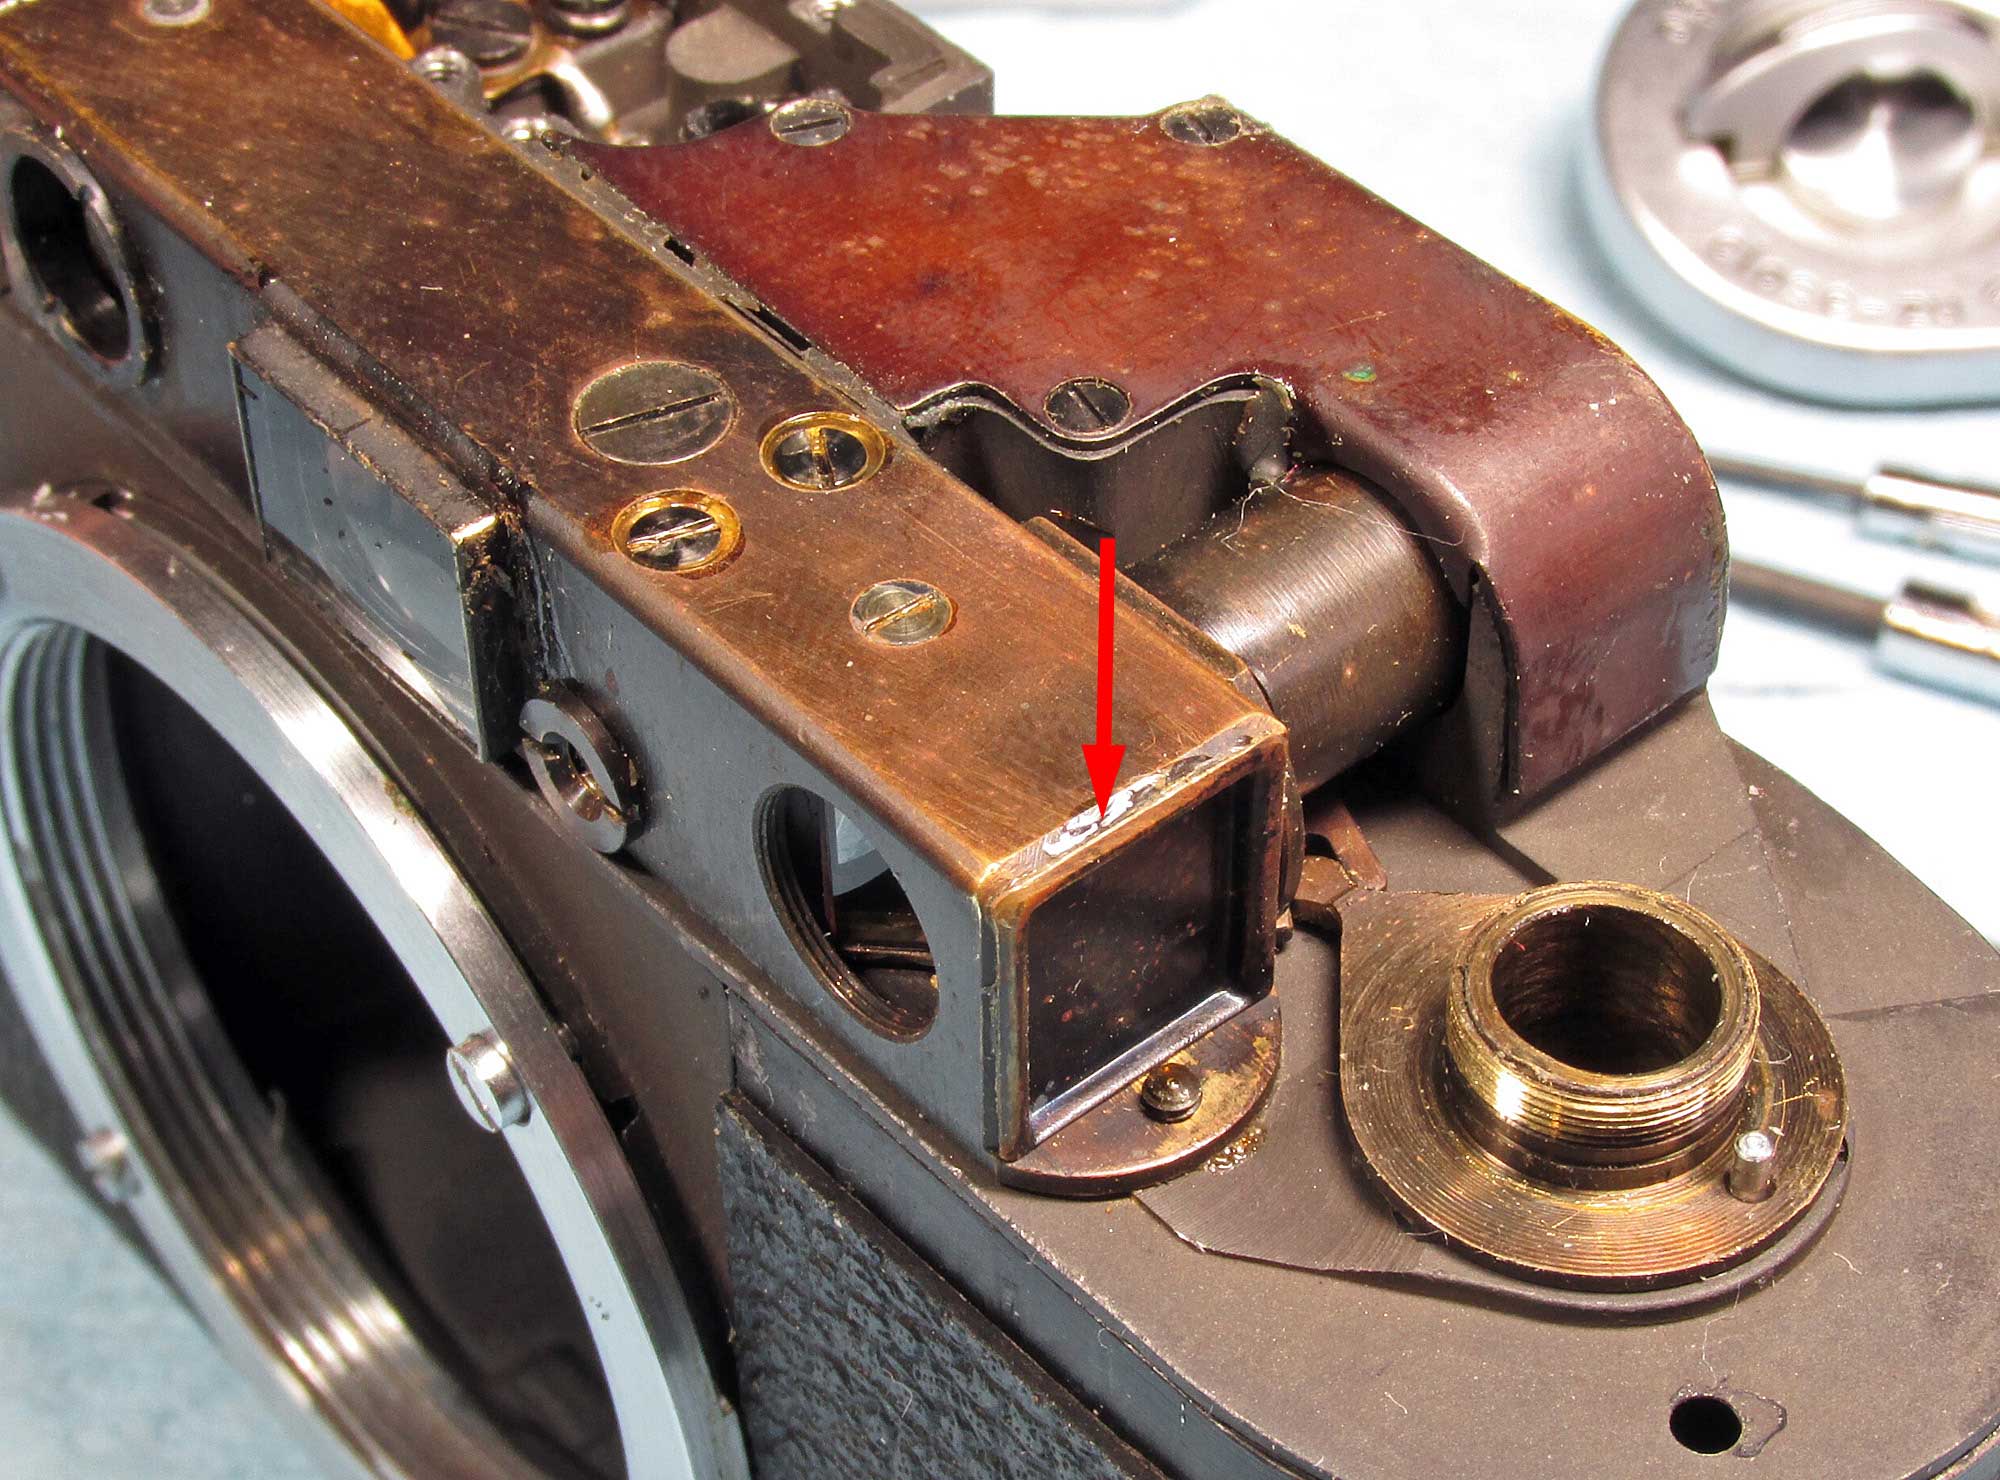
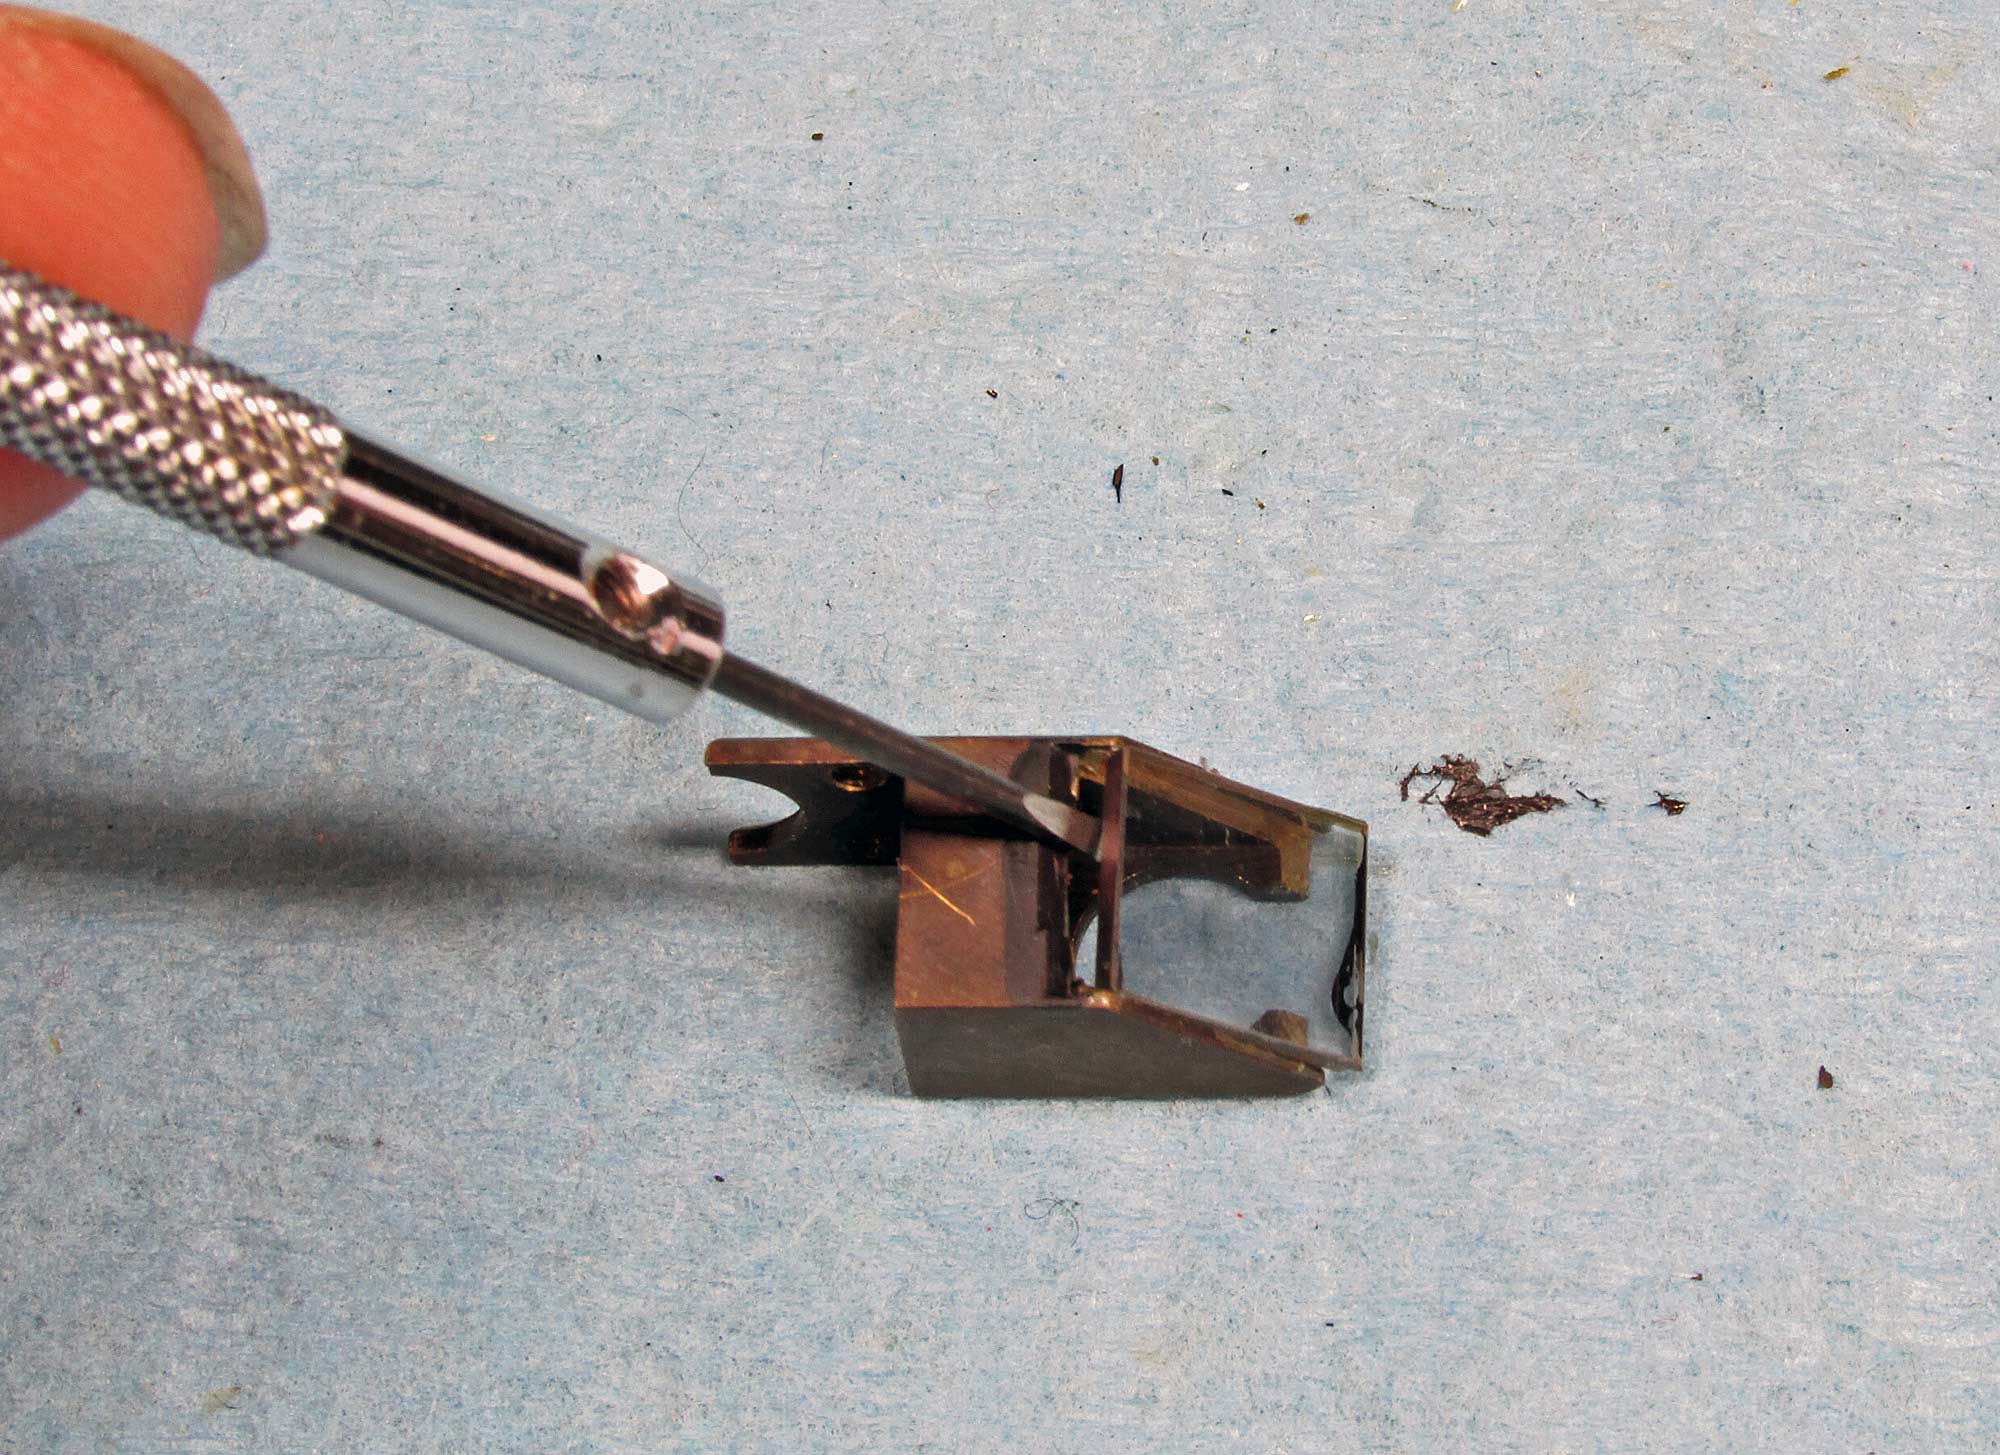
After I got the beamsplitter housing bracket loose, I noticed there were two objects in the way to prevent it from sliding out…
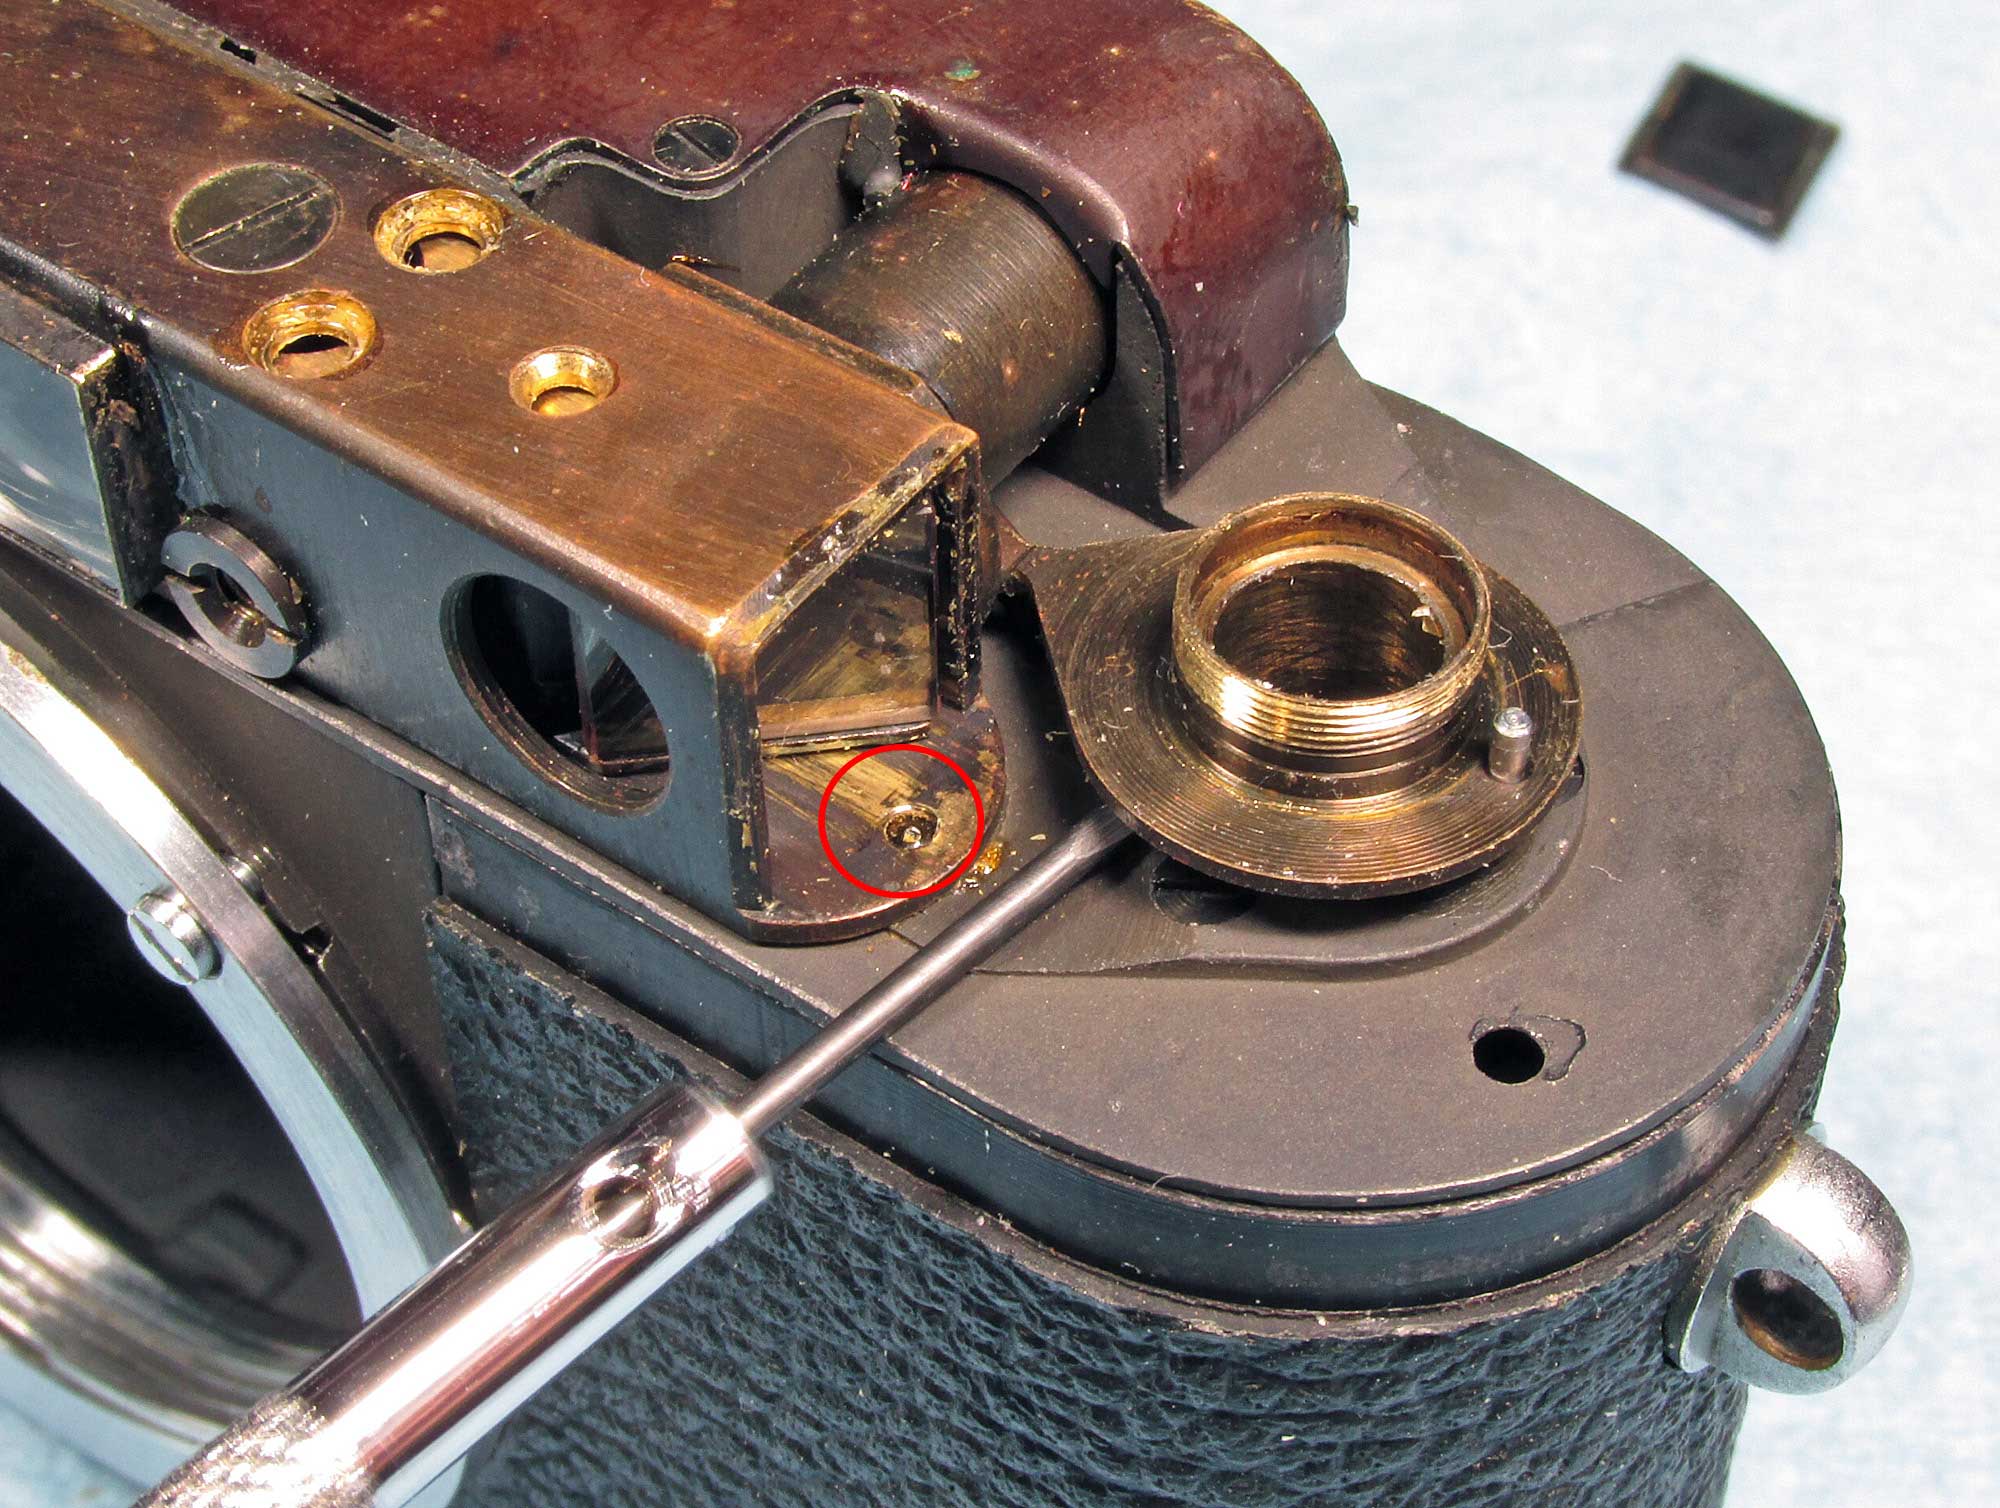

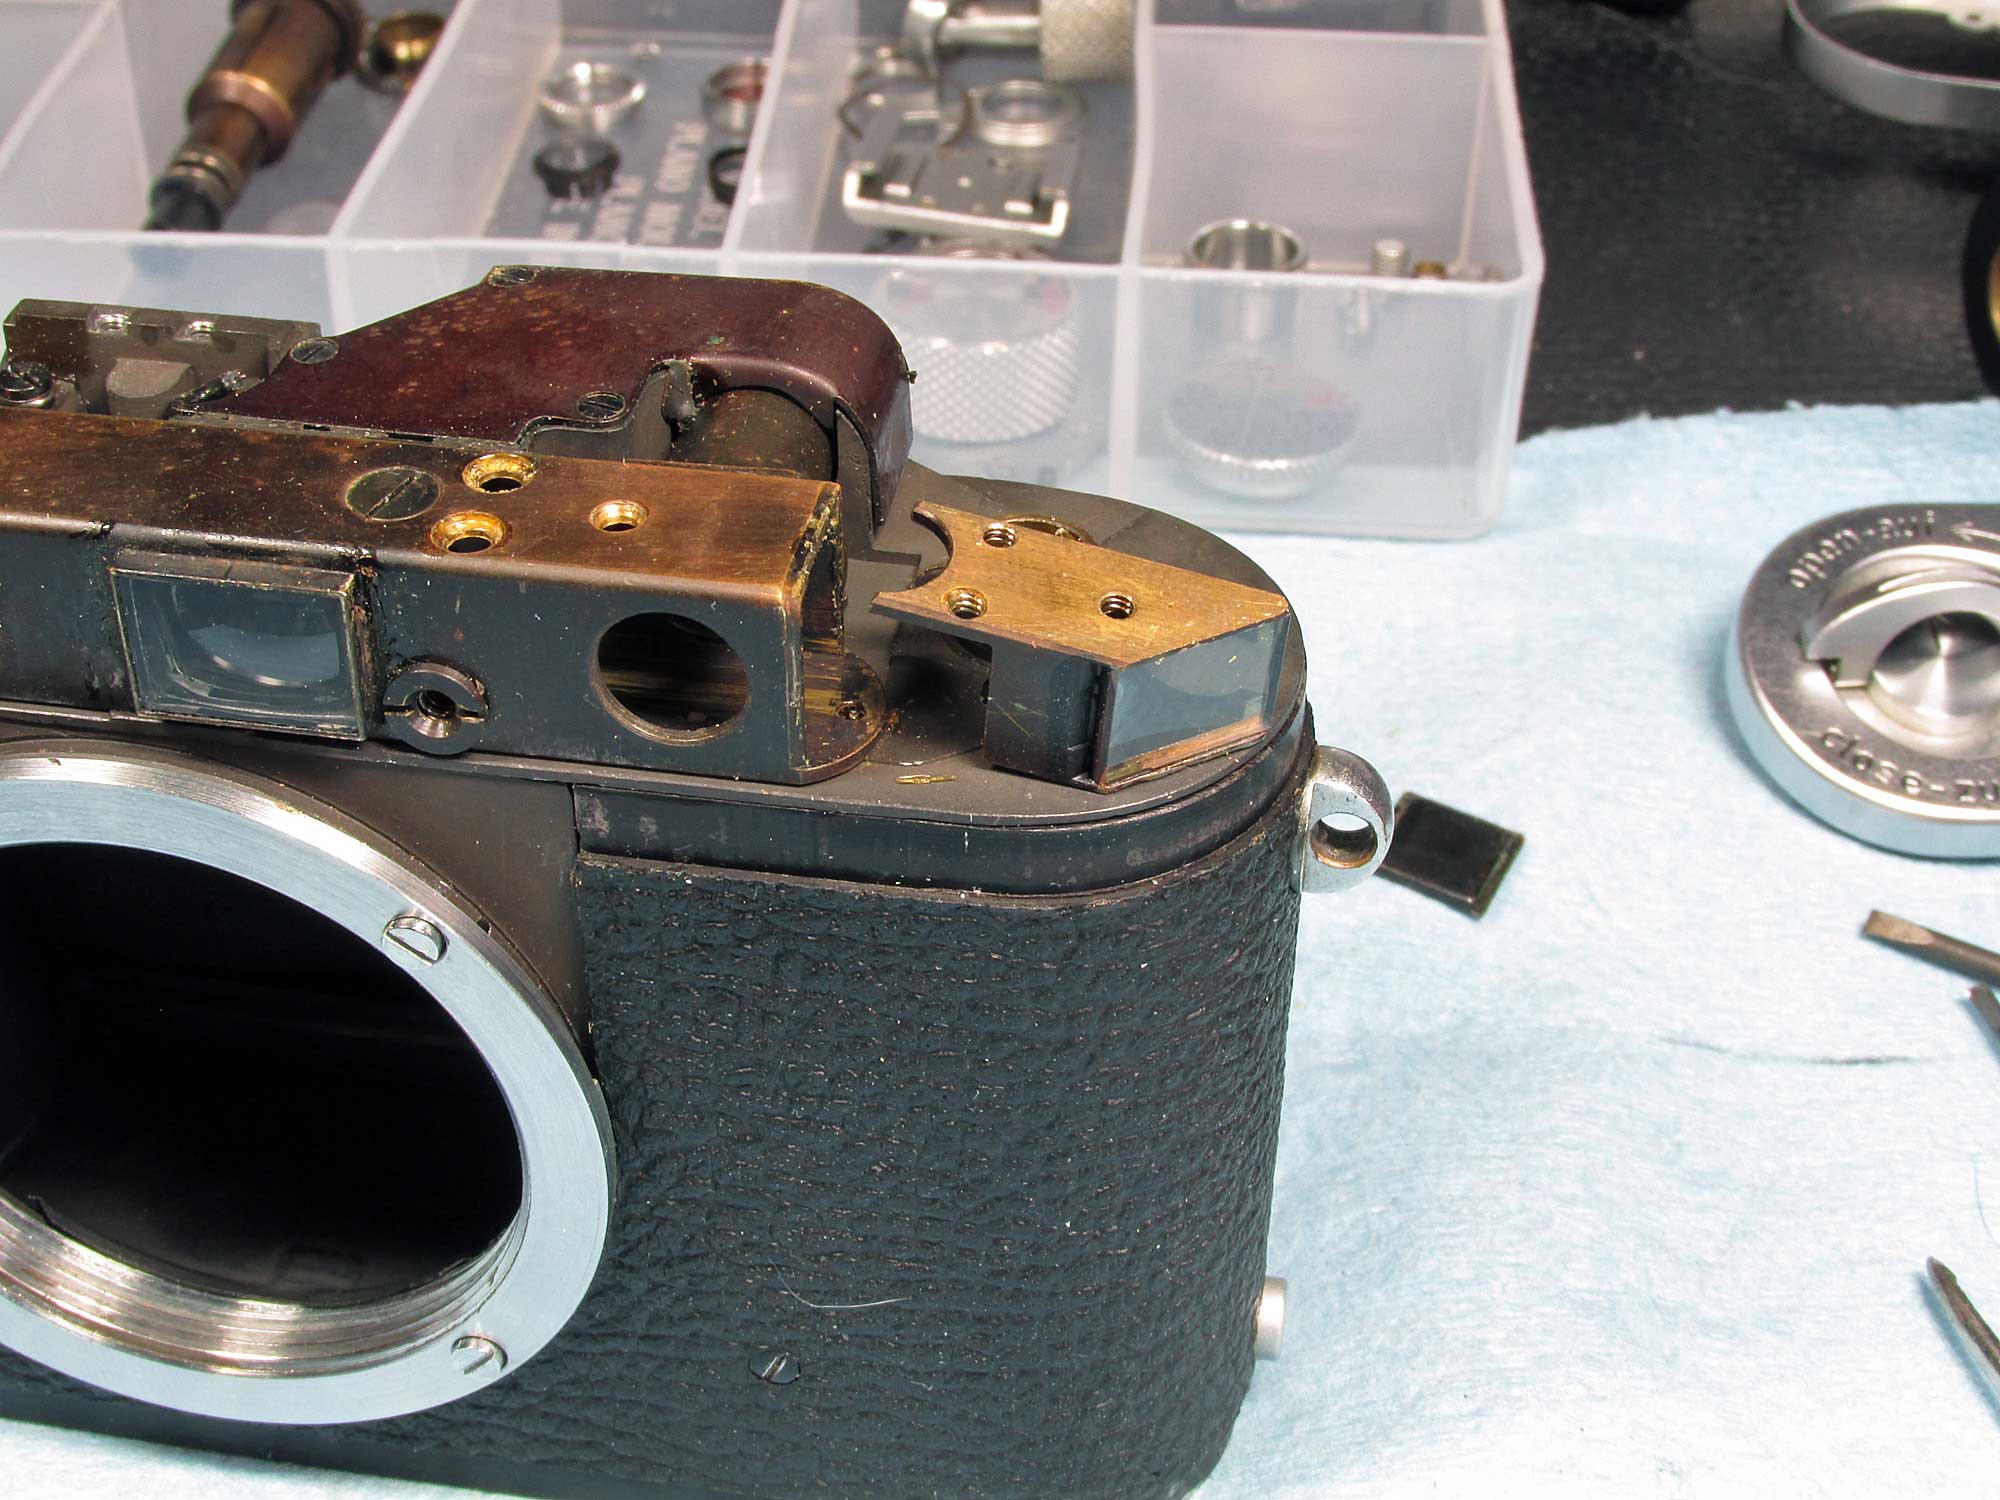
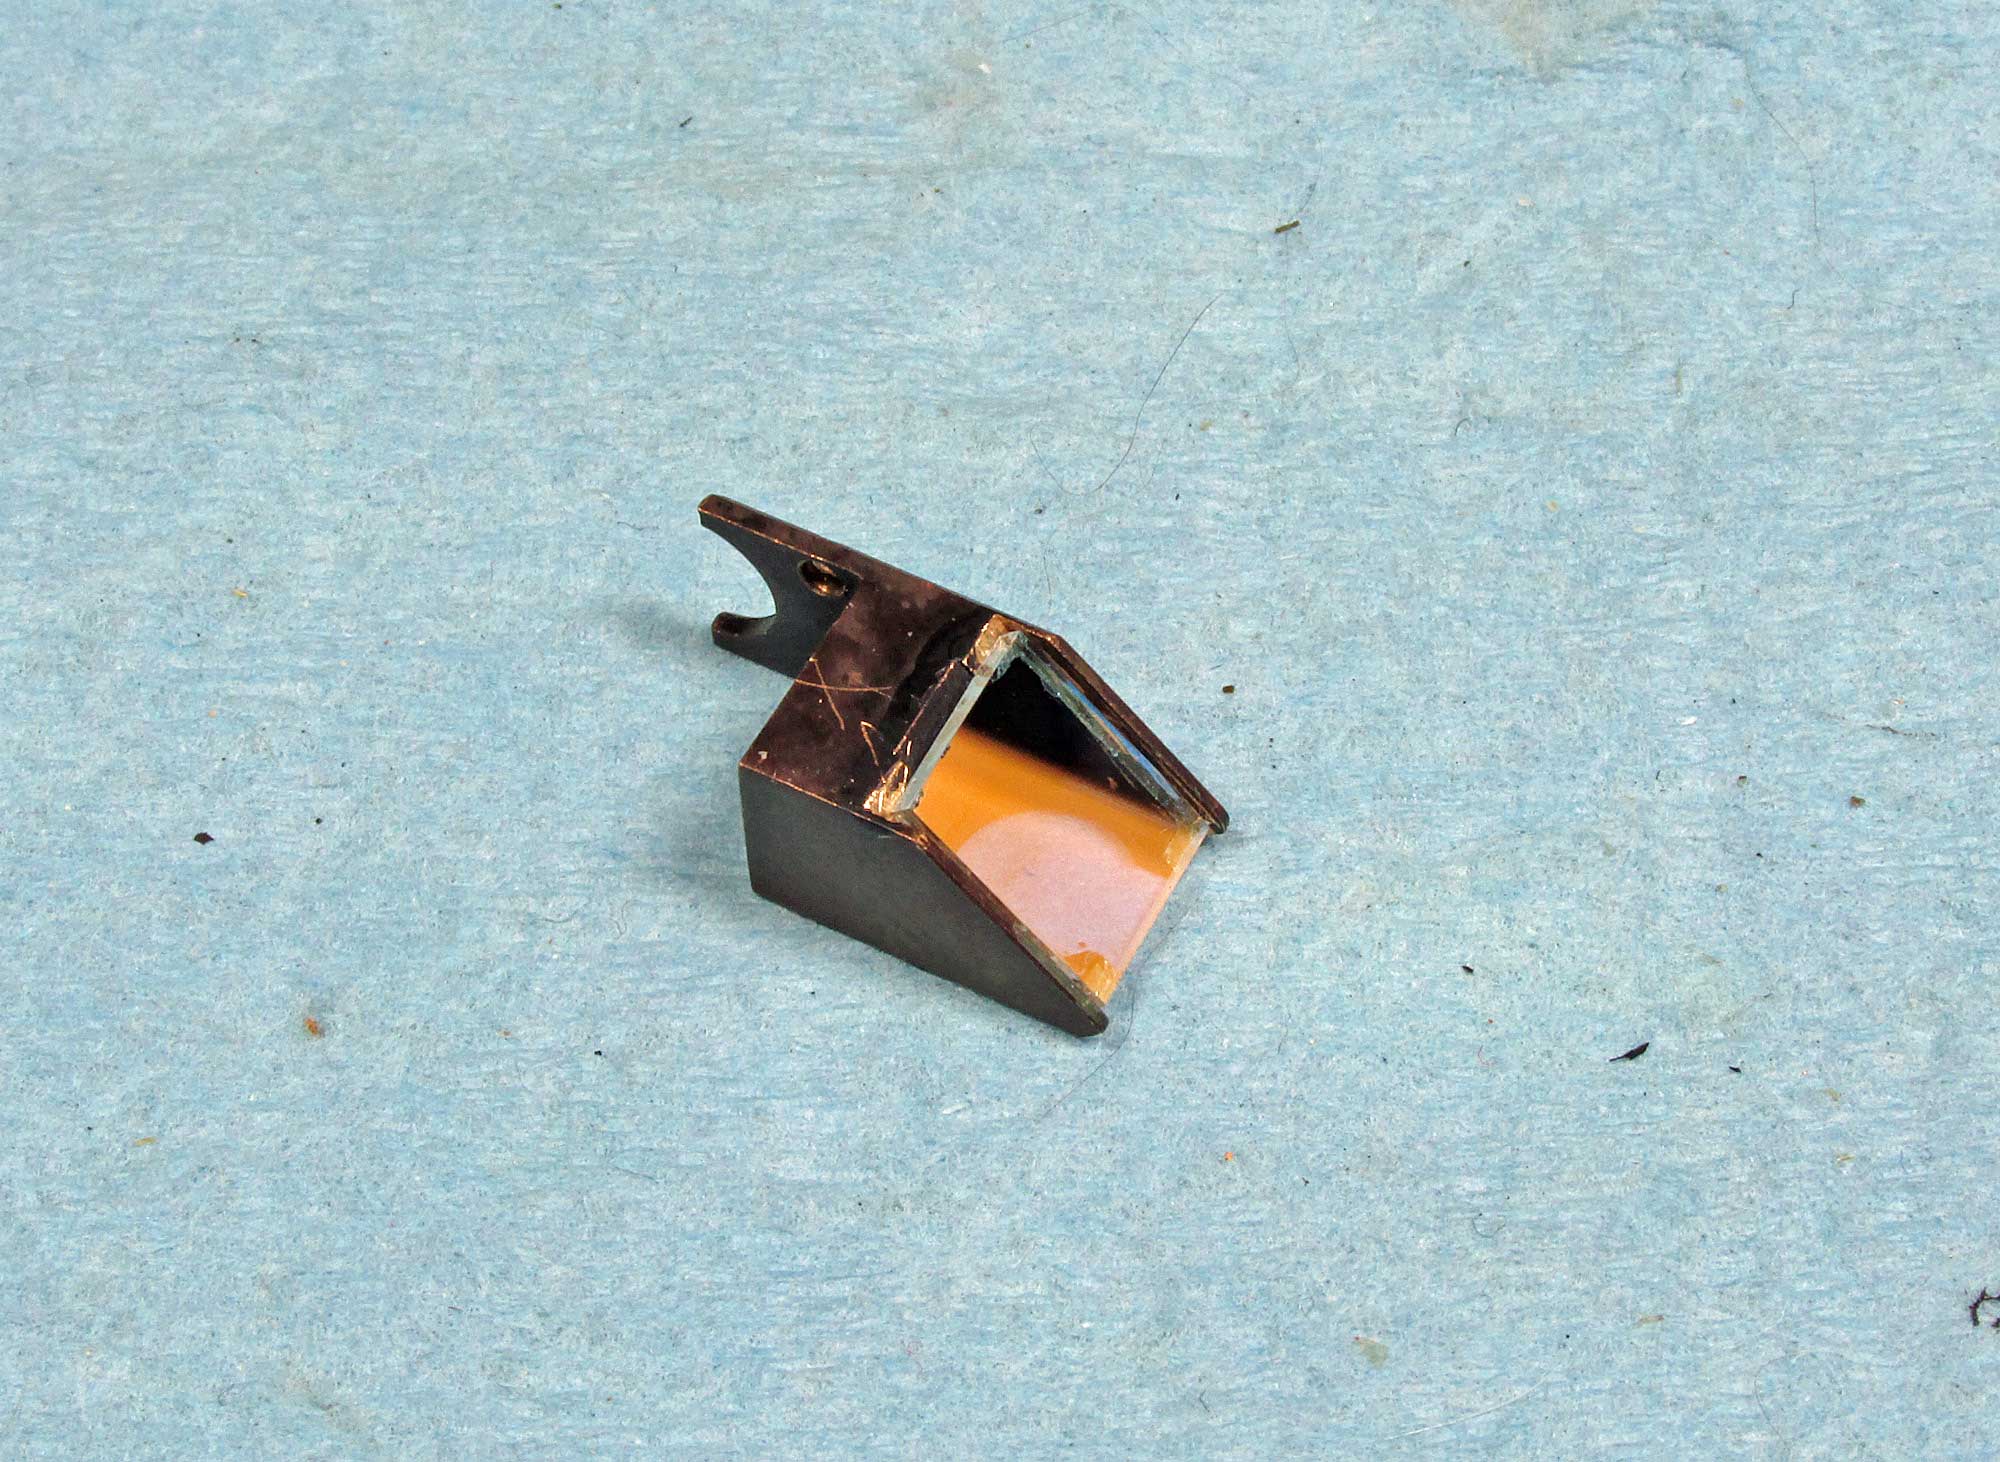
Now the beamsplitter housing can slip out
I got my beamsplitter pre-cut from a fellow on eBay (nobbysparrow) and it was only $10. I say only because it is way worth it, not buying some stock and trying to cut it myself. let alone send it off to have it professionally done for around $110 or more.
Plus it is a modern process (the silvering) from Japan and less likely to rub off and fade through time.

It really isn’t hard to do this yourself. follow my instructions on how to remove the top plate and you can have a new fresh beamsplitter in your Leica for a fraction of the cost and a few hours, not weeks or months
You are amazingly helpful with these Leica Barnacks repair tutorials. If you ever feel like doing more, please don’t hesitate. Or do one on how to do a CLA on a Contax IIa, lots of people would love that, as it so hard to find people to do those and there is a 3 month to three year wait in getting one done because they are so busy:)
Anyway thanks–quality work here.
I have the IIa and II repairs in my Flickr albums. https://www.flickr.com/photos/rwrede/collections/72157629808351690/ The older II is much easier to work on or should I say harder to mess up. The IIa is fairly easy to get at enough to clean the important stuff but much harder to replace a strap. the top plate removal and a cleaning of whats inside is usually enough.
Here are some helpful links:
http://rick_oleson.tripod.com/index-62.html
http://rick_oleson.tripod.com/index-95.html
http://www.rangefinderforum.com/forums/showthread.php?t=95751 :: this one is reading the posts for hints, the original pictures are gone now
http://www.zeisscamera.com/services_overhaul-cIIa-rf.shtml :: this guy tells you to NEVER do it yourself, yet many people do sucessfully and he gives tips
Dear Richard:
I was following your advices for cleaning and adjusting the telemeter of my Leica IIIf I have bought last year.
¿Do you know if the end cap, at the end of the telemeter, is really important?.I coudn´t find it when I oponed the camera; perhaps it was lossen in a previous repair procces.
I see very far (one to the other) the two images in the rangefinder. I can´t get the superposition moving the prism of the telemeter by pushing the cam behind the lens. ¿Some advice in order to correct this problem?
¡Great work and job in your blog!
Thanks for your help
The end cap is not needed it does keep the dust out but will work without it. for the stuck rangefinder prism, I’m not sure… try Googling, or checking RangefinderForum.com http://www.rangefinderforum.com/forums/forumdisplay.php?f=116 or you can check the repair manual: http://www.pentax-manuals.com/manuals/service/leica_iiif.pdf scroll down to plate 84/123 for the RF
Dear Richard:
Thanks a lot for your answer. I will follow your recommendations.
Thanks again for give us your time and your advices.
Wow, this is perfect but I have one question. I am pretty handy and have worked on similar projects before so I am certain that I could do this but I don’t know what size screwdrivers I will need. I have the beamsplitter on its way and would like to have the correct tools when it arrives. What size or brand tools do you use for this? I recognize the importance of having the right tool for the job and would hate to damage a screw or the finish of my camera.
any brand I believe (although I wish I had Felo or Wiha from Germany) I used my 2mm for most of the removal the shutter speed dial screw is probably a 1mm or 1.2mm as well as the screw for the Horizontal adjust in the RF.
Hey, I had the same but my focus got it wrong. I adjusted to infinity you had this problem?
Thanks
Any advice on removing the set-screws on the older “black dial” exposure dial?
Shutter speed dial? not sure, didn’t know it was different…
Well, leica is one of the best company ever, I used many products of leica great work and review man!
thanks for sharing!
Great write up. Question on diagnosing a worn or corroded beamsplitter on a circa 1936 Leica III.
When I look through the rangefinder, it\’s a bit hazy and dim. If I point it to a light bulb I can clearly focus but anything else besides a bright light, it\’s very hard to focus with little contrast. Is that a sign of a worn beam splitter?
could be. best thing is to clean the optics but do not rub the mirror itself. you can try making your own filter for the front rangefinder window https://www.flickr.com/photos/rwrede/albums/72157662681864000
Hi Richard,
I change the beam splitter as you didi. Howover my speed now all gone wrong . I seet the dial speed to B and put it back all correct .now B speed act not Bilb mode. Did i miss something ?
Thanks,
Chris
all I can say is look again at the first 4 images in the set, this is #3…https://www.flickr.com/photos/rwrede/23780388673/in/album-72157662885553529/ It has been a long time since I have been inside a Leica I depend on my own tutorials as well as others:
http://rick_oleson.tripod.com/index-154.html
http://www.pentax-manuals.com/manuals/service/leica_iiif.pdf (scroll down to Fig. 17.1 & 17.2
http://www.pentax-manuals.com/manuals/service/screw_mount_leicas.pdf
Great article and very useful, but the outcome is not always as simple as portrayed here.
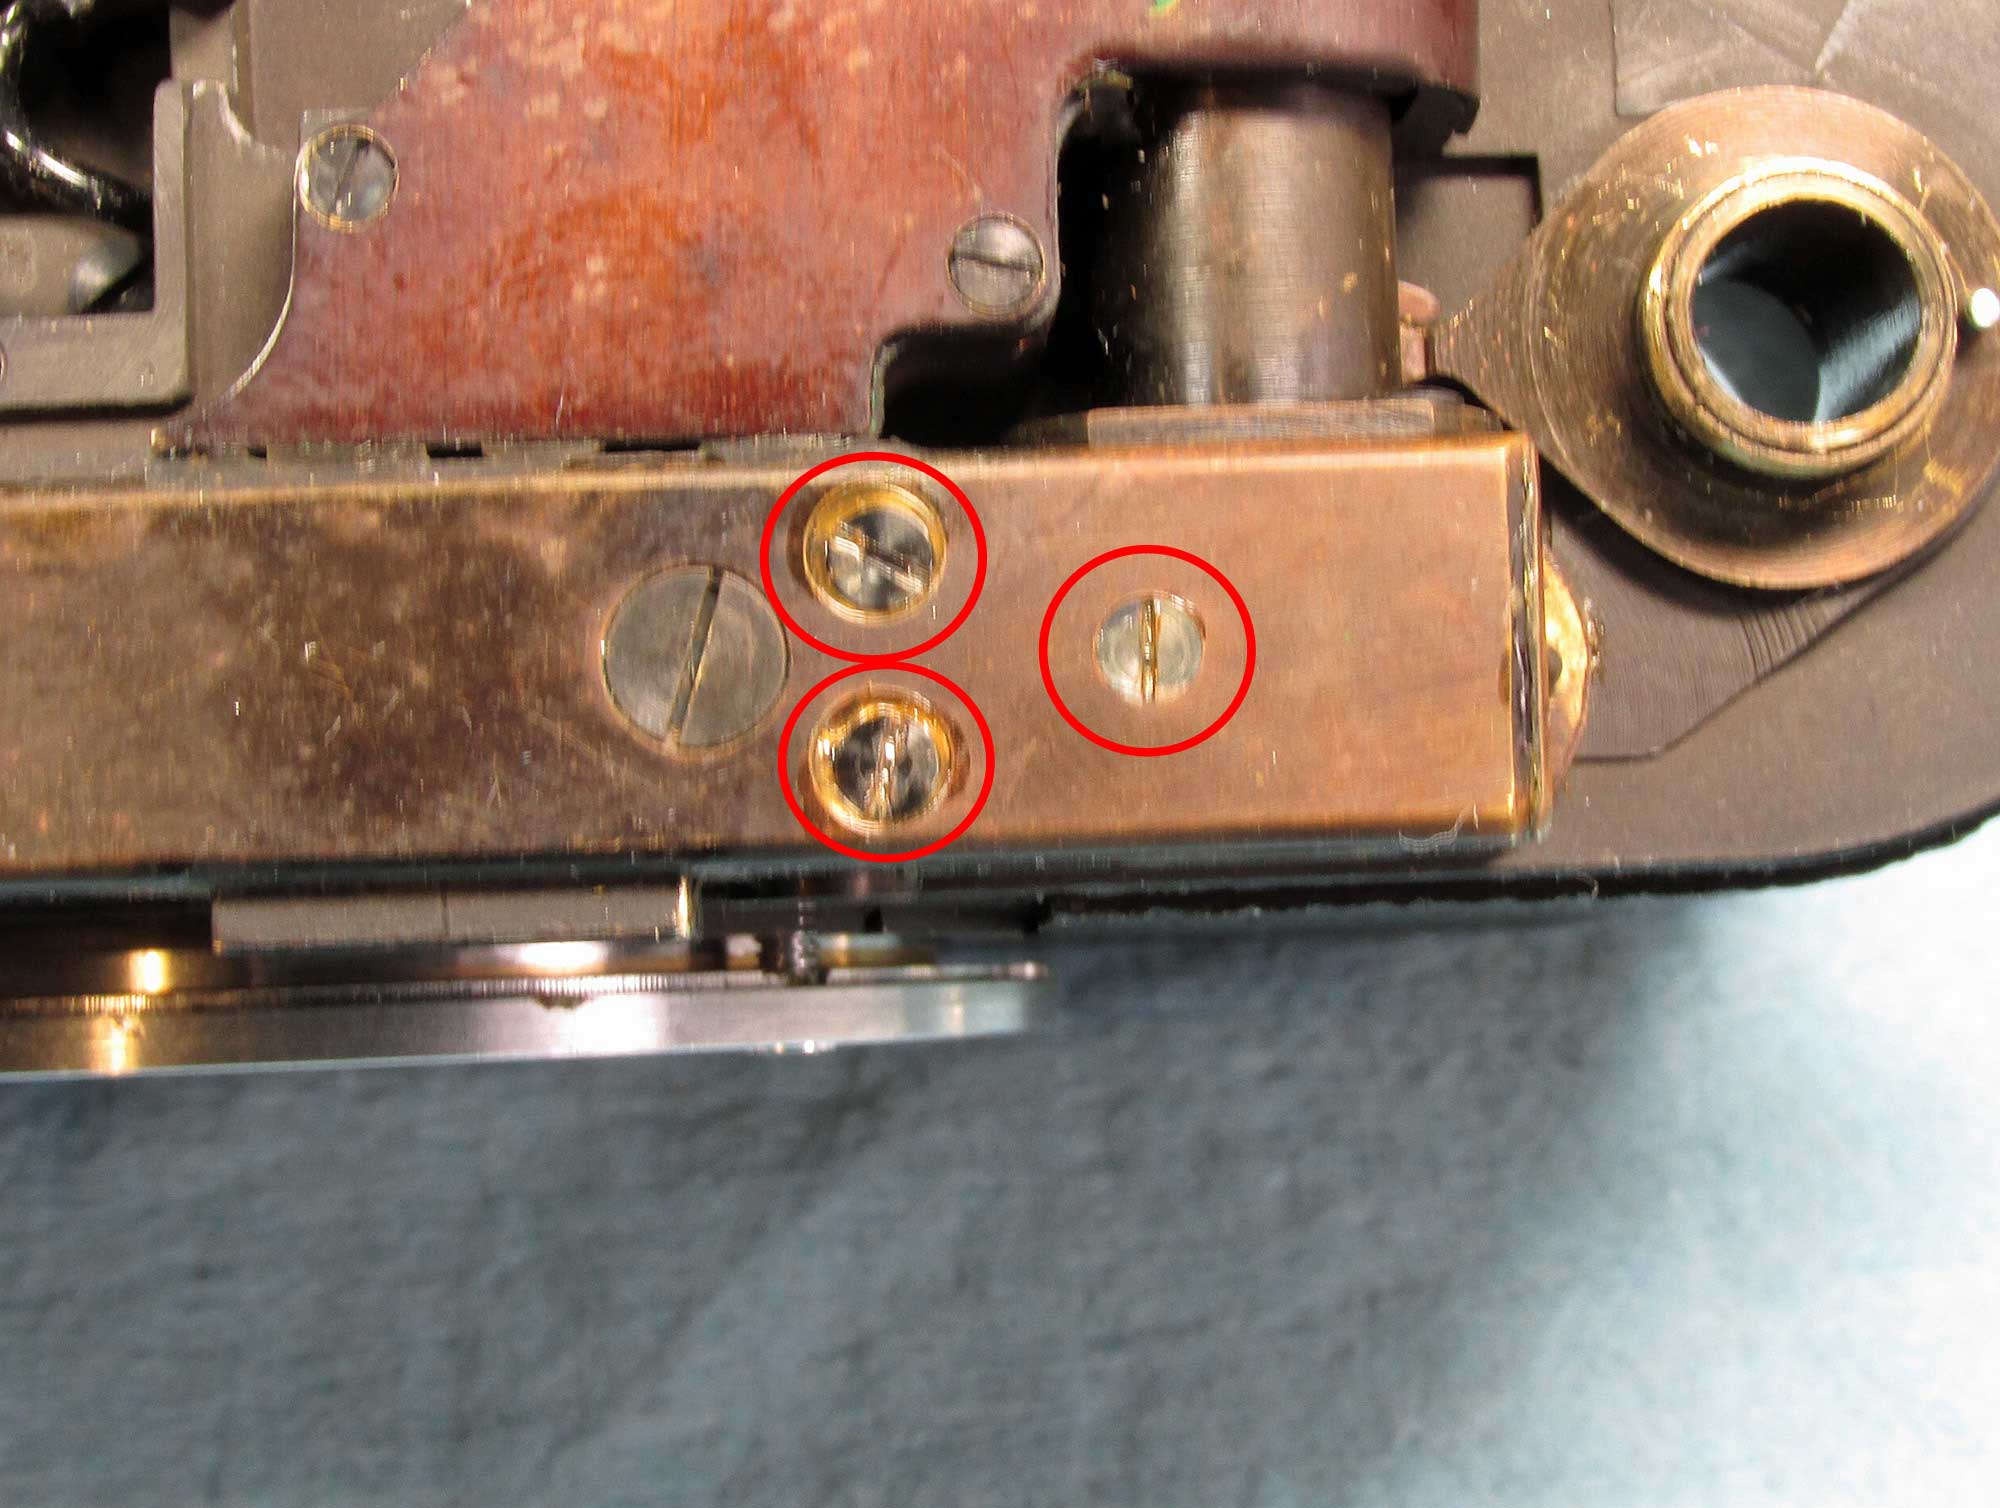
The first camera I did (Leica IIIa) required only minor vertical and horizontal adjustment, the second one (a IIIc) was much more challenging. Very minor positioning errors in gluing the mirror greatly affected the position of the reflected patch (even the way the three top screws are tightened change the patch position!) making the vertical adjustments not possible through the rotation of the front prism. The only way to re-position the patch is through shimming of the beam splitter mirror housing. I did this utilizing tiny thin pieces of scotch tape and placing them on the housing by the screw holes. This changes the “tilt” of the mirror and produces the large correction necessary to then adjust the patch in the traditional manner. Leica originally did this by lightly sanding the housing at an angle to achieve the same result…..
Thank you for your efforts to put out these clear and informative explanations. You have given me courage to tackle this on my own.
My iiig recently acquired a light leak that seems to have emerged near the slow shutter adjust knob – my negs seem to have light leaks consistently in the lower right corner. time to tackle this issue with some paint. Would much prefer to maintain the original vulcanite skin…
Again appreciate the knowledge offered here.
look for pin holes in your shutter curtain. I am thinking it would not be the slow shutter knob as yu said because any light entering the camera should not get past the shutter curtain.. sometimes just the tiniest pin hole can go undetected. they are easily fixed, go to a hardware store and get “liquid electrical tape” and paint several layers over the holes
Hi Richard,
I was reading your excellent article on Beamsplitter Replacement with great interest. I have a similar repair job on a dead Mamiya Press 23 camera [early grey type] that I’m renovating to use. I’m not a camera repairman but a Photographer who does my own repairs on lenses and cameras. I had not decided on the glue to use. Possible choices were UniBond Repair Extreme Power Glue or Araldite [two part mix glue]. You mention Elmer’s White Glue which I have not heard of until I read your article. From my web research, Elmer’s glue is a PVA glue. Is this right? I’ve never used PVA to adhere metal to glass which seems an unusual choice to me. Like most things in Photography, if in doubt do a test first. Is Elmer’s White Glue a PVA glue that you have used on your beamsplitter repair? Great article, and very clear high-quality photos. Regards Ron
Hi Richard,
thank you so much for this post. I just ordered the new mirror from japan.
Do you have the current link for the “getting top off” and “CLA” procedure for a leica iiif. The links in the post are currently not working.
Thanks and best regards, Matthias
that post has been deleted from my Flickr account (went from Pro to Free) sorry This might help:
https://jelabs.blogspot.com/2012/06/replacing-beam-splitter-mirror-in.html