Now that the new patio is done, for the most part, (there are still some fence boards to mend, stain and gravel edging etc) I have started on the new deck that will be placed over the existing (older) patio coming off of the kitchen. Fortunately, the patio slab couldn’t be in better condition. It looks only a few years old, (although it isn’t by any means) and it has good slope away from the house for drainage. It is only 9-feet by 12-feet (9’x12′) and isn’t big enough for my new Bar-B-Q and the Cheminea, and a nice table.
I am going to once again use some rather unorthodox methods to increase the size of the deck to 9.5’x15′. I know, weird size but tree roots and sloping ground around the deck prevented me from going through with my original 10’x16′ deck. It still will be an improvement, especially with room for me to put my bar-b-q.
Unorthodox you say? yes, I am putting down Evergrain composite decking right over the slab. This may not sound too bad except the new composite decking’s out there want plenty of air circulation underneath. I am going to gap it between the boards 3/16″, not just the 1/8″ as prescribed by the manufacturer.
 I am drilling 1-1/2″ holes (3) in each pressure treated 2×4 to aid in air flow. Since it is sitting on a solid concrete slab, the structural integrity won’t be effected. More holes with cute little louvered vents in them will be on the end board, one for each “cavity” created between the joists. They won’t be visible unless you get your face down there and look.
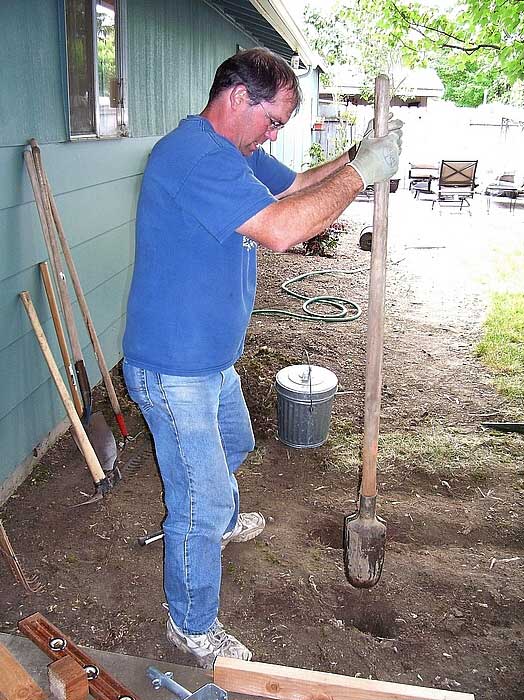 I also had to dig up some of the area where the extension will be. This was not easy because of a large tree less than 8 feet away has shallow roots every where. I had to shorten up my original 4 feet to 3 feet because a huge root just was too big to cut.
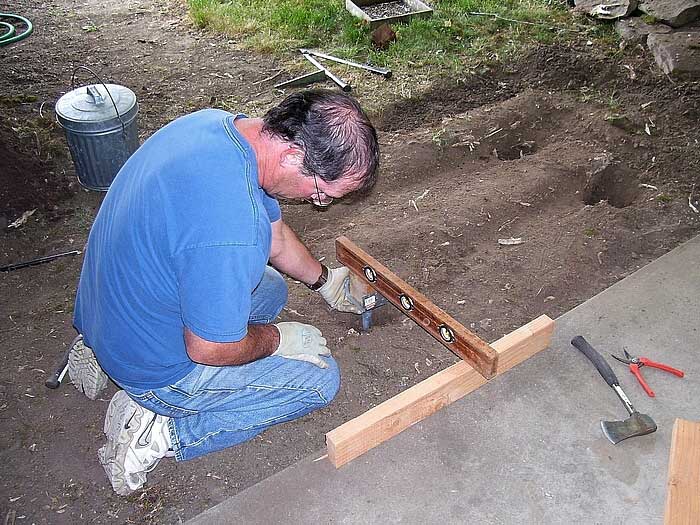
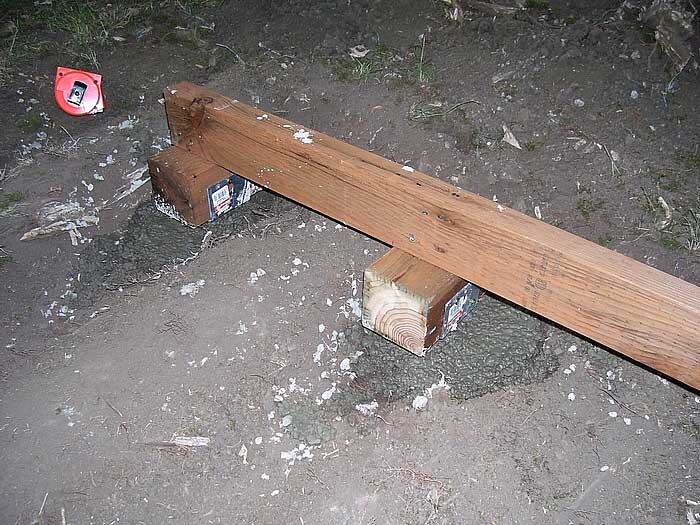 (here, I’m using scrap 4×4 and a straight 2×4 to get the saddles the same height as the patio slab) I’m using pressure treated 4×4’s as the last two outside joists, resting in a Simpson EPB44HG post saddle. A trick I picked from one of my customers who builds decks for a living. This helps get the deck right down to ground level, rising up just enough to not touch the ground. With the air holes I drilled there should be plenty of air to prevent rotting too.
Attaching the deck to the house won’t be a big thing either. I’m using a fairly new product called “Deck2Wall” spacers. A hockey puck-looking disc that goes between the siding or foundation wall and the ledger board, creating an air space to prevent rotting.
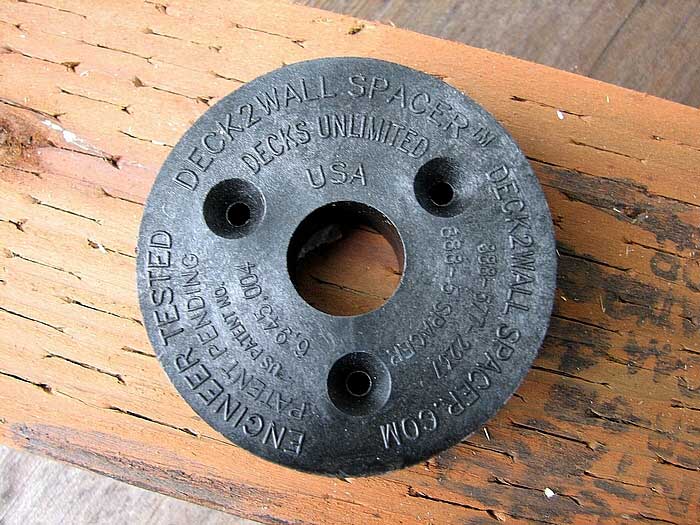
 A dab of silicone at the bolt hole is added prevention. I learned these methods because I work as Asst. Mgr at a local retail lumber and building supply store.
In years past, I wasn’t able to add a deck unless I tore out the patio, or ripped each joist down. Standard lumber decking is 1-1/2″ thick and would have been too high above my doorway. The newer composite decking is only 1″ thick, putting it just at level with the doorway. A larger than normal gap between the deck and the wall should help prevent water from getting in, because the deck-to-wall spacers also help in drainage, eliminating the need for flashing.